October is Vegetarian Awareness Month. It’s a month dedicated to the promotion of “joy, compassion, and life-enhancing possibilities of vegetarianism.” Over the years, Vegetarian Awareness Month has brought more attention to the ethical, environmental, health, and humanitarian benefits of living a meatless lifestyle. Wanting to bring awareness to this cause, we decided to go meatless for the month of October and document our experience.
A few weeks ago we were lucky enough to be invited on a backpacking trip to Havasupai. If you’ve tried to get a permit here in the past, you know how difficult it is to get through. But man, once you get that permit confirmation, it feels great. So what next? Plan your trip with our guide to hiking Havasupai here.
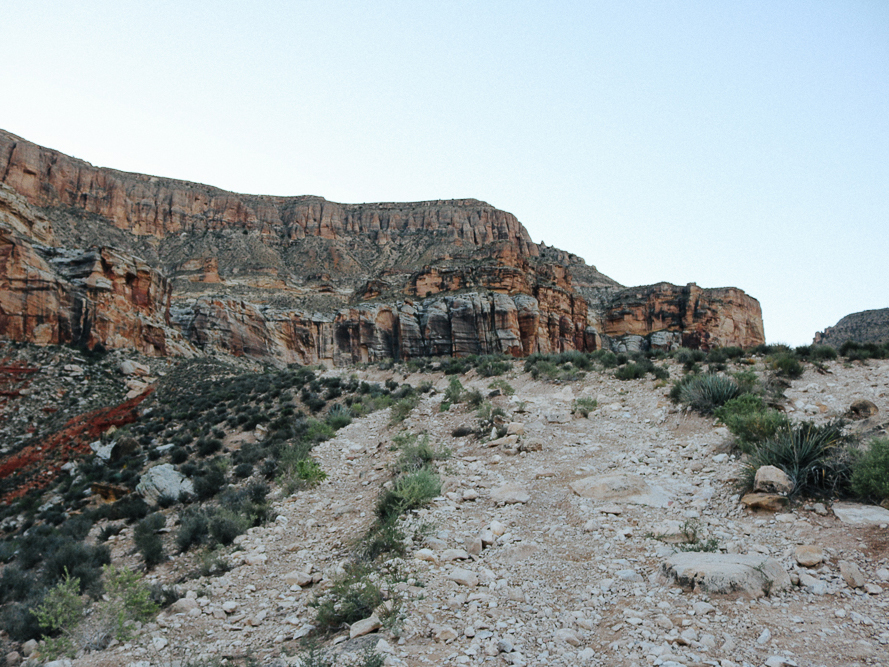
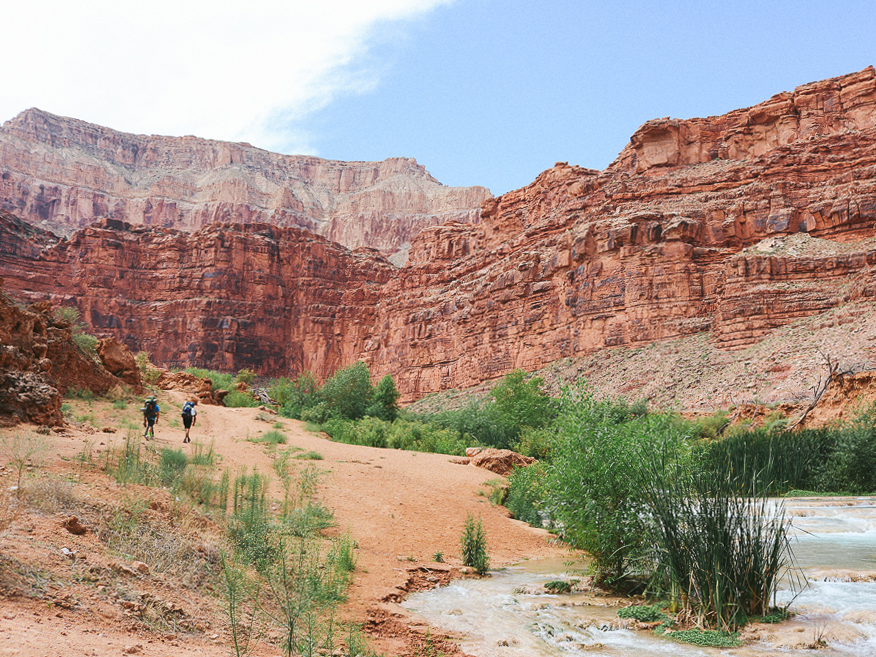
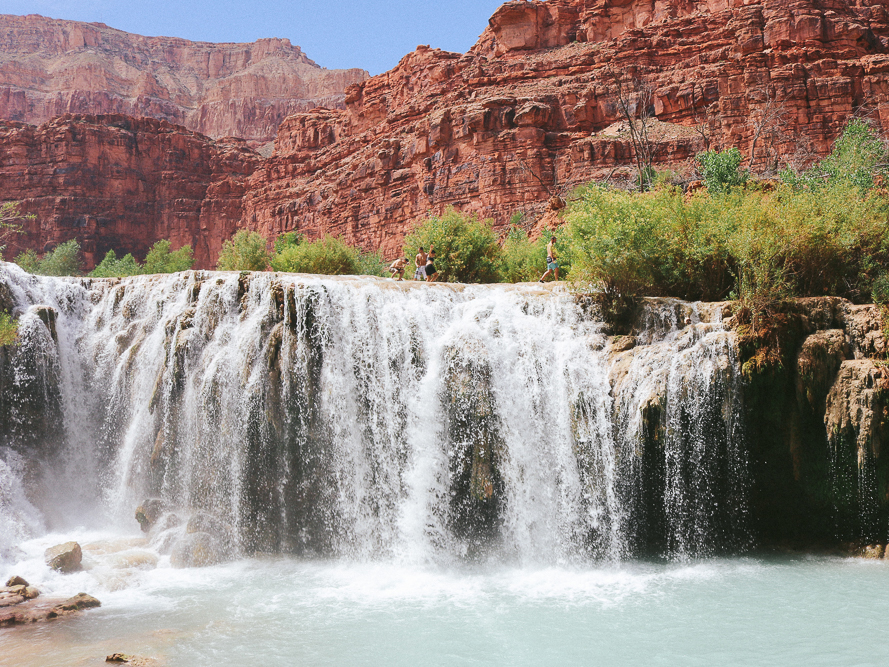
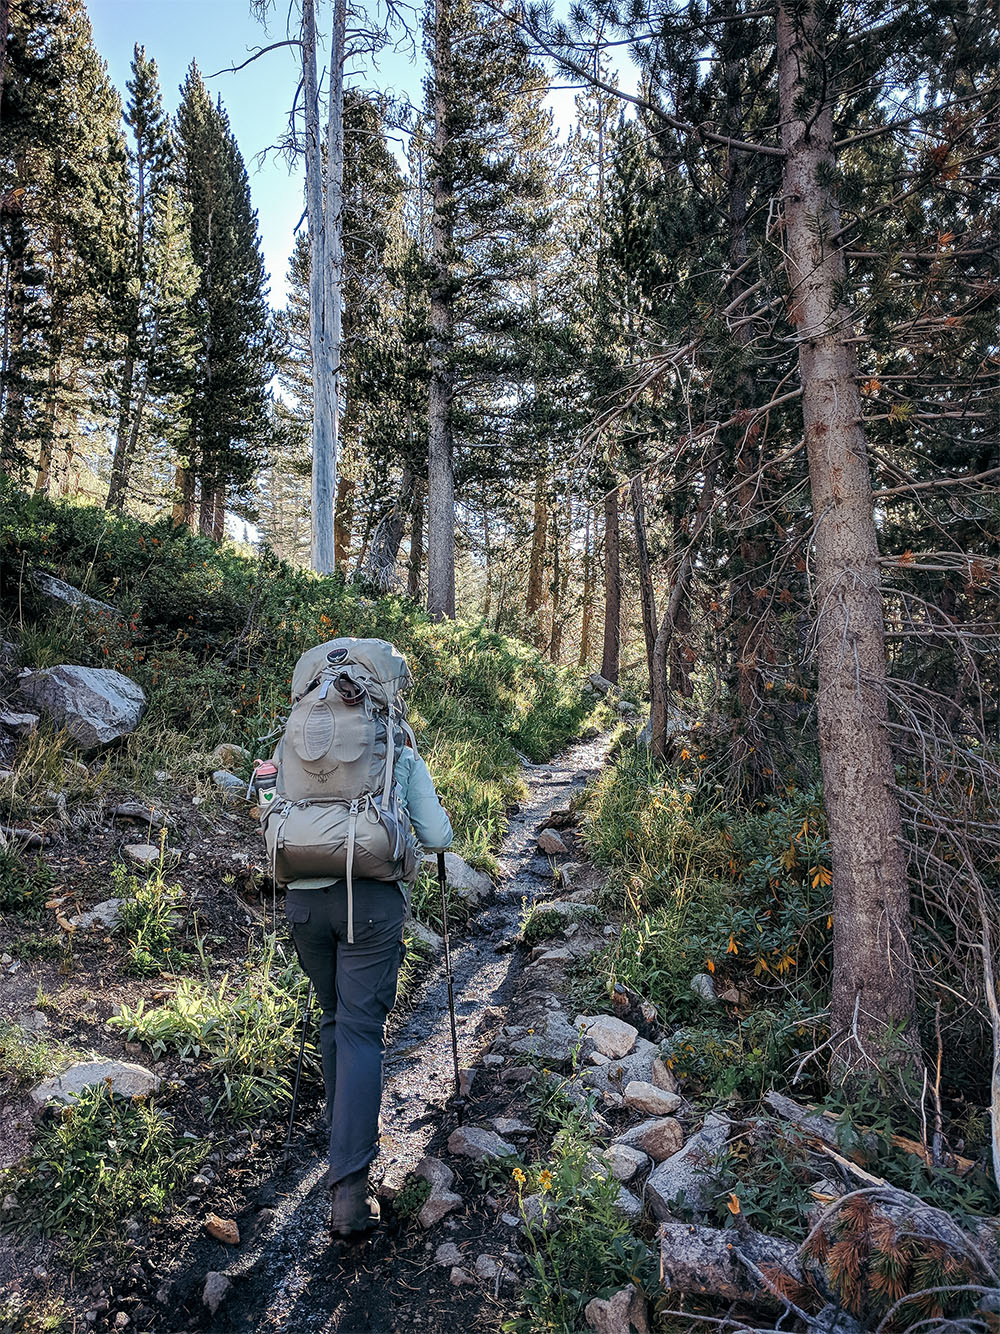
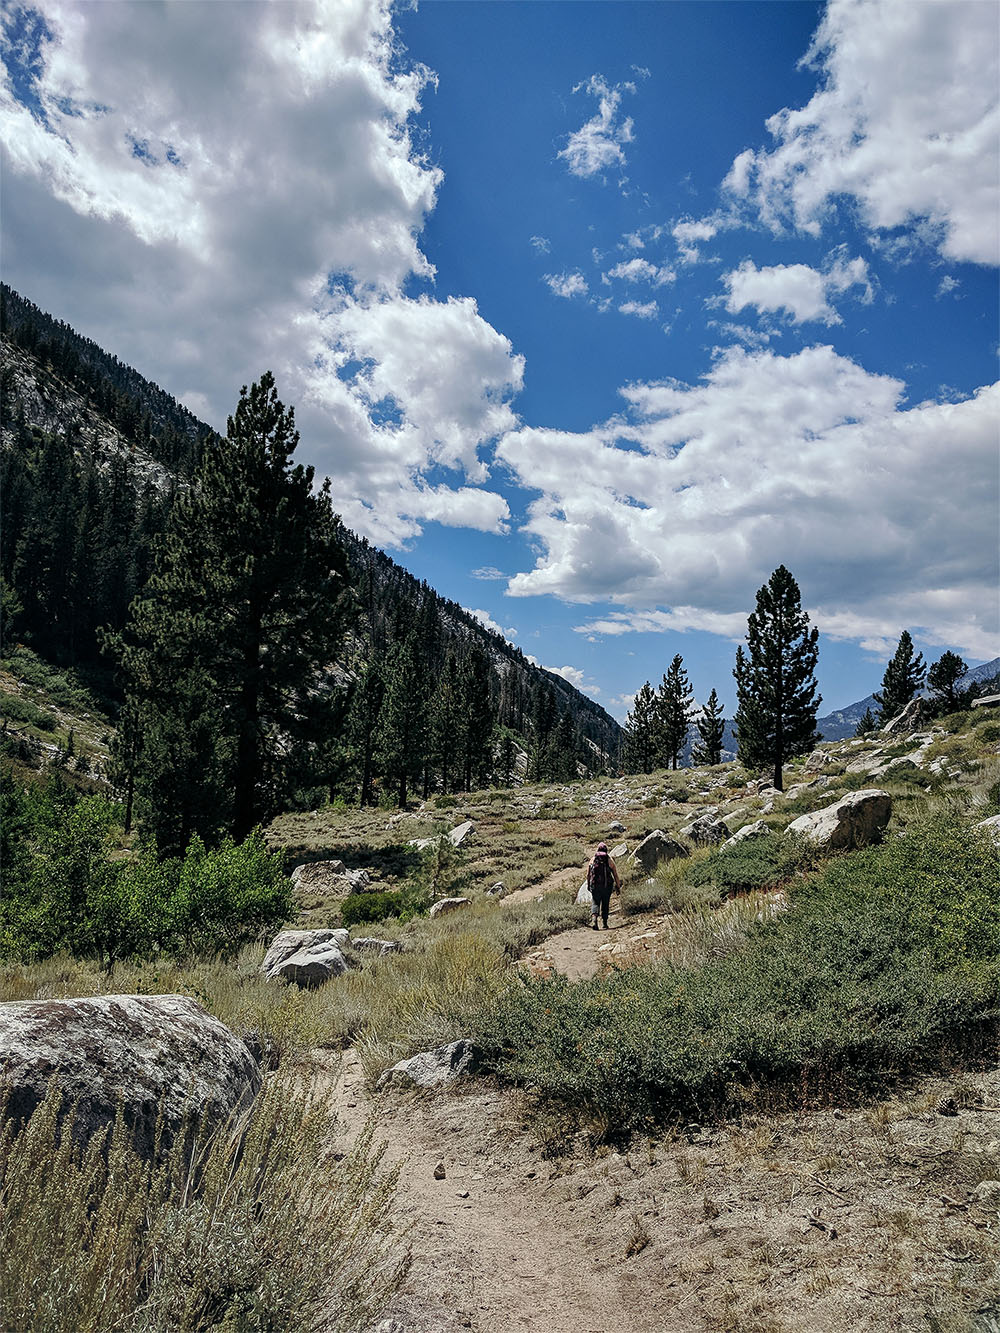
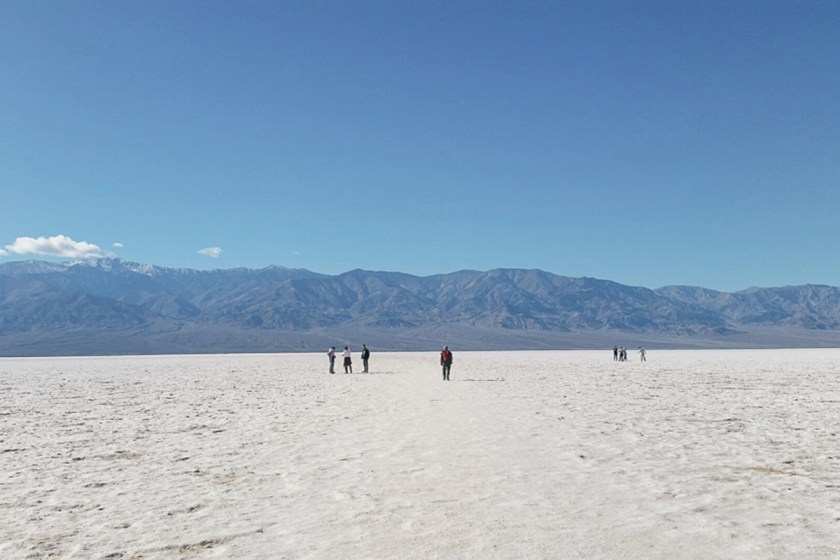
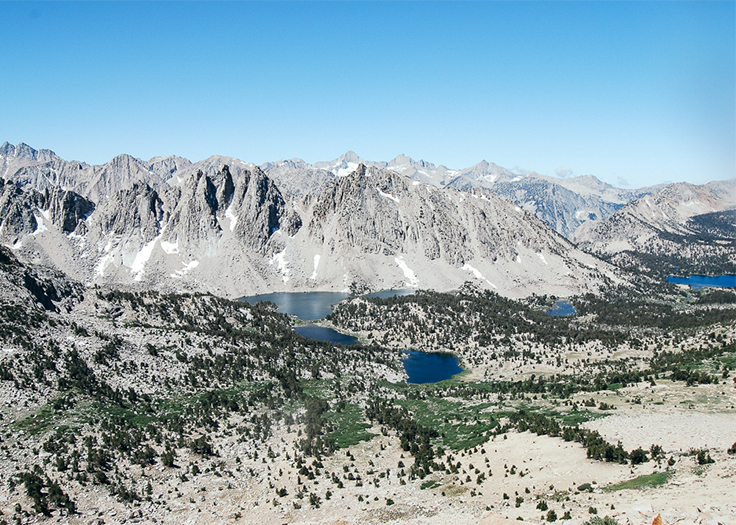
Along the hike to Havasupai
The hike into Havasupai is a 20 mile trek (10 miles there and 10 miles back). The beginning of the trail starts off as a steep downhill, going for about 1 mile. Then, there is a 6 mile hike on flat-ground with the last 2 miles being the toughest. Once you make it past the village entrance (hallelujah!), you have about 0.5 miles to the village office. Stay at the village entrance if you want to refuel on fresh watermelon, food, or iced cold Gatorade. The village office is where you sign paperwork, pick up your permits, and relax your legs for a little bit. Finally, from the village office you have a 2 mile trek to the campground (at long last!). During this part of the trail, you will get to see 3 waterfalls (Fifty-Five Foot Falls, Navajo Falls, and Havasu Falls). The remaining 2 waterfalls (Mooney Falls and Beaver Falls) are past the campgrounds.
Guide to Hiking Havasupai
About the Permit: In the past, you would have to call in and wait for an eternity on the phone. Starting in 2019, permit and campground reservations must be made online at HavasupaiReservation.com. Reservations open on February 1 at 8am MST for the entire season (February through November). 3 nights/4 days max.
Best Time to Go: Peak season is from March through October. Best seasons to go are fall and spring if you want to avoid the heat and frequent flash floods. If you plan to go in the summer, hike early in the morning to avoid the sun and Havasupai’s average 90+ degree weather. Many hikers start their hike at around 3:00-4:00 a.m. We went during Labor Day weekend and encountered flash flood warnings and rainfall.
The Cost: A trip to Havasupai is quite pricey (but worth the experience once!). Reservation fees are paid at time of booking. Additional fee payments are made at the office in the Supai Village (this is about 8 miles from the Hilltop and 2 miles before the campground). The rest of the fees are dependent on your plans. The fees are listed below:
Havasupai Fees:
All fees and prices are subject to change without prior notice.
All necessary permits, fees and taxes (includes reservation, entrance and environmental fees):
Lodge: $175 per night ($60.50 deposit per room/per night)
Make sure to do everything at the village office, before starting the hike to the campsite (questions, check-in, campsite permits, etc). If not, you will have to make the 2 mile hike back up to do all of that. Villagers will not let you in the grounds without the permit.
One mule can carry 3-4 packs weighing about 130 pounds in total. If you decide to rent a mule, you can split up the cost between 4 people. Reservations for a mule must be made at HavasupaiReservation.com.
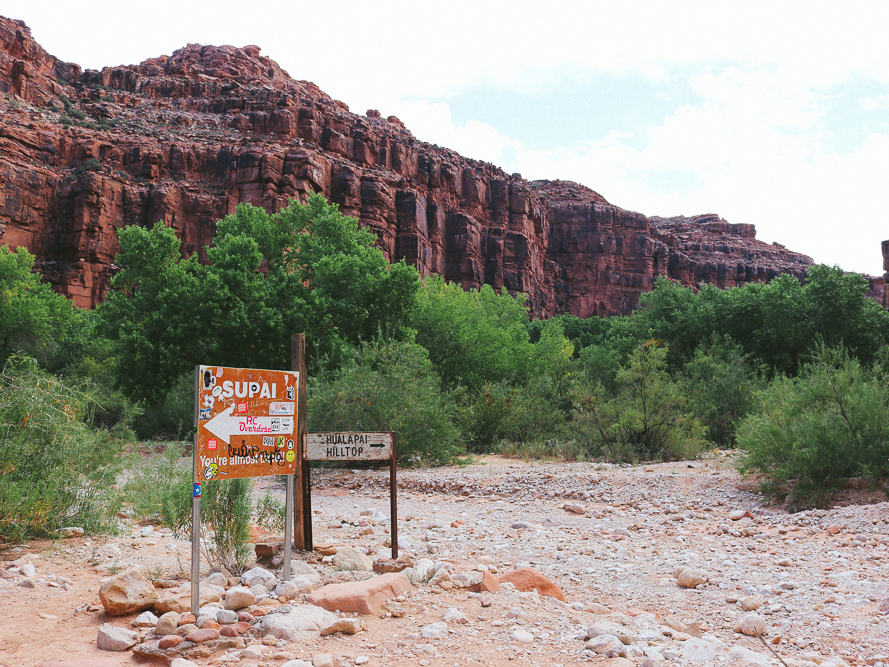
Sign to Havasupai
Tips For Backpacking Havasupai:
Start the hike before 6am to avoid the heat. Most people were already hiking out at 3 or 4am. The hike takes 4-7 hours. Plan accordingly depending on when you want to get to the campsite and for the slowest hiker in the group.
If you are backpacking, don’t plan to carry more than 1/3 of your weight. During a 10 mile hike, every single ounce counts.
Pack communal items to share so each person in the group can split the weight in their packs
Each individual needs about 4 liters of water for the hike down. There is a natural spring in the campsite to refill water. Bring a hydration pack!
Water Shoes (You’ll need these to hangout in the water. Find cheap brands on Amazon, Zappos, etc.)
Lightweight Sleeping Bag (A good backpacking one should weigh no more than 3 pounds.)
Lightweight Sleeping Pad
Day Pack (to carry around lighter weight once you’re in the Havasupai campground)
Dehydrated Foods or Backpacking Food (The pad thai, breakfast skillet, and chicken risotto are all backpacker’s favorites. Choose the ones that sound most tasty to you!)
Energy or Protein Bars (We’ve only tried Clif Bars, Pro Bar, and Stingers, but these are all good options.)
Trail Mix/Salty Snacks (to replenish the salts you’ll lose when you sweat)
Electrolyte Chews/Pills (these give you energy when you’re feeling low)
Packed Lunch (One for the hike down and another for the hike back up. Peanut butter sandwiches are easy to make, easy to carry, and can withstand being out in room temperature for a longer period of time.)
Wide-Brimmed Hat
Sunglasses
Headlamps
Quick Dry Towel (click on the hyperlink for options depending on the size you want to get)
Mosquito Repellent (because water plus the outdoors equals lots of mosquitoes)
Small First Aid Kit (probably won’t have to use it, but always good to have just in case)
Sunscreen (Choose eco-friendly ones. you can find most of these brands at Target: Bare Republic, Sunology, Blue Lizard, Goddess Garden, Yes To, Honest Company.)
Swimsuit
Trekking Poles (recommended)
Toothbrush/Toothpaste/Toiletries
ID and Some Cash
Waterproof Phone Case or Bag (if you want to take pictures in the water)
Jetboil, Stove/Pan/Pot, Fuel, Lighter (we only brought a pot to boil water since we only have dehydrated food. made set ups and cleans up super easy)
Dry Bags (optional)
Hammock (optional)
About the Campground:
All campsites are First-Come First-Served, “camp wherever you want”. Plan to get there first if you want a good spot.
Fresh drinkable water can be found through a natural filtered spring. Bring a 4 liter hydration pack for easy refilling.
Pit toilets are available throughout the campground. They are super clean and fresh.
There are dogs hanging out freely around the campsites. We think these belong to the Supai people, however, we’re not 100% sure. You are not allowed to pet them or feed them.
The Supai people make a special fry bread that are sold at the entrance of the campground at $5 a piece (cash). It’s a village version of a funnel cake with self serve toppings (e.g. nutella, strawberry syrup, powdered sugar, cinnamon and more).
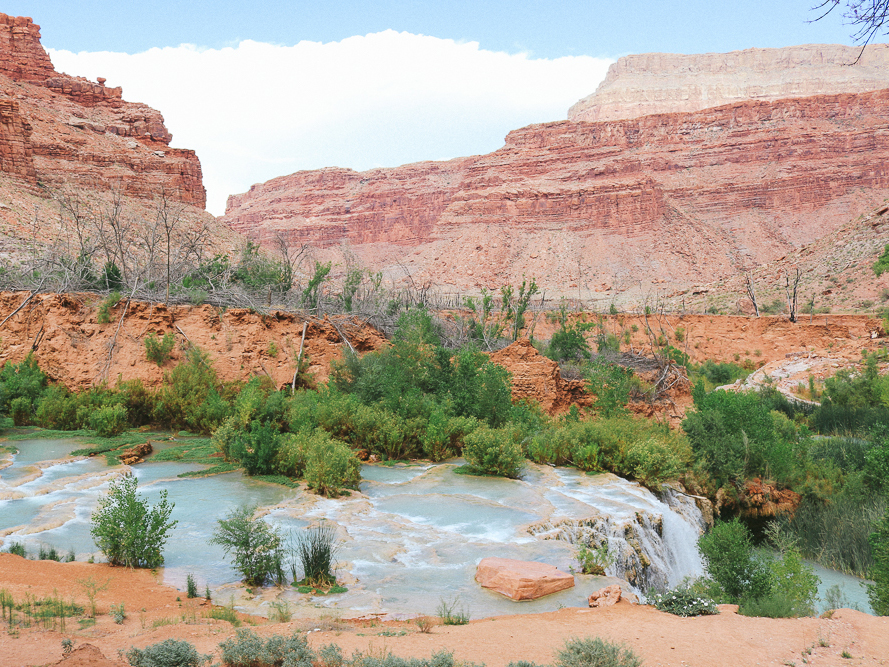
Fifty-Five Foot Falls area
Other Things to Do:
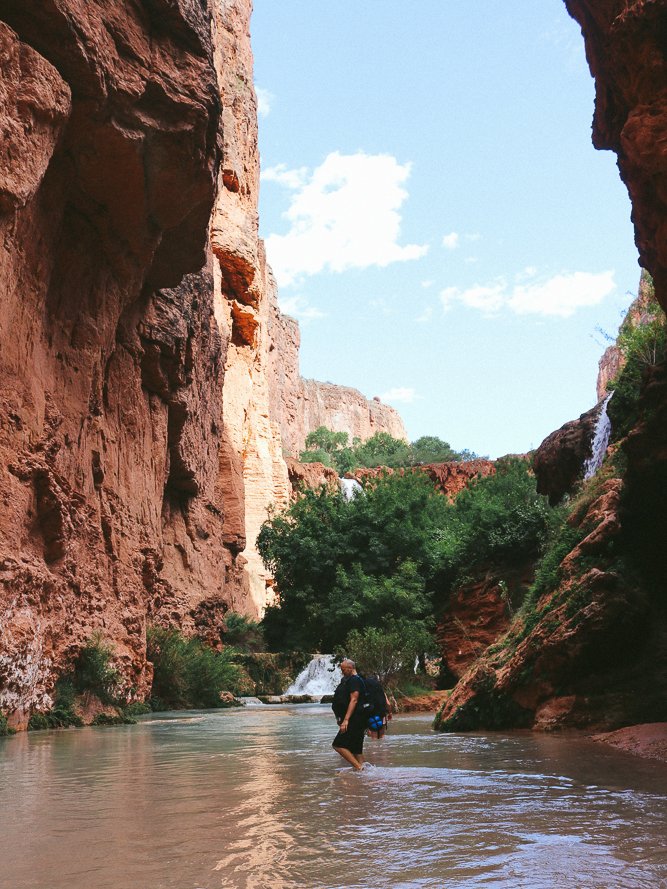
For an epic adventure, add a hike to the Confluence of the Colorado River and Havasu Creek to your itinerary. The Confluence is a phenomenal sight showing the meeting of the brown Colorado River and the blue-green Havasu Creek. It is roughly a 16-mile round trip hike which starts from the Havasupai campgrounds. This is a full day hike so plan to start before or around sunrise. Bring along a map, GPS, and good water shoes. The trail is poorly marked and without the right equipment you can end up very lost. If you’re contemplating whether you want to hike The Confluence or not, ask yourself “When’s the next time I’ll be at Havasupai?”. We unfortunately could not hike it ourselves because we didn’t know about the trail until we got there and did not budget enough time for it.
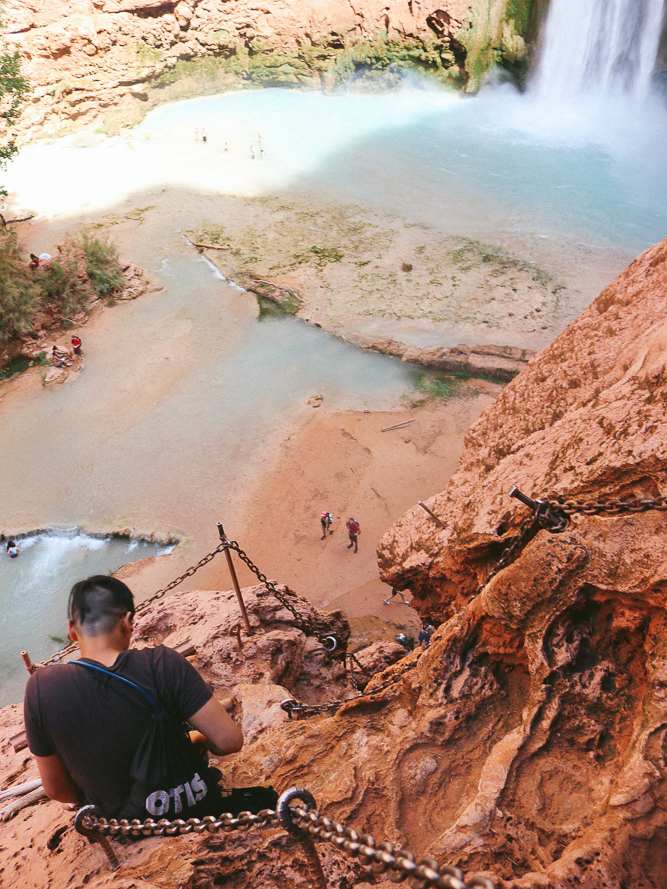
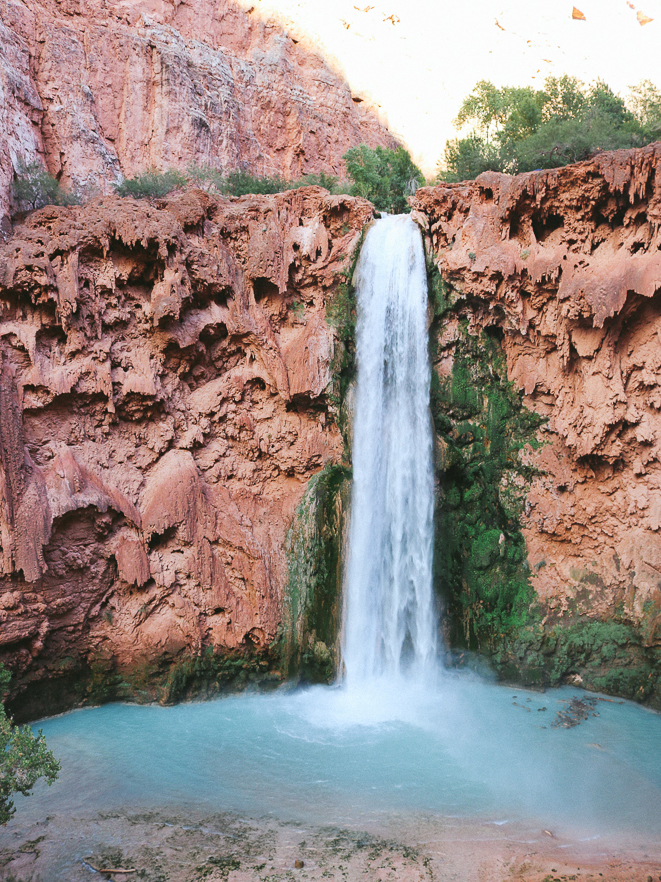
At the Mooney Falls area, you can swing off of a small waterfall. It’s found a bit further out from the falls, near a small cascading waterfall. Below the swing, you can swim under the waterfall into a cave. We got to swim by there and it was such a neat experience!
Fifty-Five Foot Falls areaFifty-Five Foot FallsHiking down to Mooney FallsMooney Falls area
Overall, Havasupai is an absolutely beautiful and sacred place. It’s no wonder the destination is extremely touristy and full of all types of people from all parts of the world. We were shocked to see the amount of people there. One thing we still can’t get over is the amount of trash we found throughout our hike and in the campgrounds. It was a sad sight. If you ever find yourself in Havasupai, please do your part to keep this place as pristine as possible. It is the Supai people’s home. Savor every moment you get to spend in this hidden wonder of the Grand Canyon. You are one of the few lucky people that get to experience it. Please keep it beautiful for others to enjoy too.
When you’re outdoors, you’re not alone. We share the outdoors with hundreds of plants, animals, and people. There are unwritten rules and guidelines you need to follow — not only for your sake but for others too. Below we’ve put together a guide to hiking etiquette 101 to keep these in mind the next time you step into the outdoors.
Guide to Hiking Etiquette 101
Respect the Sound of Nature. The chirping of the birds, the rustling of the leaves, the howling of the wind, and the rippling of the rivers and streams — these are all sounds of nature people love. It’s peaceful and serene. Playing loud music on hikes can ruin this experience for others. More importantly, loud music can also disturb animals who use nature’s sounds for survival methods or mating calls. If one must listen to music, please wear earphones instead.
Stay Right, Pass Left. Most trails are only wide enough for one party to go up or down. So who steps aside? The rule-of-thumb is that the ones hiking down do. Going down, one has gravity on their side, which makes it easier for them to stop and start again. However, when going up, one is hiking against gravity and it would be harder to regain momentum after a few seconds of rest.
Stay on the Trail. It’s tempting to go off trail or cut switchbacks. Many do it for some risky “fun” and because they want to take a shortcut to the top (or bottom). Respect the trail and stay on it. This helps reduce erosion and protect the plants that live there. Plus, trail helpers have put their hard work into the creation of the trails. Respect this by using it correctly and respectfully.
Leave No Trace. The outdoors is for everyone to enjoy. Pack out your trash and leave the environment more pristine than it was when you got there. Be a good Samaritan and go the extra mile to pick up other people’s trash seen on the trails too. The Leave No Trace Center for Outdoor Ethics is a great resource to learn more about Leave No Trace principles and how to respectfully enjoy the outdoors.
Leave Flora and Fauna Alone. The environment is a fragile ecosystem and everything has its place. Leave flowers, foliage, rocks, acorns, and pinecones as they are. Nature is not a museum for us to come and take items home as souvenirs. Bees and butterflies depend on wildflowers for seed, nectar, and pollination. Squirrels pick up pine cones to stow away for the winter. When these are taken home, it hurts the chances of nature replanting and regrowing its natural ecosystem. The same goes for animals (we’re not joking). If a baby animal looks lonely or cold, let them be. It is part of the natural cycle of the wild. If one interferes, it could end badly like this unfortunate bison calf.
Don’t Drink Standing Water. Avoid standing water at all cost. It is the perfect breeding ground for mosquitoes and other insects; they love to hang out and lay their eggs in it. Instead, use running streams or waterfalls, or any active body of water to filter drinkable water.
Hike Ahead When You See Stacks of Rocks (Kind of). Lost? Look for a stack of at least three rocks (also known as a cairn). A stack of rocks on a trail is usually unnatural, meaning another hiker must have put it there. It is a trail marker indicating that it’s the right way. With that being said, use your best judgment as some hikers may have stacked the rocks for fun (don’t do that!) and may potentially lead you to the wrong trail.
Do Your Business in the Natural Restroom. When out hiking, one should never assume restrooms will be found along the trail. So what is there to do? Go in nature. We’ve discussed this before in our Guide to Backpacking 101 article, but here’s a refresher. The Number One is easy; pick a spot at least 100ft away (~ 45 adult steps) from the trail, waterways, and campsites to do your business. Number Two is a bit trickier. First, pick a spot at least 200ft away (~70 adult steps) from the trail, waterways, and campsites. Then, gather smooth sticks, rocks or leaves to use as “toilet paper” (it’s less messy and cleaner than using actual toilet paper). You can also use a handkerchief, just make sure to rinse it off after and have no one else touch it but you. After, dig a hole at least 6 inches deep, and do your thing. When done, cover the hole as if you were never there.
* If you can imagine, human poop is actually ruining our national parks. Read more about it here. One way to help is to use a WAG bag and pack it out. Some places have even required hikers to only use WAG bags to help preserve that natural area such as Mt. Whitney.
Stay Away from Wildlife. It’s not every day one gets to see a bear, a bison, a bighorn sheep, or a wolf. Even smaller animals such as snakes and marmots are rare to encounter. Although it can be exciting, remember that they are still wild. It’s very important to keep a distance and to not startle them.
* Tip: before heading outdoors, do research about the animals that live there and what do if you encounter one.
Disconnect to Reconnect. When we stare at our phones all day, we forget to look up and see the world in front of us. Like the city, there is always something to see and hear in the natural world. Put away the phones, leave the selfie sticks at home, and enjoy what the natural world has to offer.
Smile Like You Mean It. Get friendly and say hi to your fellow hikers. We’re all enjoying the outdoors together!
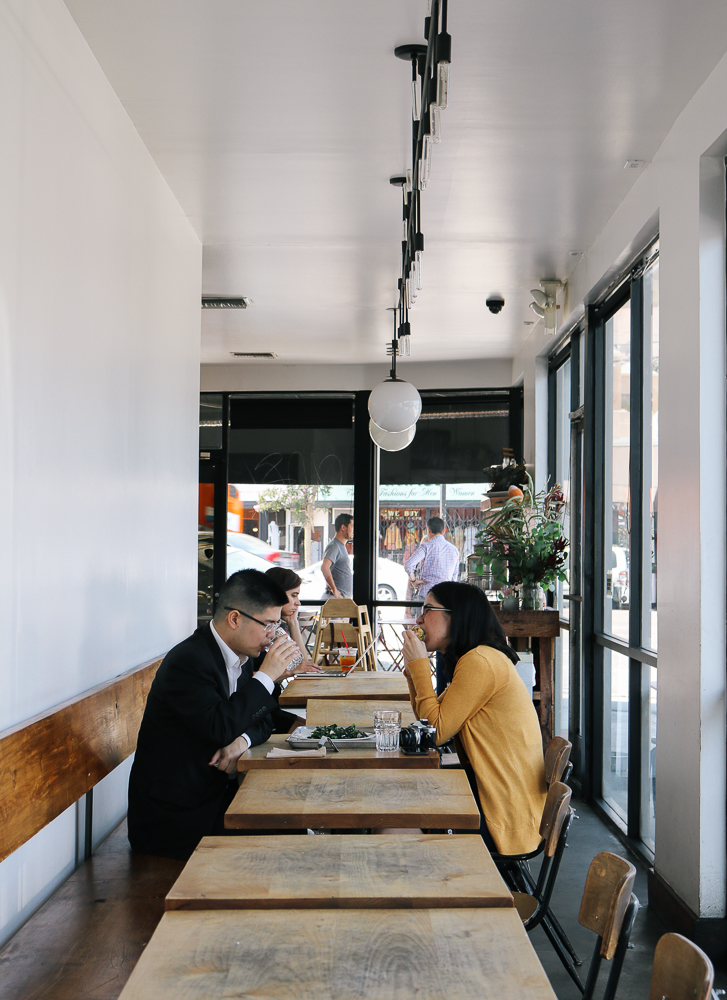
Like most people, Vivian and I both love food, a lot. Being that food is a staple in our daily lives, recently, we’ve been thinking a lot about the conscious choices we make around where our food came from and how they are prepared. We love it when restaurants make it easy. On today’s blog, we’re highlighting Forage, a small but mighty farm-to-table restaurant located in Los Angeles, California.
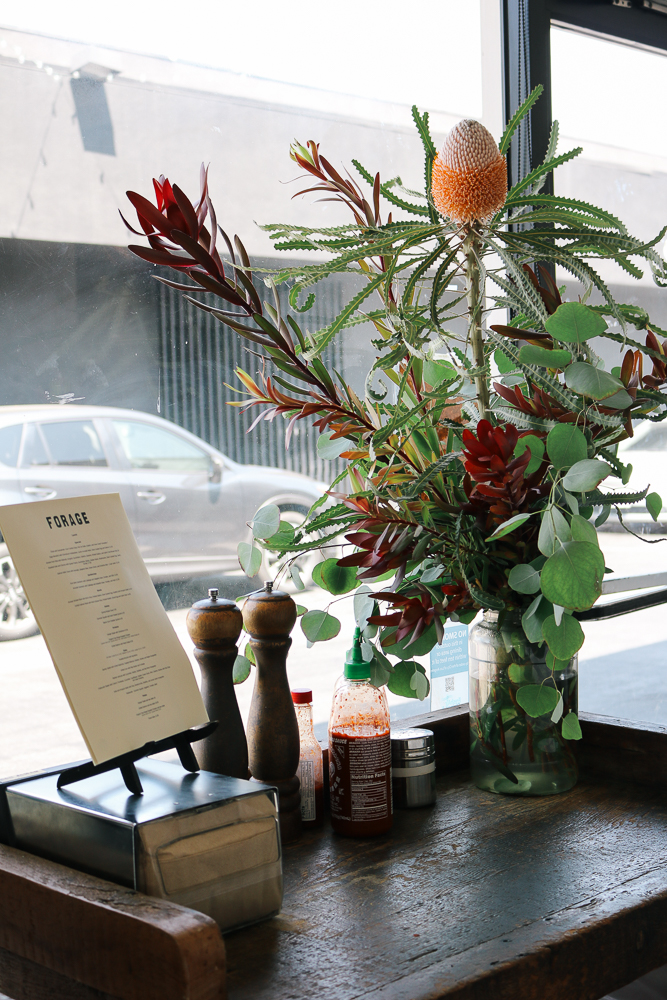
Forage is a small family owned farm-to-table restaurant. The Forage Family team up with local urban growers and farmers to get their fresh produce each season. Their food features specialty cafeteria-style dishes with more than cafeteria inspired ingredients.
When we entered the restaurant, we were surrounded by a fresh, sunny, and tranquil atmosphere. The place is heavily brightened with natural lighting; additional large windows instead of walls make room for breathing space in the small dining hallway.
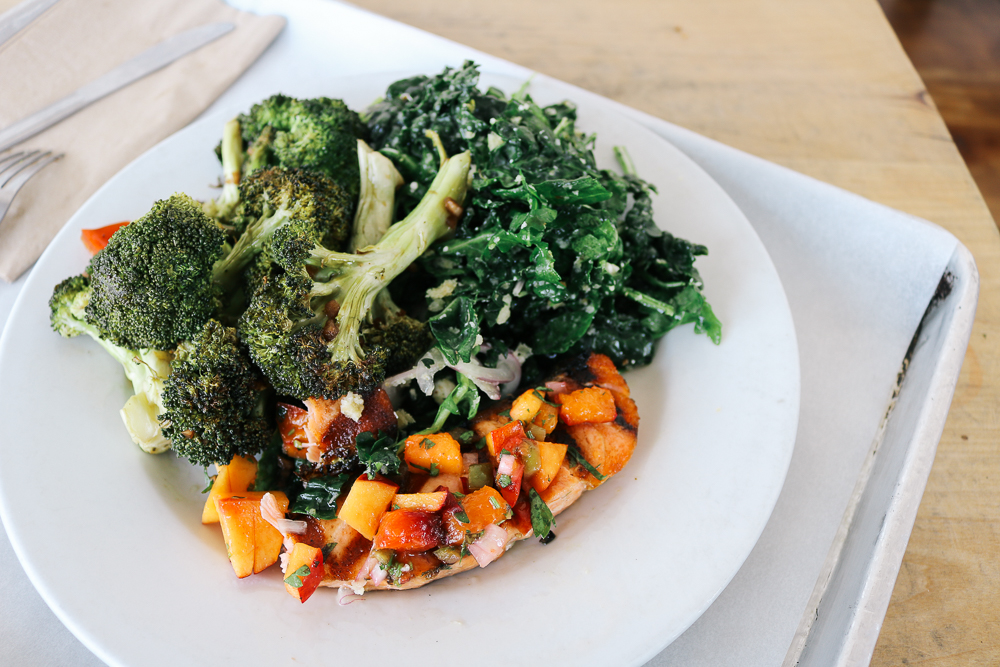
Now the menu: it’s simple and changes according to the season. Ready-made dishes waiting behind a glass counter can be ordered according to your preferred portion sizes. It’s cafeteria style, meaning you pay for each side, with protein being at an extra cost. I love that each meal was specially made with fresh seasonal produce. It made for a very healthy and delicious meal.
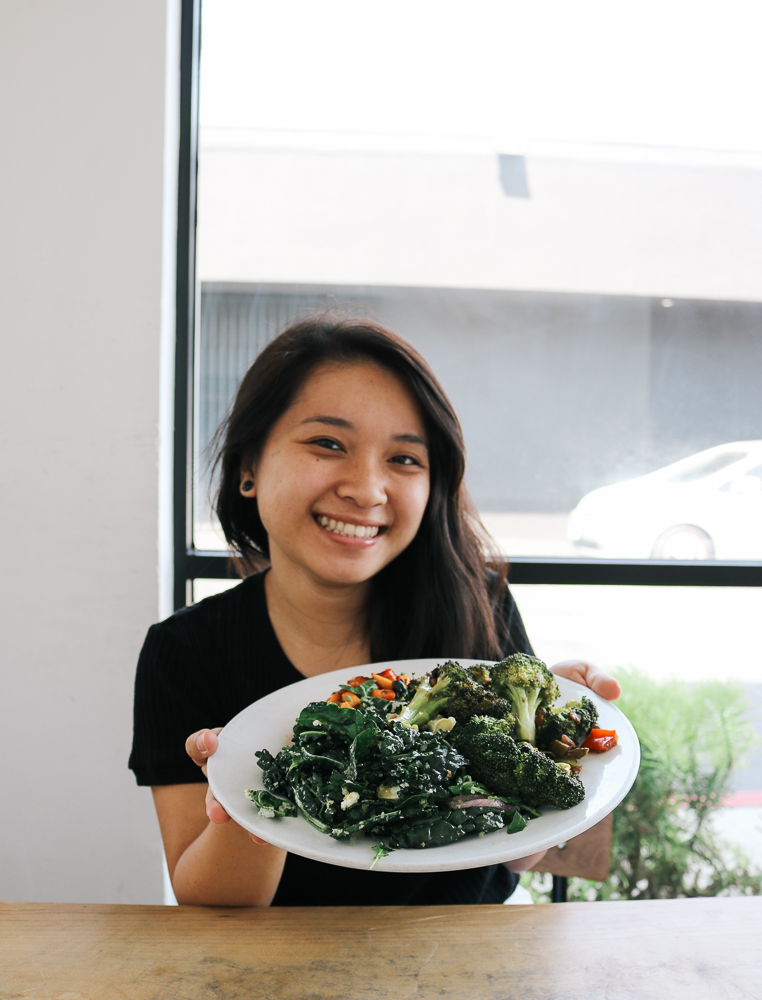
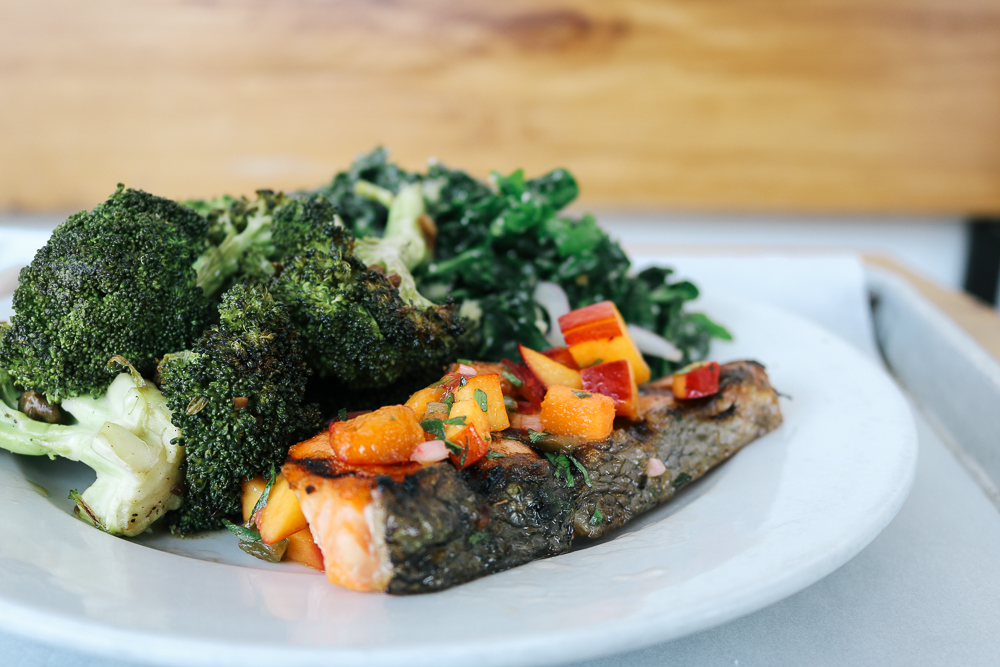
JENNIFER: “I got the Grilled Salmon with the kale salad. Usually, I’m not the biggest fan of kale, but I wanted to give kale another chance that morning. It just looked really appetizing behind the glass display. I ended up really liking it! The kale was seasoned a citrus lemon dressing, then topped with copious amounts of feta cheese (I love cheese). The salmon was very light and flaky, too. And the broccoli! I like my vegetables slightly cooked so that they’re still crunchy. Somehow, Forage got it just right with the perfect balance of texture and taste. I left feeling full and happy (and healthy!). I think… if you don’t like vegetables, Forage makes it a breeze to eat. But then again, I love my vegetables.”
Fresh grilled salmon, kale salad, and roasted broccoli
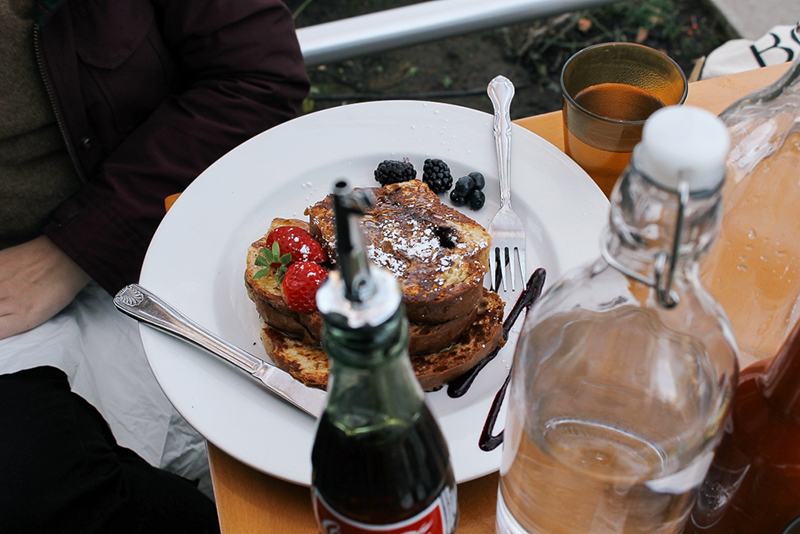
VIVIAN: “When I was looking at the dishes behind the glass divider, the salumi Eggs Benedict immediately caught my eyes. It was only a display, but I was already drooling looking at it. I eagerly waited and when the plate came out, the presentation was beautiful: two pieces of French bread topped with corn-avocado mash, slow-cooked eggs and salumi (Italian cold cut), drenched in a chimichurri hollandaise sauce. Everything tasted amazing together. It had the perfect mix of tanginess from the sauce, saltiness from the salumi, and crunchiness from the french bread. My favorite part? Cutting into the eggs and watching the yolk ooze slowly down the entire dish. What sets this upscale Eggs Benedict apart from the rest is the unique ingredients and preparation that Forage puts into it. Somehow, they manage to fully complement each different flavor so well together. It really showed the level of care and expertise that Forage puts into their food. In the end, I was definitely one happy, satisfied customer.”
Eggs Benedict with salumi
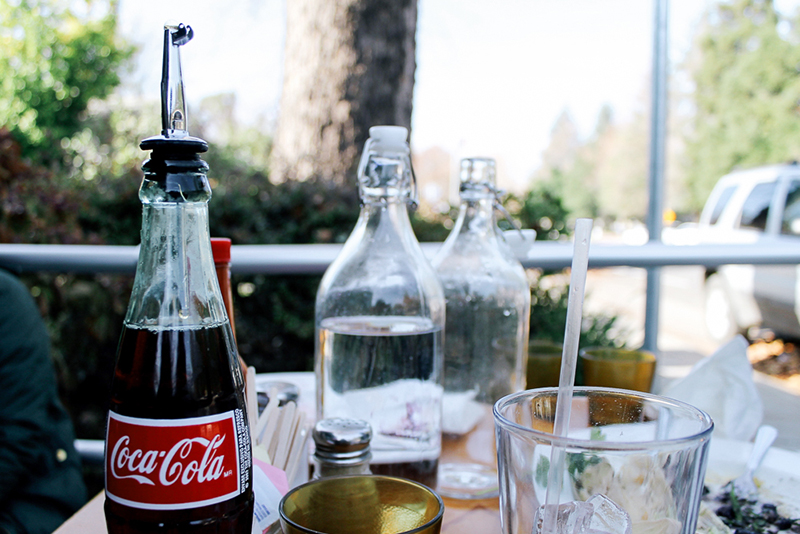
Besides the food, another thing we loved about Forage was the use of glass cups rather than plastic or styrofoam cups. This definitely stood out to us since a lot of self-serve restaurants don’t offer reusable tableware.
Overall, we really enjoyed our meal here at Forage. Every dish here is simple, fresh, and healthy — but each dish was carefully crafted to bring out the natural flavors of the ingredients. It was even better tasting knowing that we were helping to support local farmers — which is good for the planet and our body. The next time you find yourself in Los Angeles, consider giving Forage a try.
Dining out is a staple of many of our lifestyles. We dine out when we make plans to catch up with friends, celebrate a special event, or get together for a night of drinks. Food is so easily accessible that we don’t stop to think about where it comes from, what is needed to eat it, and what happens to the food we can’t finish and leave on the table. Luckily, a lot of restaurants are embracing the green movement and you can too. In this article, you will find 12 ways to eat sustainably waste when dining out.
12 Ways to Eat Sustainably When Dining Out
I don’t know about you, but when I dine out I don’t stop to think, “Is this lettuce wrap locally sourced and organic?” The phrase “out of sight, out of mind” gets thrown around here — if we don’t see the impact of it in our own homes, we definitely don’t think about the impact of it in a restaurant. It’s time to change that.
Order What You Can Finish. As Americans, we love our huge portions and we love to have options. Because of the way we eat, preventing food waste that will end up in landfills is a major concern. Practice portion control. If you know you can’t finish a whole pizza, fries, and dessert by yourself, chill out and don’t order it all. Consider eating out “family style” by ordering multiple plates with your table and sharing each plate with one another.
Bring Your Own Tupperware When Dining Out. Eyes bigger than your stomach? We’ve all been there and it happens more often than not. There will be times when we just cannot finish our foods no matter how hard we try to stuff it all in. Take food home without the guilt of wasting plastic or styrofoam and pack leftovers in your own reusable Tupperware. It might feel weird to do so, but there’s nothing embarrassing about being eco-conscious. Plus you might inspire the person next to you to do the same.
Spruce Up Your Leftovers. But what to do with all your leftovers? Save the energy, water, and electricity you would have used to make a new meal by revamping what you already have. It’s a great way to limit food waste and save your hard-earned money. S-c-o-r-e.
Keep Reusable Utensils in Your Lunch Bag. Plastic is one of the biggest causes of landfill waste. With plastic utensils, we use them once and throw them away. If you’re eating at a restaurant that uses plastic forks, knives, and spoons, bring your own reusable utensils instead. They have the life expectancy a million times that of plastic ones.
Carry a Tumbler or Mason Jar. Can you imagine all the plastic cups we throw in the trash every day from coffee shops, cafes, boba places, or pressed juice locations? If one person limits their daily cup consumption by just one, they can reduce their plastic pollution by 23 pounds per year. Not enough to convince you? Some drink places offer discounts or rewards for those who bring their own tumblers or mugs. Do good, save money. It’d be a crime not to participate.
Say ‘No’ to Straws. Straws are a huge environmental problem because it’s another “one-time use” item. Either bring your own reusable straw to use or don’t use one at all. Trust me, you can easily drink water without it. Some restaurants and coffee shops have even banned straws from their stores because of their wastage. It’s awesome.
Take Your Extra Napkins Home With You. Everyone knows this scene: you order food at a counter then leave with a stack of napkins to take back to your table. Most times, we don’t end up using them all. Instead of throwing these napkins in the trash or leaving them on the table to be cleaned up (they will get thrown away by the restaurant anyway), give these napkins a second chance by taking them home to use. They’ll end up saving a sticky car spillage situation one day.
Finish Your Water. If we were to collect all the water that was left over in cups after diners leave a restaurant, we’d have enough water to fill a small lake. All of that clean water that could be used to quench another person’s thirst just got dumped in the drain. How wasteful! The next time you are out at dinner, finish your water and say no to refills if you know you can’t finish it. Or use the leftover water to refill your reusable water bottle. Tip: Whenever possible, always order tap water over bottled water.
Support Restaurants Who Get Their Organic Foods Locally. Local farms grow foods that travel fewer miles to get to you, lessening the carbon footprint on your food. Organic foods are also grown with fewer harmful chemicals that can hurt the environment.
Explore Raw Food Options on the Menu. Raw foods are just as delicious as grilled, sautéed, and fried foods. Try it out! Replacing one cooked meal with a raw one can help save cooking energy. Raw foods also use up less water and energy to be grown, prepared, and eaten.
Keep Your Meat Options Open. If you love protein and can’t imagine eating a raw meal, consider changing up the different types of meat you eat. Expanding your palate keeps one animal from going endangered too soon. It will also prevent their increasing number of mass production. But if you want to take it a step further, opt for meatless options every now and then to take strides in agriculture pollution (I’m still not giving up on the raw option idea!).
Lower Your Carbon Footprint. This is one of the easiest ways to make your “dine-out” more sustainable. Pile your friends up in one car and carpool to your destination. If you don’t mind a bit of an adventure, consider taking public transportation too.
You don’t have to give up the pleasure of dining out, but you can make the experience more sustainable by embracing the green restaurant movement. A lot of up-and-coming restaurants are beginning to provide more sustainable foods as well as becoming more eco-conscious with their tableware. It’s really awesome. We need you to help too. The next time you dine out to keep some of these options in mind. Every little change makes a huge impact!
Today marks the National Park Service’s (NPS) 100th birthday – the big one-zero-zero! To celebrate, the NPS has been offering tons of fun and educational activities to the public – some of which are free. Didn’t know about the perks? Missed out on an event? Don’t worry; there is still plenty of time to celebrate the rest of NPS’ Centennial Year. With our guide to the National Park Service’s Centennial Celebration, you won’t miss another thing.
Before we start, let’s get to know the NPS a bit better:
Who is the NPS? The NPS is a federal government agency responsible for protecting all of America’s national parks, national monuments, and historical sites. You can count on the NPS to help preserve the natural treasures of our lands and to keep them for us all to enjoy.
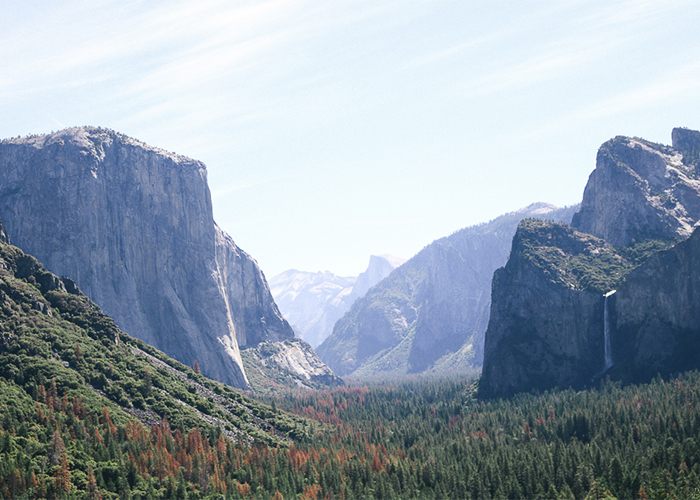
Why is the NPS important? Without the NPS’ dedicated work to protect our lands, all the beautiful and historical places in America would not be standing here today. This means there would be no vacations to Yosemite National Park, no stops to see Mount Rushmore and no ferries to Alcatraz Island. These visits are not only unique experiences; they are also a great learning space for you and me. When you pay a visit to your next trip under the NPS, be prepared to fill your mind with the rich history, culture, and natural beauty of the United States. It is truly America’s greatest idea.
Below are 8 ways you can join millions of others in celebrating the NPS’ 100th birthday. Grab your friends, “Find Your Park,” and discover a world full of wonders. With over 400 sites preserved by the NPS, you are sure to find one just for you.
Guide to the National Park Service’s Centennial Celebration
Get Free Entry to All National Park Service Sites. Who doesn’t love free things? Mark your calendars for these special fee-free days: August 25-28, September 24, and November 11.
Apply For An ‘Every Kid in a Park’ Pass. It’s a great time to be a fourth grader. Starting this year (and so forth), 10 year olds can apply for apassthat will allow them and their family & friends freeaccess to national parks, land, and water. Note: The pass is active from the start of the school year (September) to the end of the summer of next year (August).
Collect the Centennial Junior Ranger Badge. Every national park has a special Junior Ranger Program for visitors to earn a shiny/wooden badge or patch specific to that park.Open for all ages – and even adults – visitors will usually need to complete the junior ranger booklet and/or attend a ranger-led talk. This year, you can receive an exclusive centennial badge in honor of NPS’ 100th year. Download the booklet and get started!
Watch the National Parks Adventure Movie. Be prepared to be amazed and inspired during this 45 minutes of your life. Highlighting some of the most popular national parks in the U.S., The National Park Adventure Movieperfectly captures the beauty and importance of preserving natural wonders of the parks. Both Jennifer and I were so moved, one of us even cried real tears during the movie.
Attend NPS Centennial Events. Looking for a specific event at a NPS site near you? Clickherefor the event calendar. Also, since August is NPS’ birthday month,hereare specific centennial events happening across the country. With just a couple days left of August, we hope you can still make the most of it!
Show the NPS Some Love. Purchasing one or more of the limited NPS Centennial merchandise(s) is a great way to savor a memory, show off your trip, and support the National Park Foundation. Here are three websites to buy your centennial gear(s): one, two, and three.
Inspire Your Non-Outdoorsy Friends. The centennial year is the perfect opportunity to turn your non-outdoorsy friends to outdoor enthusiasts. Take them to a national park and I can guarantee you that they will be blown away by the natural beauty of Mother Nature.
Stamp Your Heart Away. A fun way to keep track of all your NPS visits is to buy a National Parks Passport to carry along all the NPS sites you visit. Each location has a stamp that is color-coded to the particular region you are in. This year, the NPS has special stamps that commemorate its 100th-year celebration. Make sure you collect them all!
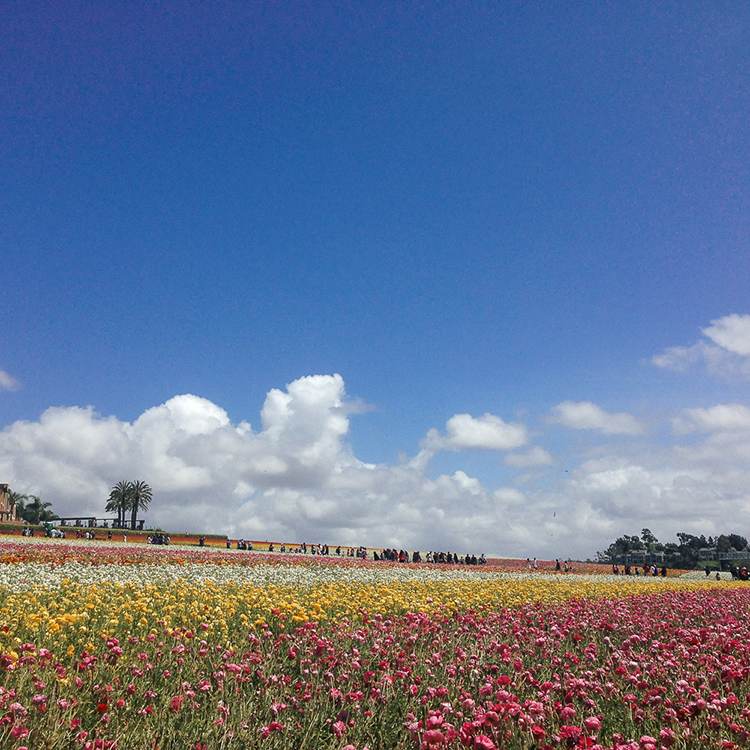
Often misunderstood, honeybees play a major role in our ecosystem and our economy. First and foremost, they pollinate wildflowers to keep our planet lush and beautiful. Second, they pollinate the fruits and vegetables we consume each day. Third, they produce honey, a natural sweetener we use in most of our foods. But what happens if they disappear forever?
Some people know it as “global warming”, others, “global climate disruption”. No matter what you call it, there’s no denying that climate change is real. The topic is everywhere- in the news, on social media, amongst our daily conversations, and finally, in our Presidential and national debates. No doubt, conversation about climate change is brewing. Since we’re on the topic, we wonder, is it too late to combat climate change?
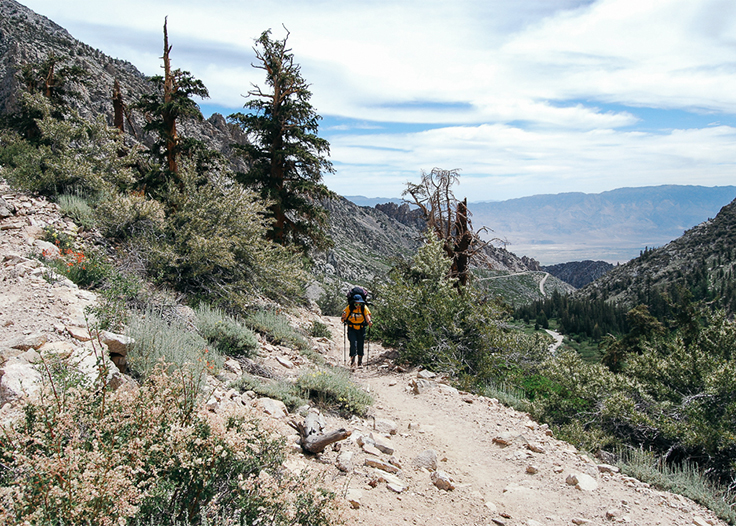
Backpacking in the wilderness is one of the best ways to see the hidden treasures of Mother Nature. You are able to get away from the crowds and fully immerse yourself in the trees, mountains, rivers, lakes, and waterfalls. However, backpacking can be quite daunting– yet still exciting! — because you are literally carrying your life on your back for a couple of days, weeks, or even months. Many beginner backpackers struggle with what to bring and what to leave at home. With the help of our friend and long-time backpacker, Tamara Yerkes, here is what we have learned to survive our first backpacking trip.
Guide to Backpacking 101
Every Ounce Matters. The longer you hike the heavier your pack will feel. You’ll quickly learn that you won’t need your stick of deodorant (embrace your natural scent). It’s okay to re-wear your hiking shirt/pant even if it’s a bit dirty. And maybe, it’s not all that weird to saw off the handle of your toothbrush to save weight and space. Bring what you need to survive, nothing more.
Weigh Your Pack Before Setting Off. With all the tools you’ll need for a good night’s sleep and possibly even survival, your pack should be about 25% of your weight (33% at most). Try not to go over this number. You can risk doing some serious body damage.
Learn the A, B, C, D of Packing. Packing your backpack properly is an art form. It is amazing how much you can squeeze into your overnight pack with the correct technique. We recommend a visit to REI to ask a staff member for tips on how to pack a backpack correctly. Even so, here’s our ABCD’s secret to packing:
A=Accessibility: It is a pain to have to go through your pack just to get one item out of it. Place the items that you will most frequently use at the top/brain compartment and the less frequent ones at the bottom. Our recommendation: pack your sleeping bag in the most bottom compartment, sleeping pad, and tent first. Your cooking materials go next. Then your clothes. And lastly, your food and hydration pack.
B=Balance: It’s important that your backpack is balanced on both sides to avoid pain and injuries. You don’t want to waddle like a penguin during your hike or increase your chances of falling off the mountain. In addition, a well-balanced pack makes for a less sore back. Tip: keep the heaviest items along the back of the pack to maintain balance and control.
C=Compression: One of the best ways to make room? Squeeze! Don’t be afraid to push down on your clothes and other flexible items; you want to utilize every air bubble in your pack. If you are bringing containers, utilize the space in them to conserve room. We threw a bunch of little items into our empty bear canister. Tighten your pack by using the compression straps they come with. They’re there for a reason!
D=Dangle: You want to put as many things into the backpack as possible. Avoid dangling items outside your pack; you can lose the item, create an imbalance to the backpack, or hit people and plants.
Buy a Compact Water Filter. Even if the water looks clean, do not (we repeat — DO NOT) drink out of the raw lakes and streams. Animals are carriers of Giardia which can give you severe diarrhea – yikes! It’s extremely important to keep your water supply abundant and clean with a portable water filter. You can go 3 weeks without food, but you definitely cannot survive more than 3 days without water.
Carry a Bear-Proof Canister. If you backpack in bear country, make sure to bring bear-proof canisters for your scented/food items. More importantly, make sure all scented items can fit in the canister, too. This keeps bears out of our human things, which helps keep them wild (and alive). Also keep the bear canister at least 100 to 200 feet away from your campsite and cooking area. The last thing you want is to be eaten by a bear as you’re enjoying the beautiful scenery.
*Some places allow you to hang your scented items/ food such as Yellowstone National Park. Do your research and learn how to store your scented items in the bear country.
Keep Food Easy. Bring along foods that are easy to make, easy to clean up, and easy to store. We recommend dehydrated foods and liquids (yay), granola, pasta, bagels, wraps, and peanut butter. Trail mix and Clif bars are a great source of energy too.
Set Your Campsite Up in a Triangle. Think triangle. Choose a flat, leveled spot for your tent and use this as one of your three points. Then, if you have a bear canister, place it in a 45-degree angle, 100ft away from your tent. Finally, select a spot for your “cooking area.” This also needs to be at a 45-degree angle and 100ft away from your tent and bear canister to complete your triangular set-up.
Cook Responsibly. As noted above, cook your meals at least 100ft away from your campsite in case you drop any food scraps or create any scents that may attract animals to your tent.
Scatter Your Dishwashing Water. Only clean your dishes with water — no soap or scrubs! You can use rocks or pebbles to “scrub” your dishes if needed. Once done, rather than centralize your dirty water, scatter it into the wilderness. Doing this will help keep large animals away.
Accept the Fact that Nature is Your Bathroom for the Weekend. Need to pee? Simply pick a spot in the wilderness that is 100ft away (~45 adult steps) from waterways, trails, and campsites. Do your business and go on with your life. Make sure to do a Number One on a rock as to not ruin the vegetation around you. A Number Two is a bit tricker. First, find a place that is at least 200ft away (~70 adult steps) from waterways, trails, and campsites. Then, gather smooth sticks, rocks, or leaves to use as your “toilet paper”. We don’t recommend using actual toilet paper because it is messy, unsanitary, and must be packed out after. (You can also use a handkerchief to wipe, just make sure to rinse it off after you’re done and have no one else touch it but you). With a small shovel or trowel, dig a 6-8in hole and do your business. Once you’re done, cover the hole as if you were never there.
* If you can imagine, human poo is actually ruining our national parks. Read more about it here. One way to help is to use a WAG bag and pack it out. Some places have even required hikers to only use WAG bags to help preserve that natural area such as Mt. Whitney.
Buy Topography Maps. A topography (topo) map contours the landscape and provides elevation references. Bring a detailed topo map of the area that you plan to hike in to ensure that you will not get lost on the trail. Your topo map will become your best friend, hold it dear to your heart.
Prepare for High Altitudes. If you plan to be in higher altitudes, bring electrolyte pills or drinks with electrolytes (e.g. Gatorade) to help with altitude sickness. Staying hydrated will help too. The best way to avoid altitude sickness is to acclimate slowly by hiking up to a moderate level of elevation, then staying for a night or two, and repeat. Know the signs of altitude sickness (e.g. a headache, shortness of breath, nausea, fatigue, swelling). Once you feel this, the only cure is to go back down in elevation.
Follow the ‘Leave No Trace’ Rule. Pack out what you take in and take nothing that is not essential to survival. Leave nature better than when you saw it so that other hikers may enjoy its beauty too. The Leave No Trace Center for Outdoor Ethics is a great resource to learn more about Leave No Trace principles and how to respectfully enjoy the outdoors.
Pack the 10 Essentials. Need a quick checklist on what to bring? The 10 Essentials list from REI is a great place to start. Every hiker and backpacker should familiarize themselves with them and get in a good habit of packing them.
Backpacking is an experience unlike any other. Not only are you isolated in nature, but you also get to meet some of the kindest, smartest, and most hardcore people on Earth (we even made a couple of cool new friends on the trip!). The experience is definitely liberating. You are disconnected from the outside world without all the extra materials that car camping or ‘glamping’ ensures- it’s just you, your pack, and the wilderness.
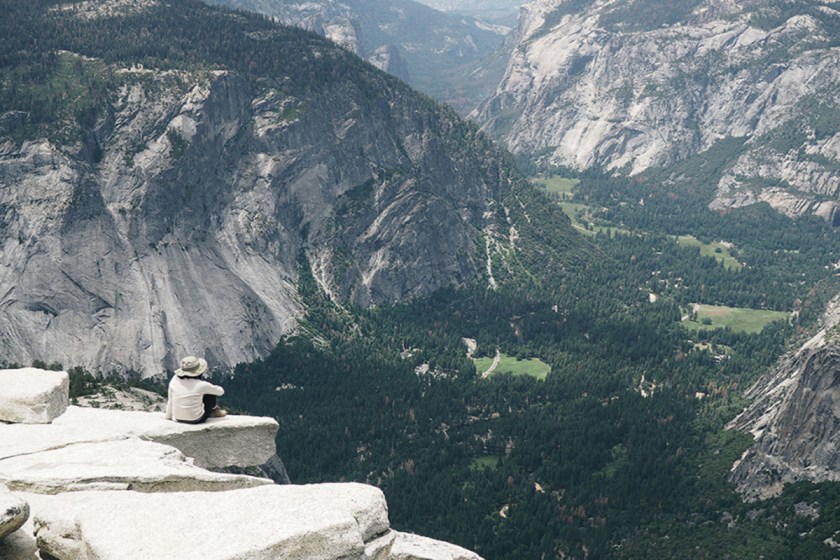
If you’ve heard of Yosemite National Park, you most likely have heard of Half Dome, an exciting and treacherous summit that one must do if the opportunity arises. Each of us has wanted to attempt this hike ever since we first visited the national park in the summer of 2014. A few weeks ago, we finally had the opportunity to summit the dome.
Hiking Half Dome requires a lot of preparation so we arranged a list of our tips to better prepare you for your trek up.