Summer is finally here! It’s time to put away your winter gear and break out your sunglasses and sunscreen. In today’s blog post, we’ve compiled a list of our 10 favorite summer essentials.

Summer is finally here! It’s time to put away your winter gear and break out your sunglasses and sunscreen. In today’s blog post, we’ve compiled a list of our 10 favorite summer essentials.

It’s a beautiful day and staying indoors is not an option. On one of the biggest day for BBQ-ing in America – we’re talking about huge cookouts, backyard bbq’s, parade celebrations, and tons of fireworks – the 4th of July is possibly one of the most hazardous “celebration” to the environment too. To help offset our environmental impact, we’ve put together a list of 9 ways to have a sustainable 4th of July BBQ.
Read More
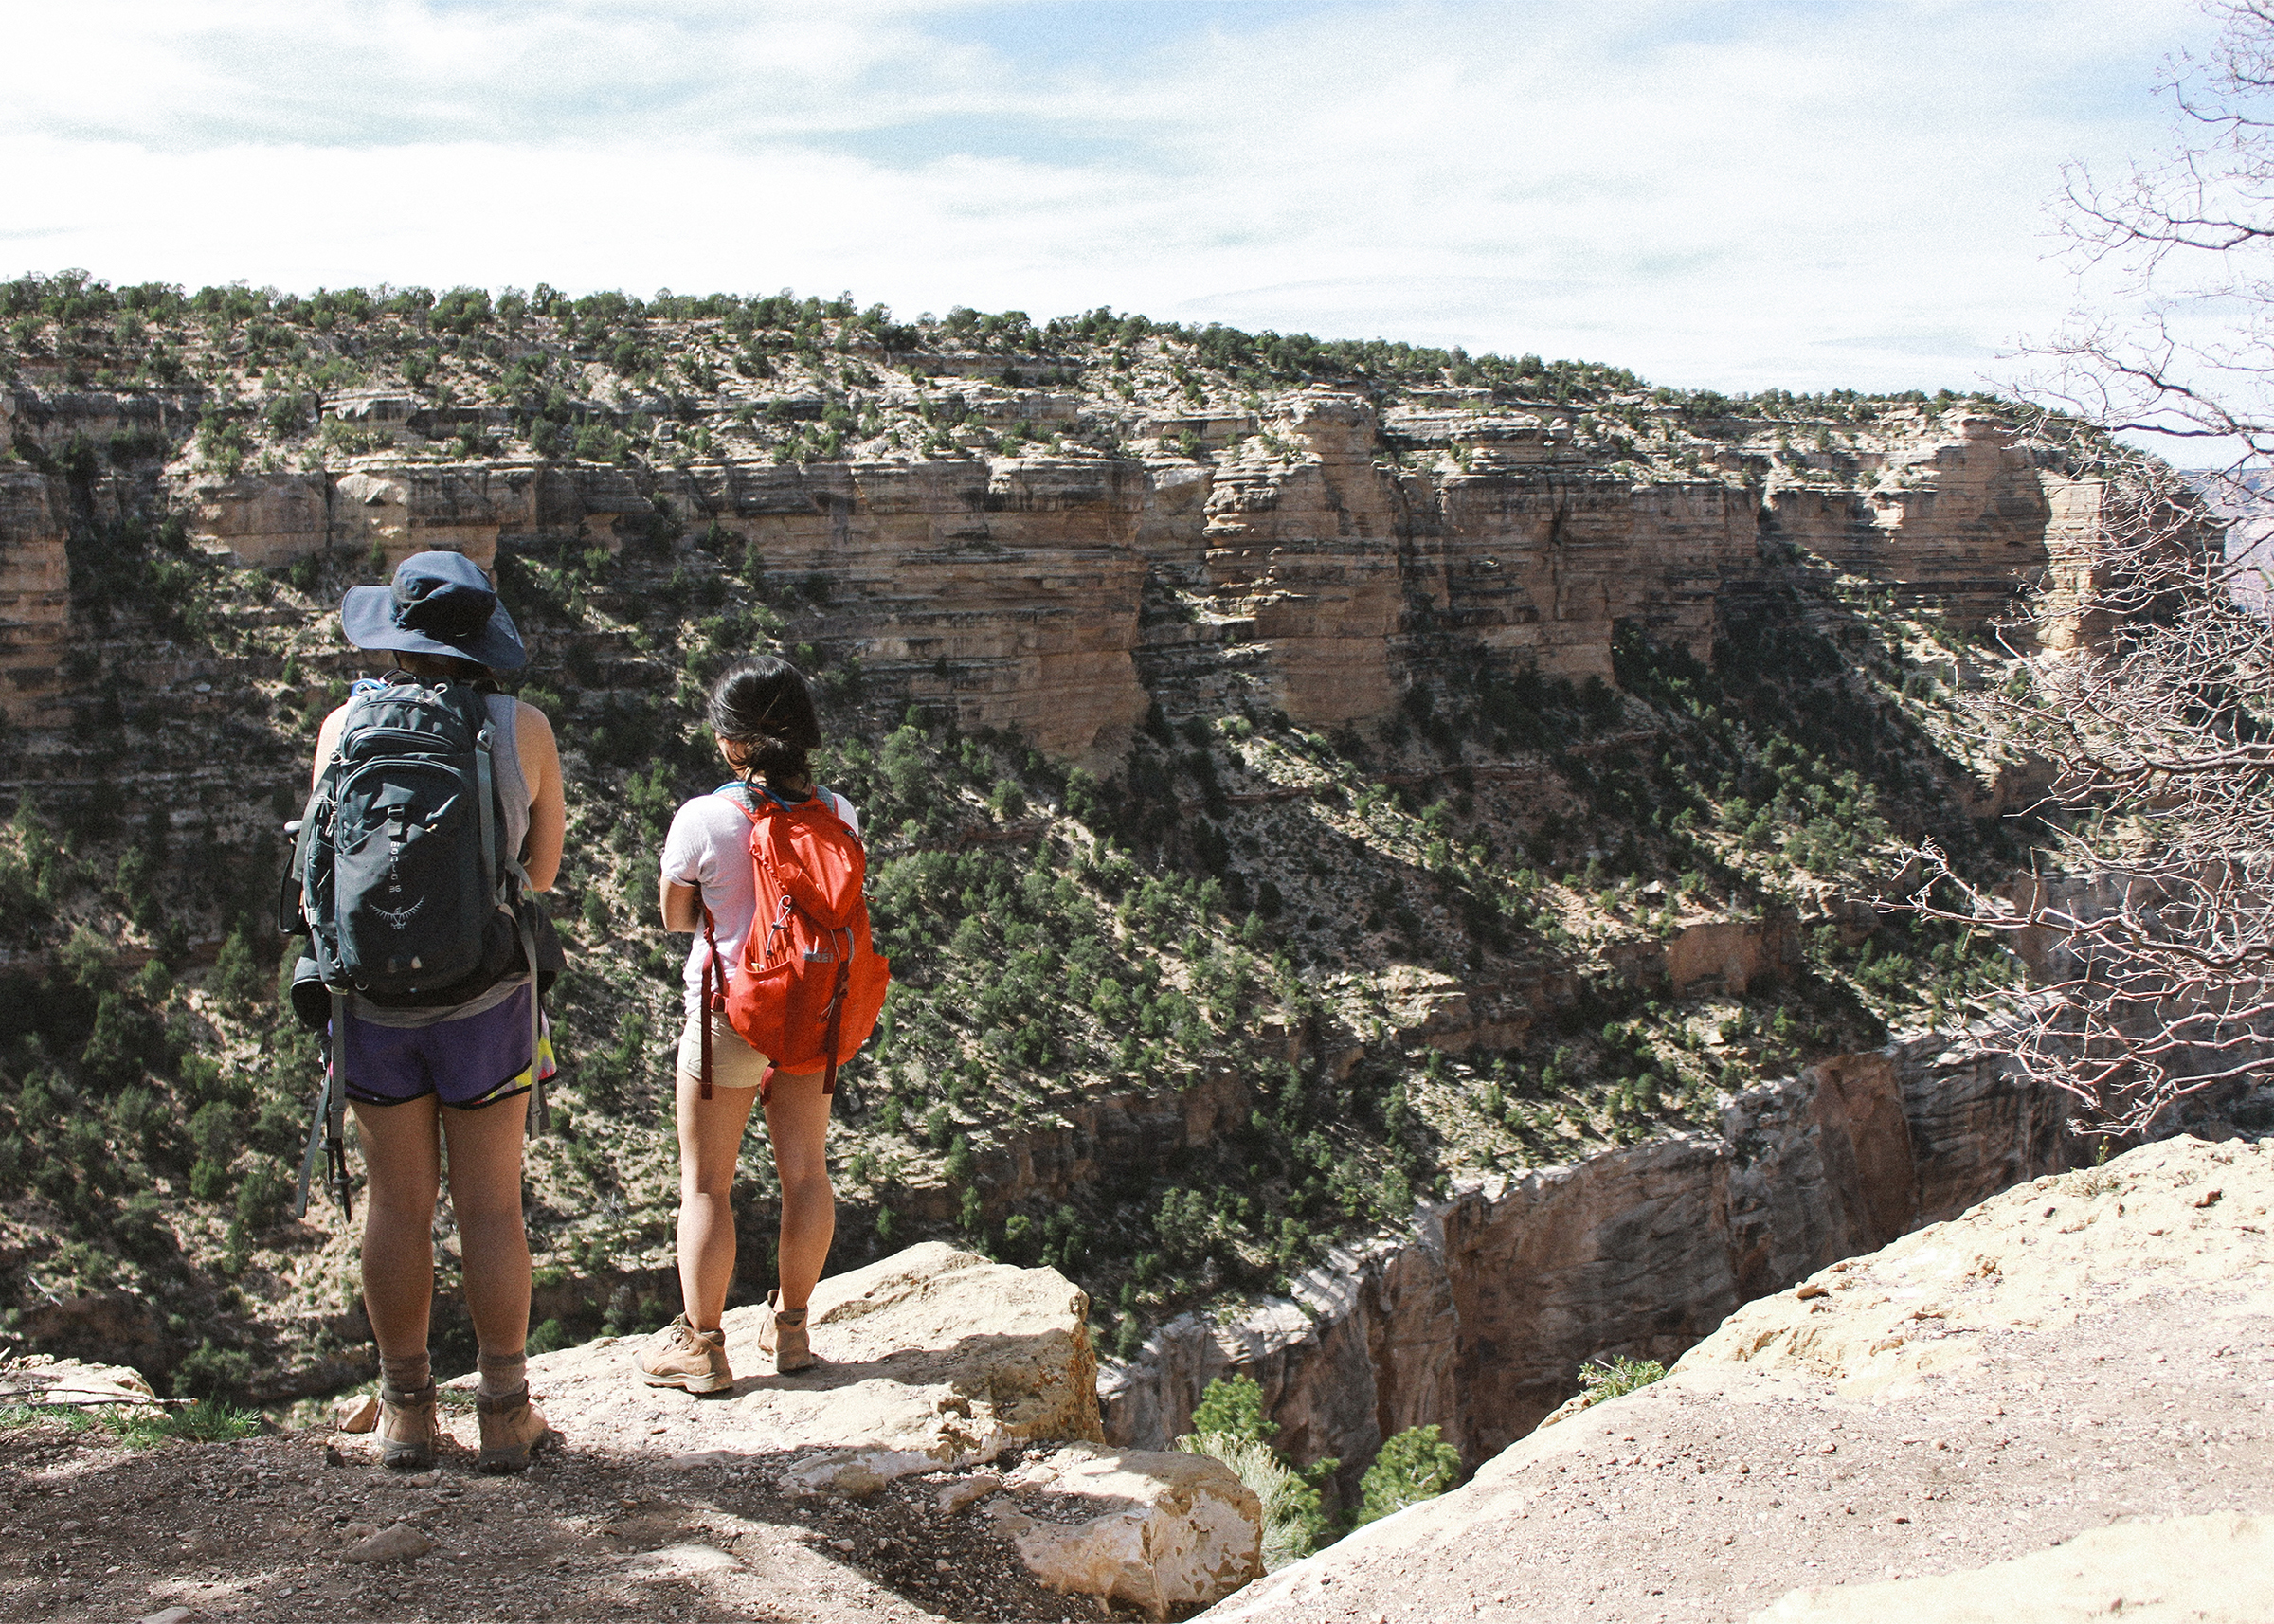
When traveling to Arizona, a trip is not complete until you have visited this quintessential natural wonder. Hint: it is arguably one of the most recognizable canyons throughout the world and is visited by millions worldwide.
The canyon is none other than the one and only Grand Canyon National Park. Mother Nature has worked her magic again with this one! One of the best ways to experience the vastness of the canyon is to hike the Bright Angel Trail.
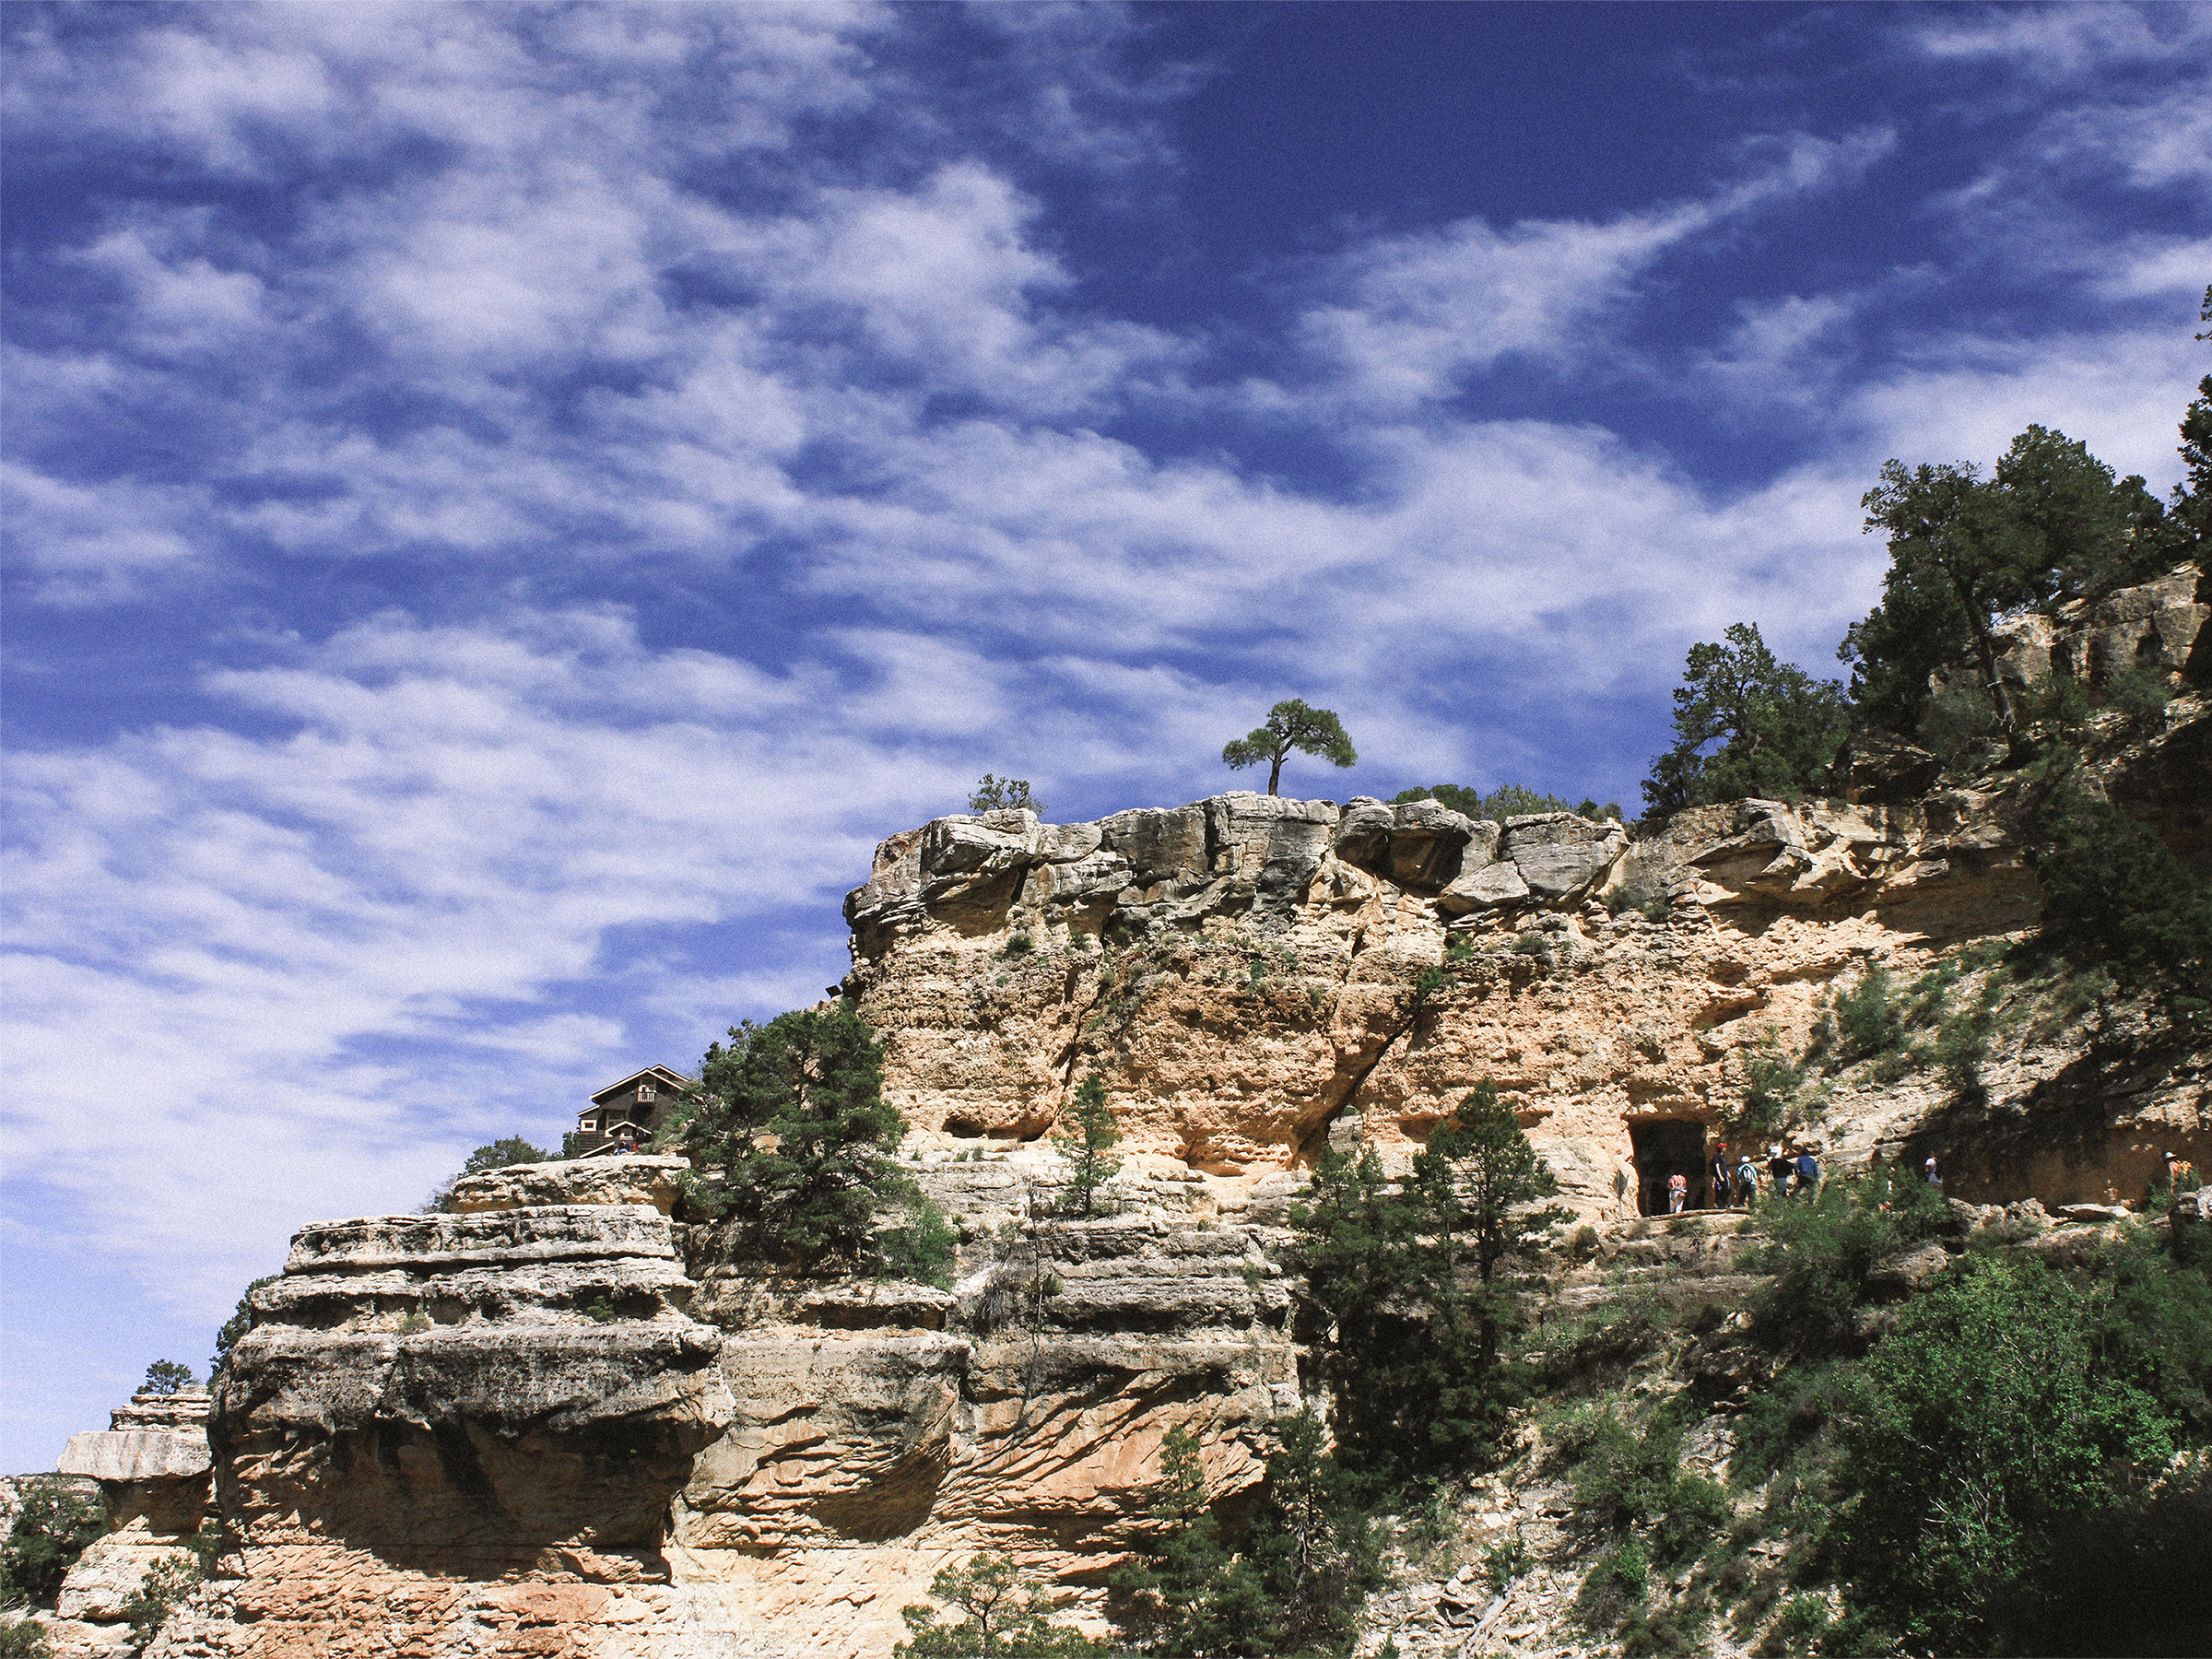
Jennifer and I were fortunate enough to catch the last day of National Park Week on April 24, 2016. National Park Week is a week where the National Park Service teams up with the National Park Foundation to celebrate America’s treasures. During this week, there are special programs and events and certain days where entrance fees are waived. When we arrived at the park, the first thing we did was walk along the South Rim, a popular 11-mile trail that overlooks the canyon. However, I believe one of the best ways to truly explore the Grand Canyon is by going deep into it – plus, that allows you to avoid the rowdy crowds at the rim. After talking to a friend, she recommended the Bright Angel Trail, one of the more popular trails that leads into the canyon. The other one is the South Kaibab Trail.
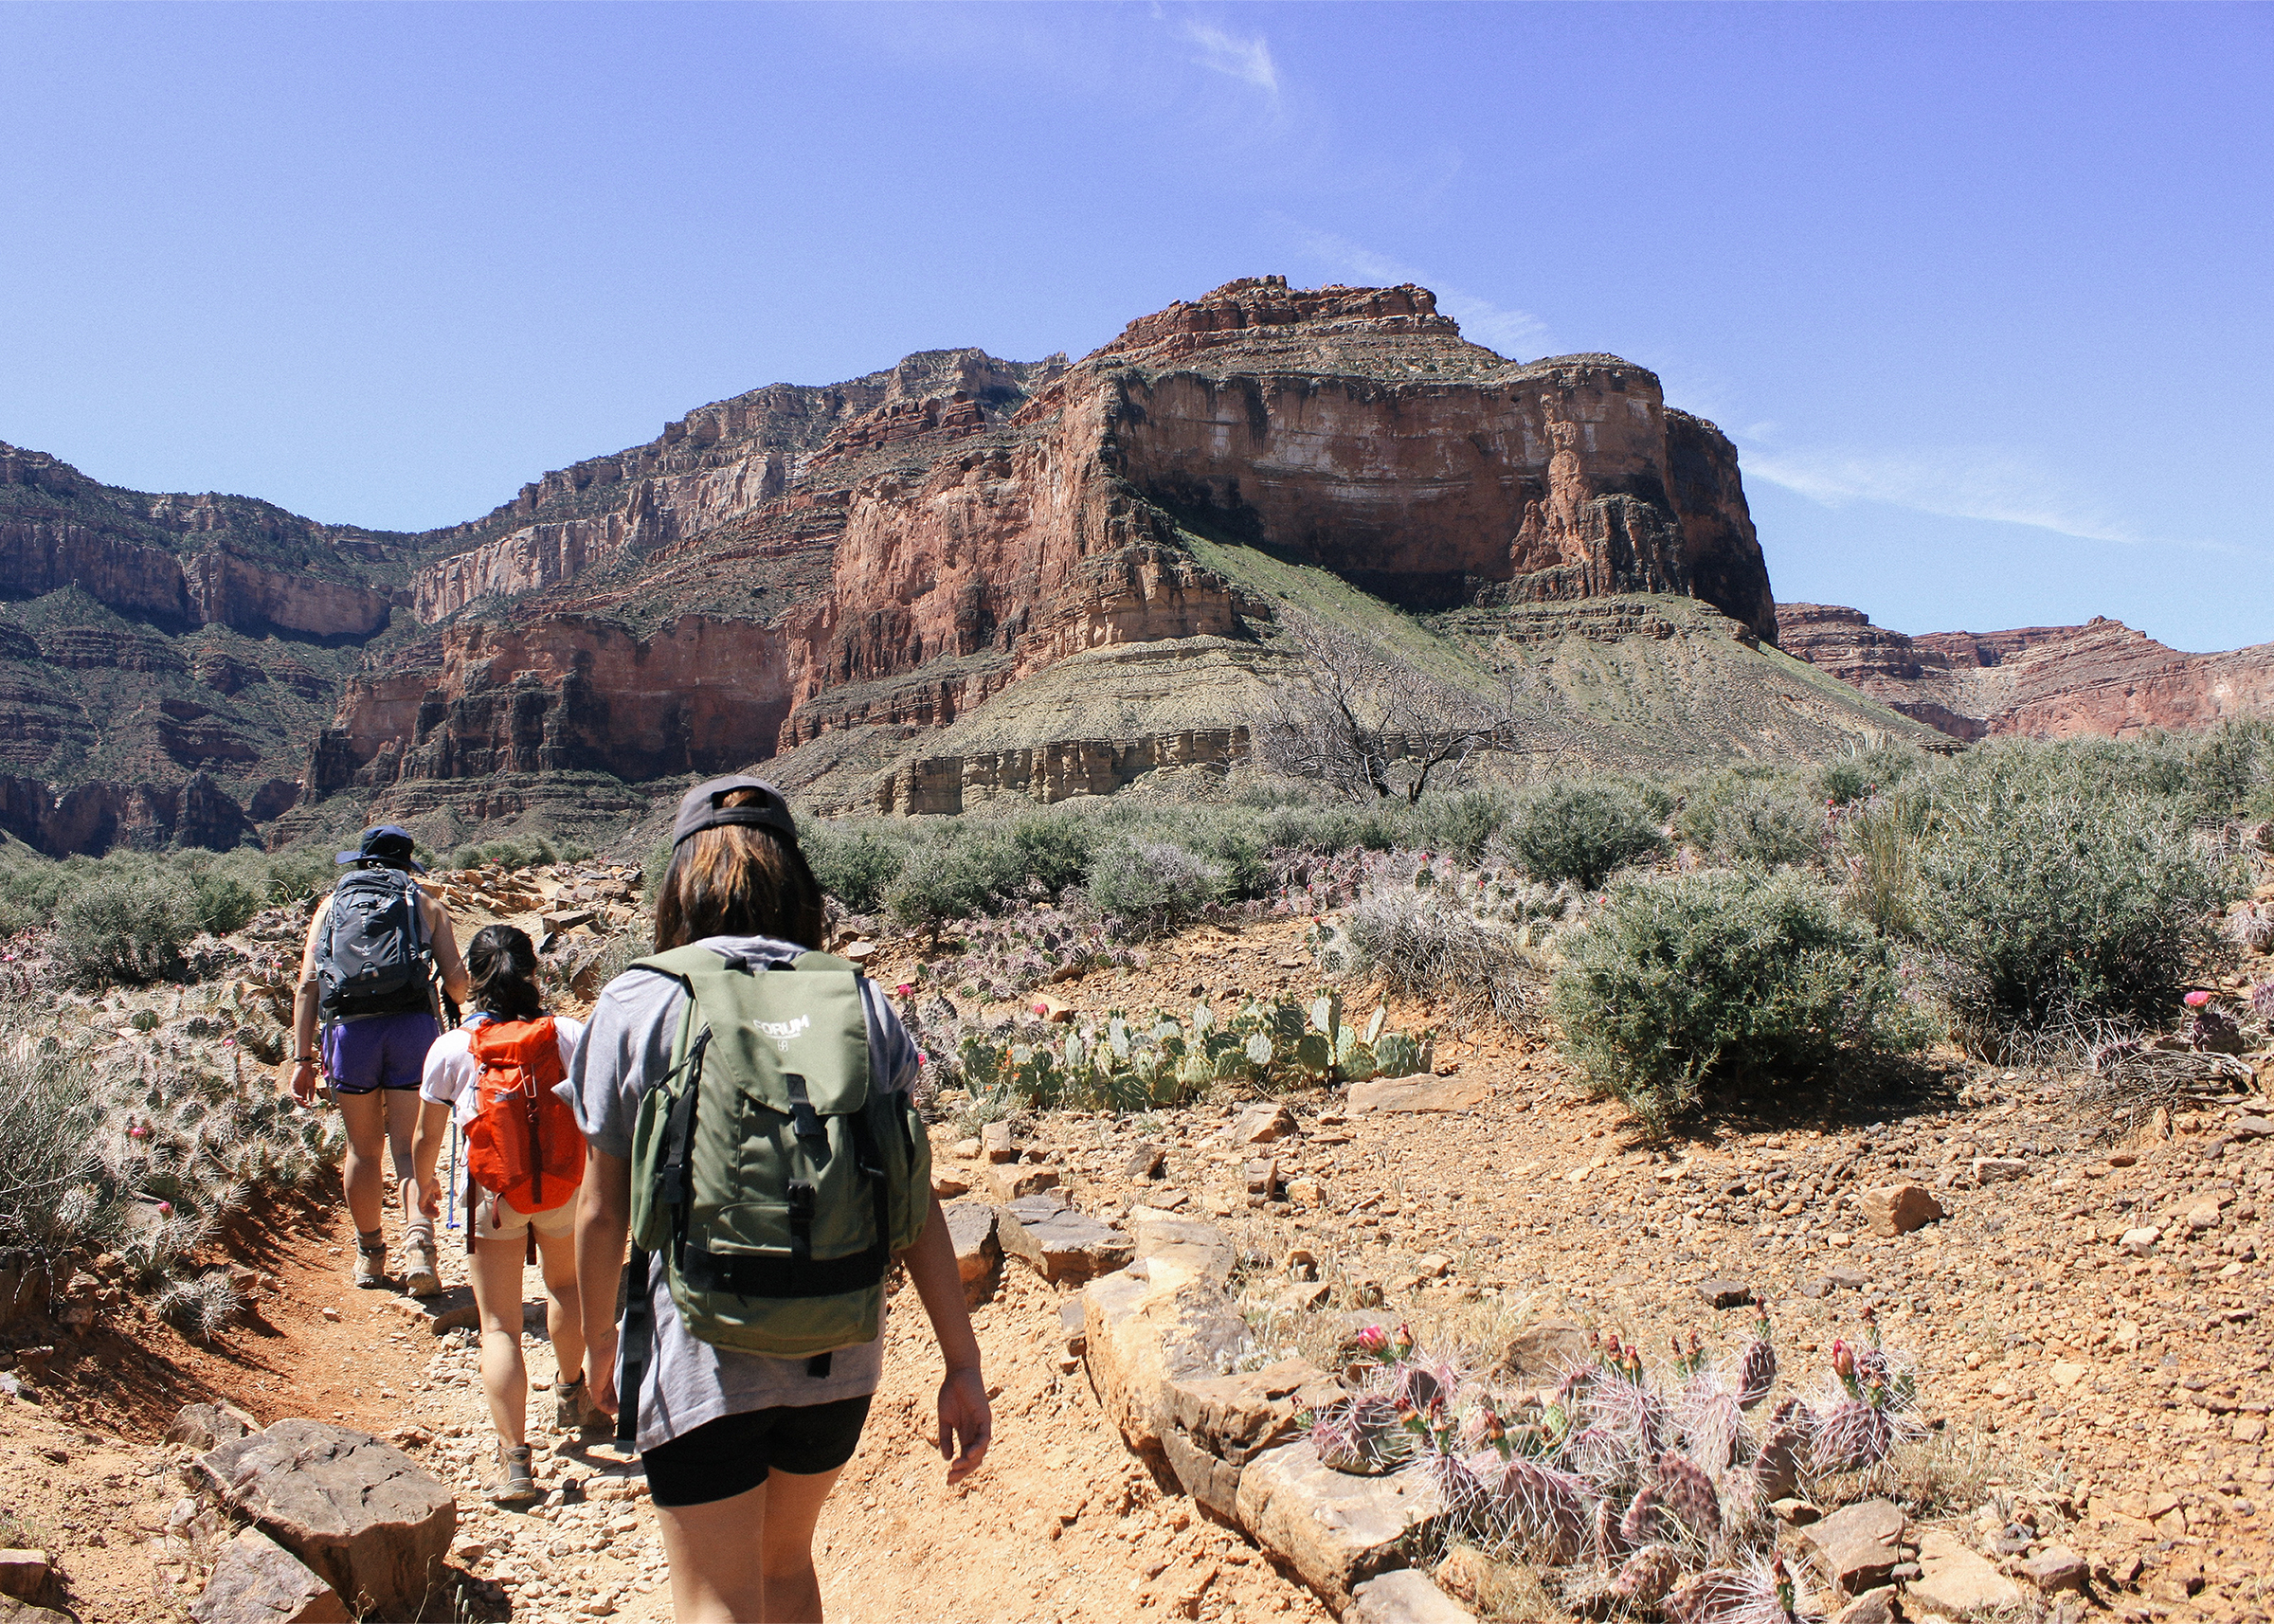
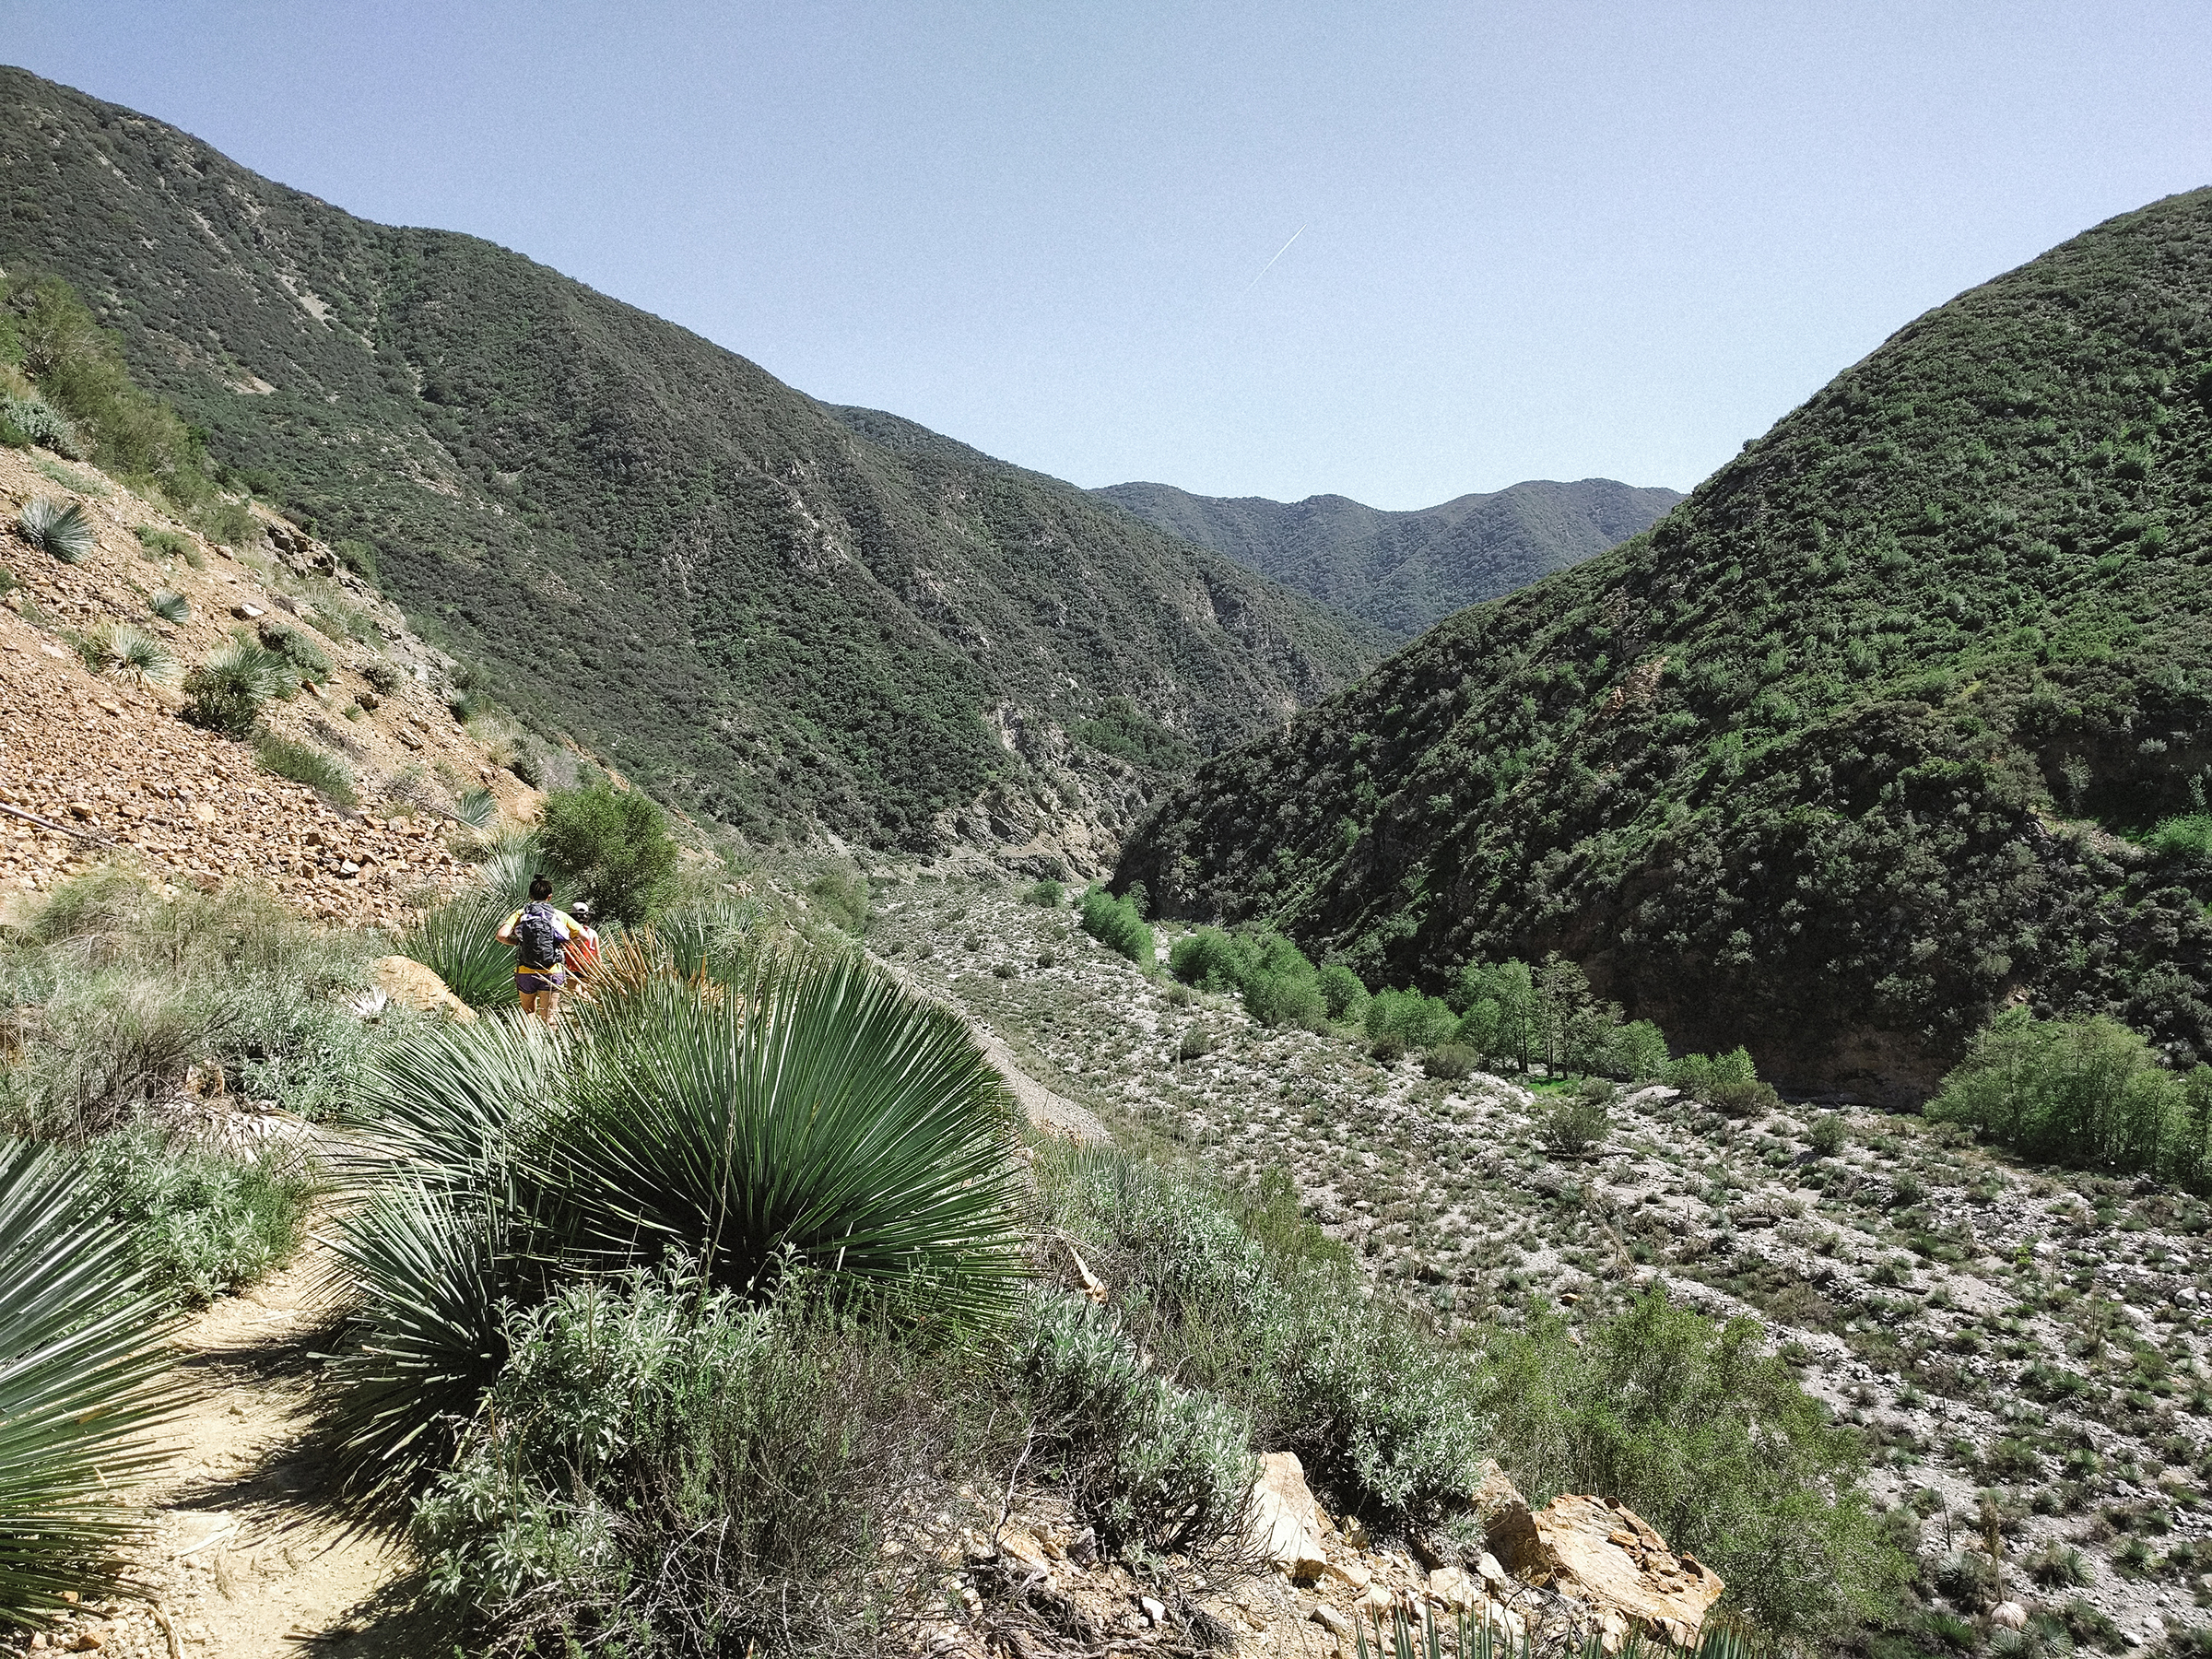
Bright Angel Trail is an approximately 12-mile roundtrip hike of pure bliss. As you hike down the trail, you will be surrounded by these massive, towering geological formations that make you wonder if they’re even real. I was so taken back by the beauty of the Grand Canyon that I fell behind the group a couple times. I wanted to soak everything in and engrave the scenery into my mind.
There are six different stops along the Bright Angel Trail: 1st Tunnel, 2nd Tunnel, Mile-and-a-Half Resthouse, Three Mile Resthouse, Indian Garden and Plateau Point. Water is available from Mile-and-a-Half Resthouse to Plateau Point (though some are seasonal), while restrooms are only available at the third and fifth stop. One of my favorite parts of the trail is the hike between Indian Garden and Plateau Point. The scenery was absolutely surreal. The open view had these enormous red rocks glistening in the background and flowers and cacti blooming on the side of the trail –it was as if the scenery was taken out of a movie backdrop. It was perfect in every way and I was truly mesmerized.

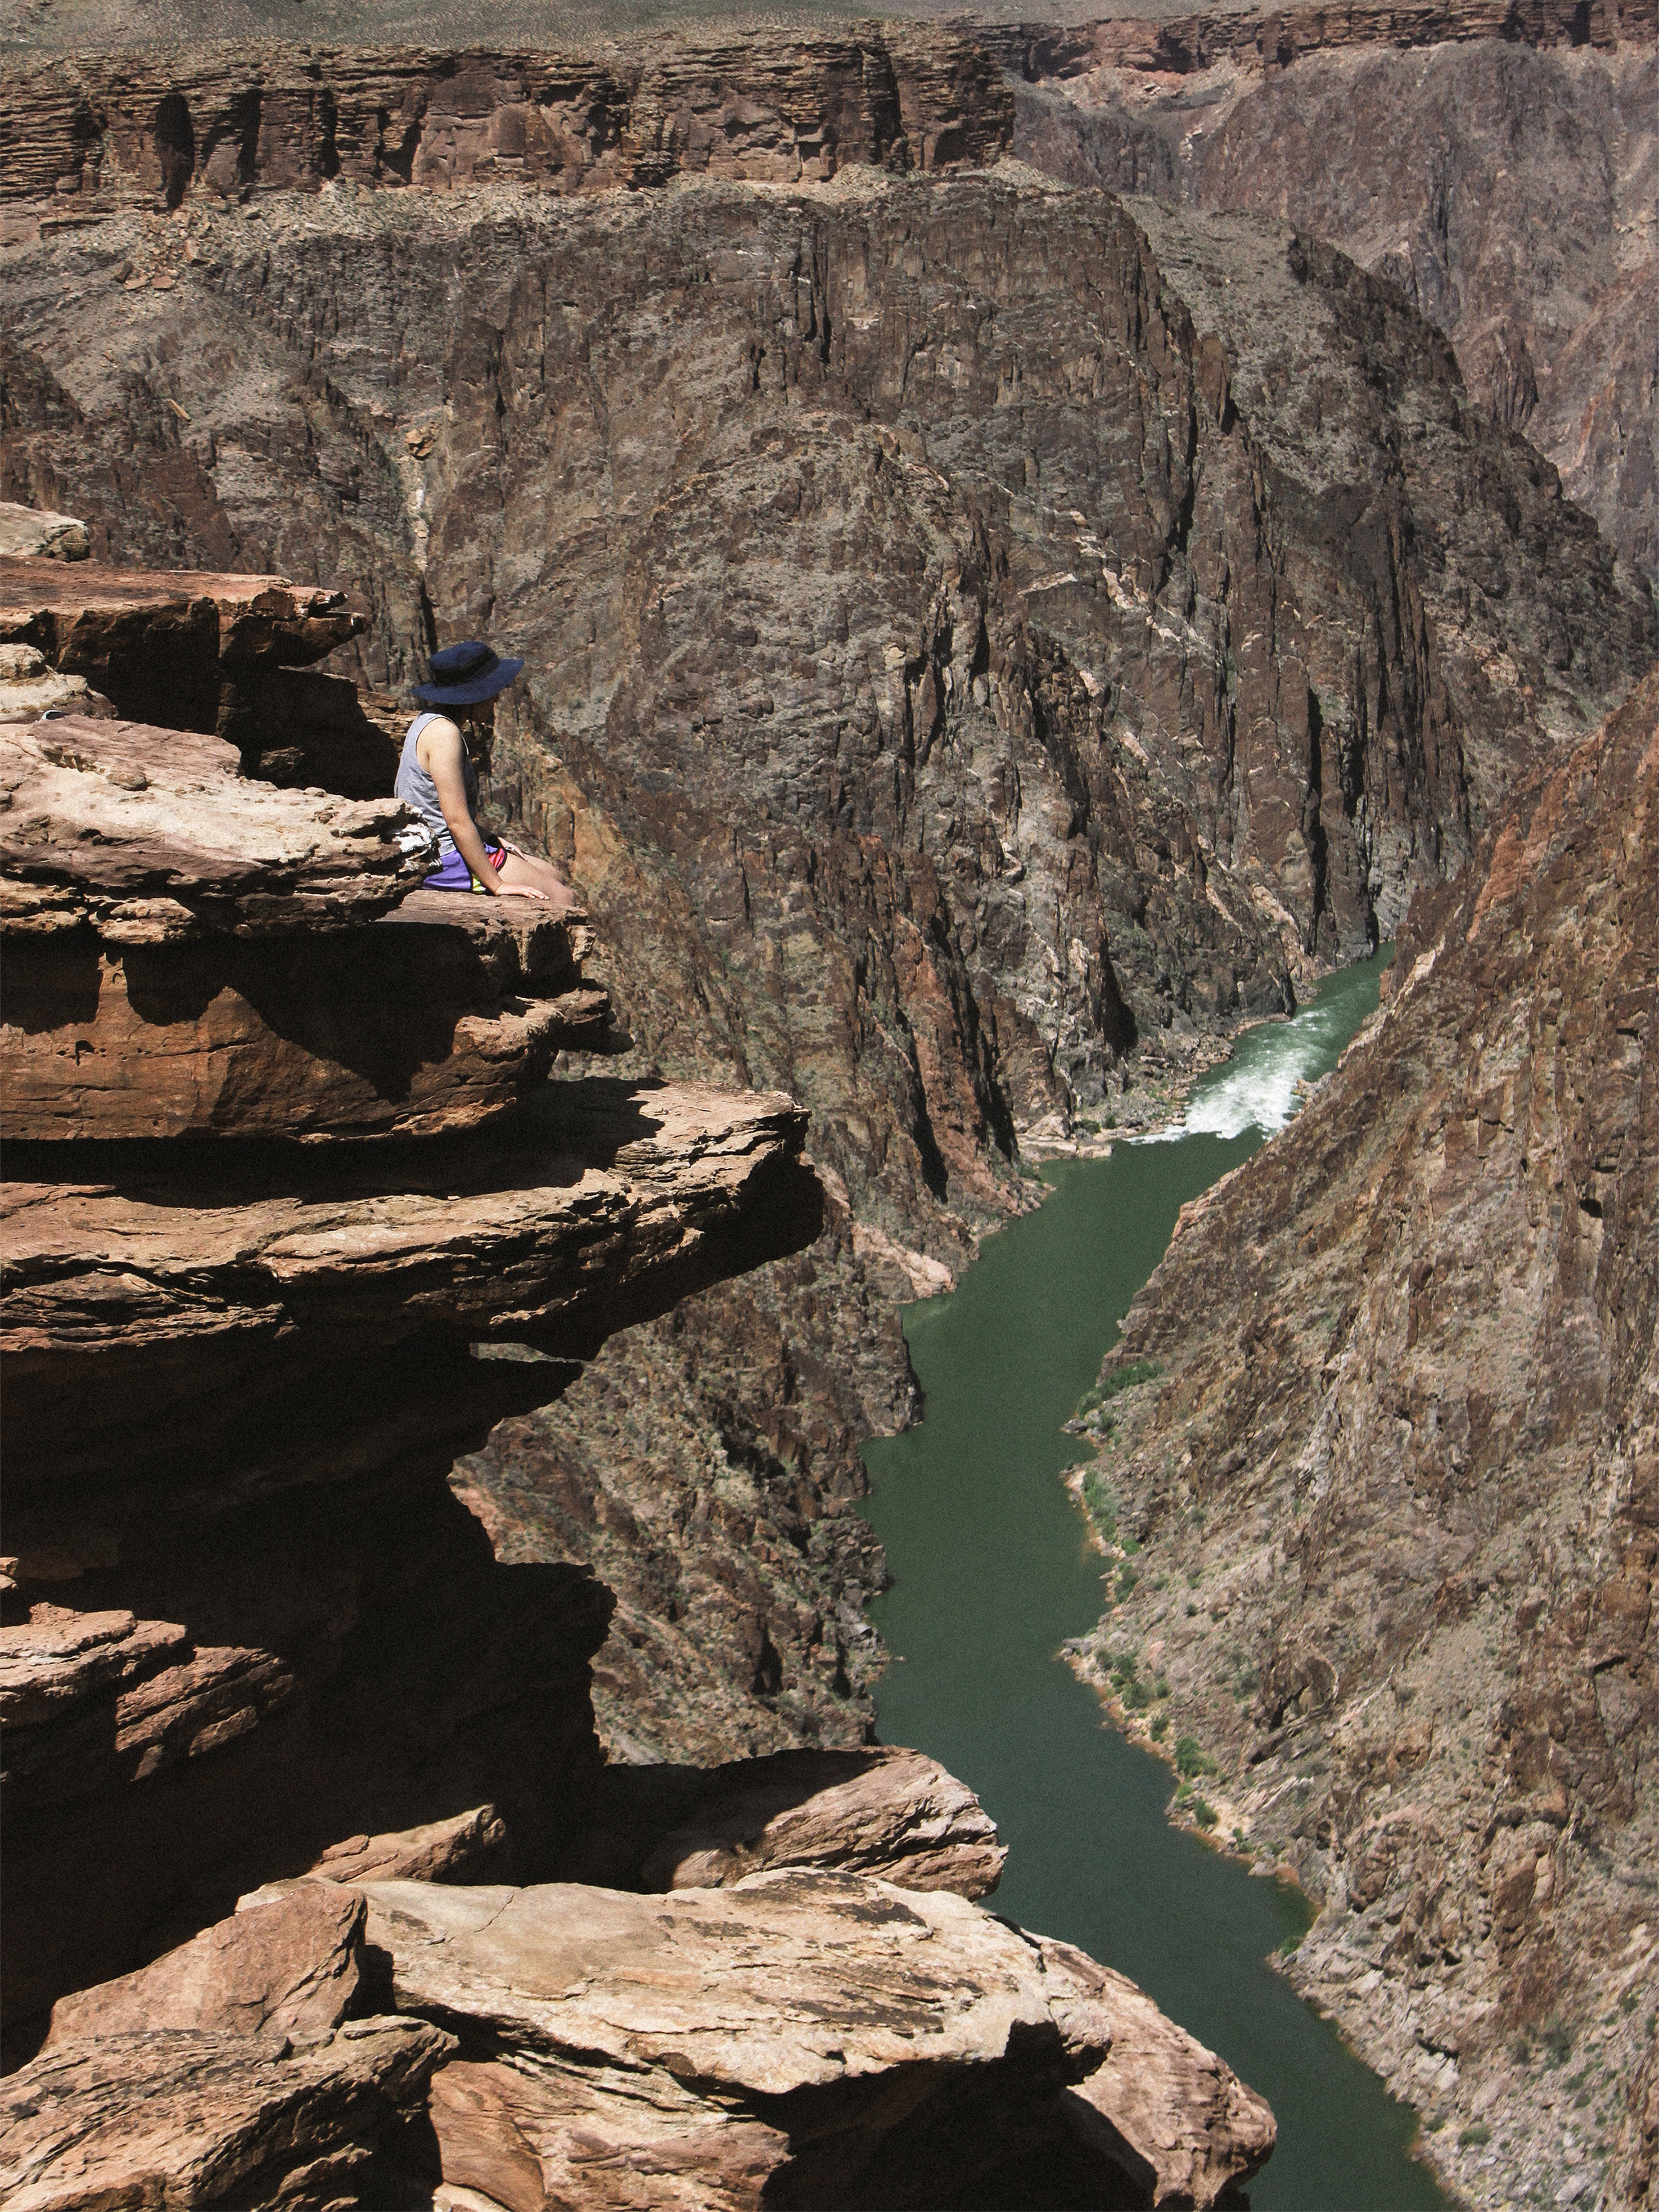
Just when I thought the view could not get any better, we arrived at Plateau Point (the end of the hike). Here, you can peer down into the grandiose canyon and gaze upon the mighty, emerald-colored Colorado River. My eyes grew wide and my mouth opened in awe. I remembered thinking, “someone pinch me, I think I’m in heaven.” It’s amazing how the Colorado River has carved its way through these gigantic rocks over centuries and created a stunning view for visitors to enjoy. At this point, everyone chose a spot on a ledge, munched on some snacks, took some photos, and admired its beauty in silence.
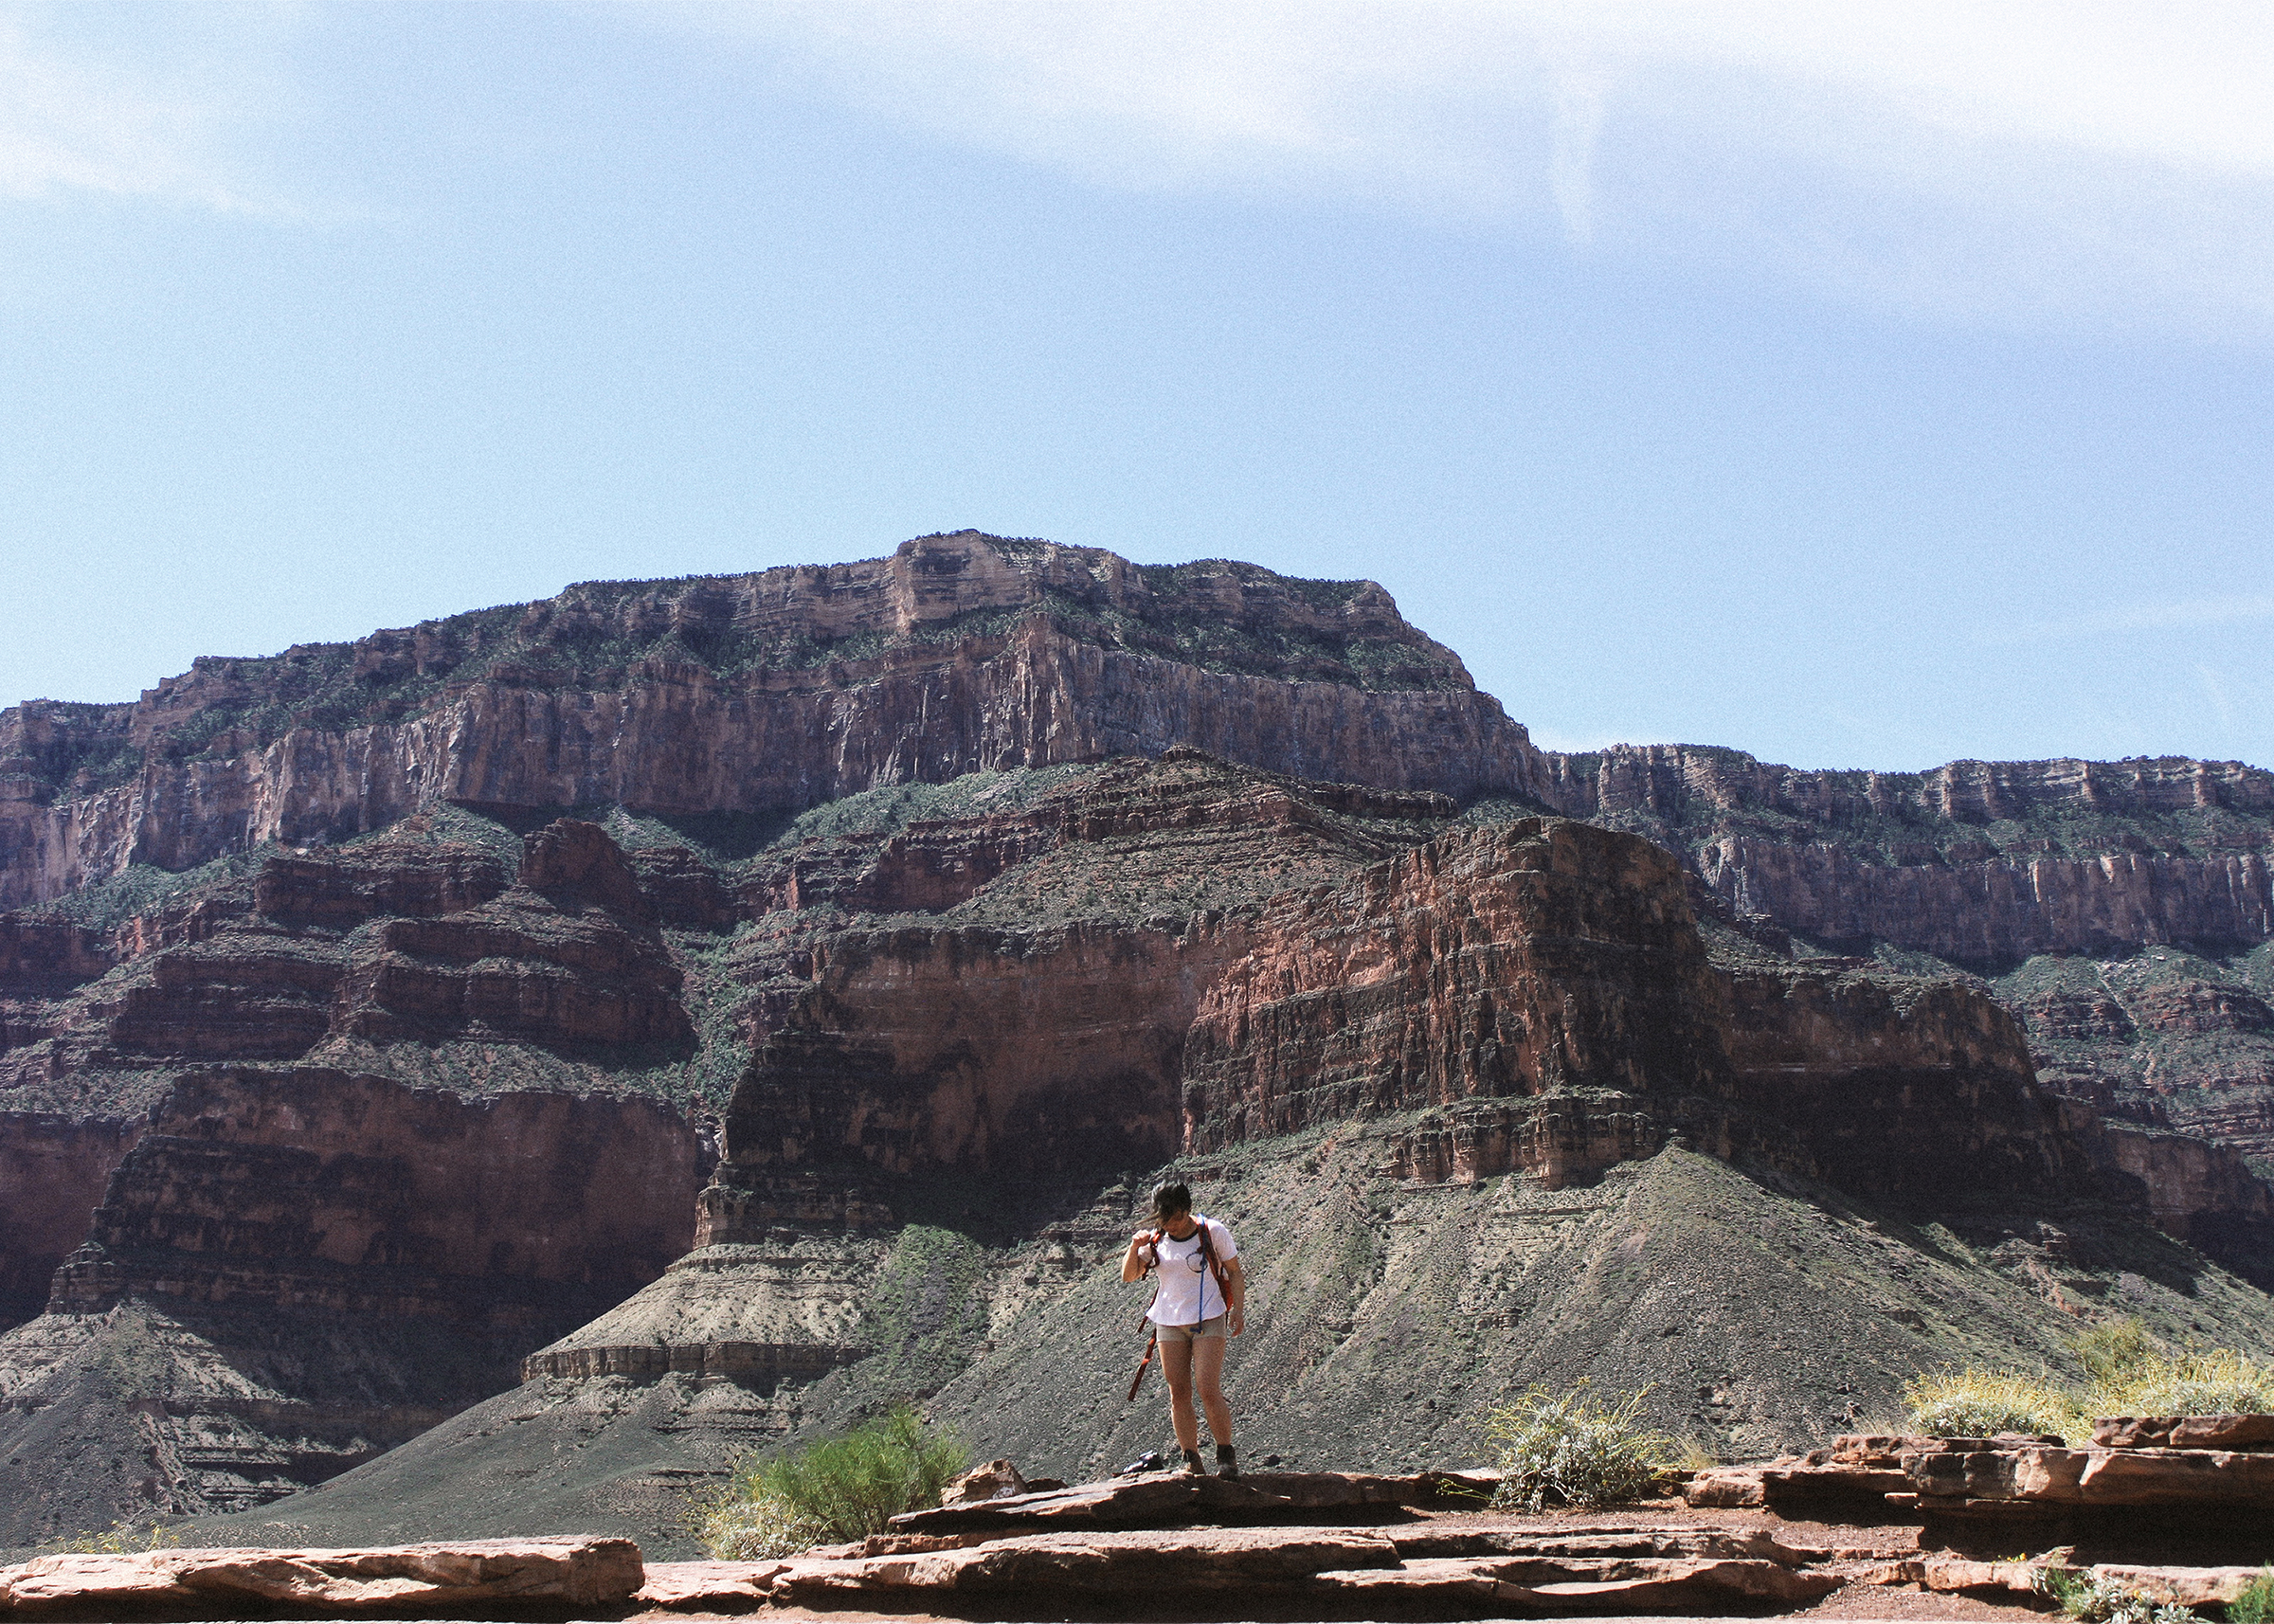
After we had our moments, it was time to hike back up. Coming down into the Grand Canyon was no problem, but going back up, now that’s a whole nother story. This is where you will need to mentally prepare yourself for some serious, hardcore leg and booty workout. All I remembered was that it was a never-ending hike of switchbacks after switchbacks after switchbacks after more switchbacks. By the 4 ½ miles up, I was drenched in sweat, sunburnt, and hiking as slow as a turtle. Putting all my weight on my trekking poles and keeping a steady pace, I eventually made it to the top and was actually the first one to arrive. I’ve never been so happy to see the start of a trailhead (then again, I feel like I always say that on any hike back up). One of the best feelings after an intense hike like the Bright Angel Trail is taking off my hiking boots and putting on my sandals, allowing my feet to feel free and cool.
Tips to Keep in Mind:
Have you visited the Grand Canyon National Park? Hiked the Bright Angel Trail? Share your experience in the comment section below.
Cheers,
Vivian
(Photo Credit: Tu-tram Nguyen)
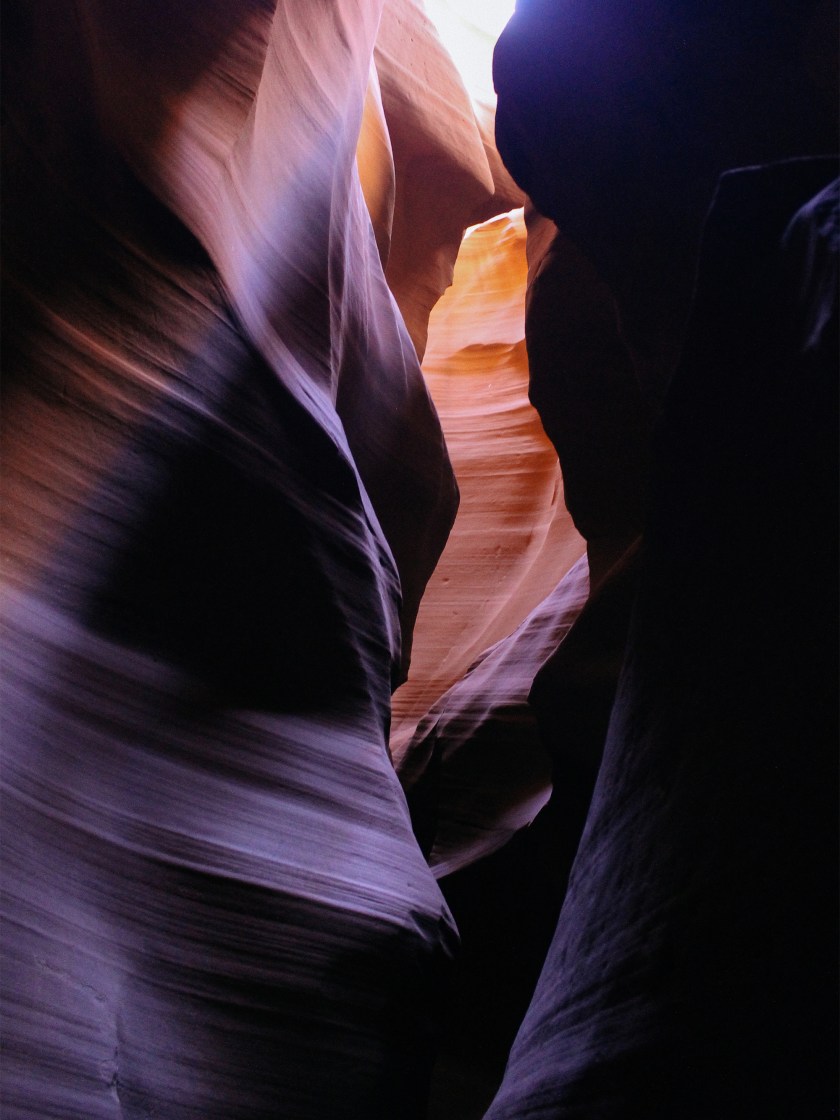
The Navajo name for Upper Antelope Canyon is Tsé bighánílíní, which means “the place where water runs through rocks.”
Slot canyons are truly one of nature’s hidden treasures. There are two canyons in Antelope, with Upper Antelope Canyon being the more popular tour due to its easier accessibility. The canyon is a short ¼-mile walk on flat ground. There is no climbing or squeezing through walls, no twists, and no turns required (which I think takes away the fun of walking through slot canyons). Still, it is quite literally a dream paradise for photographers.
To visit Upper Antelope Canyon, you will need to reserve a ticket with a tour company. There are 7 different tour companies in Upper Antelope Canyon. My friends and I went with Roger Ekis Tour for a fee of $40 per person (plus a $2 base fee). The tour lasted about 1 hour and 30 minutes.
After we checked in, our tour guide piled 16 of us into a massive jeep (think a Safari ride times 2) through the dusty terrains of Arizona. We zoomed by wild grazing cows, sandy potholes, and miles of nothingness as the wind slapped us all in the face and teased us with damaging eyesores. Honestly, the bumpy 20-minute ride was one of my favorite parts of the trip.
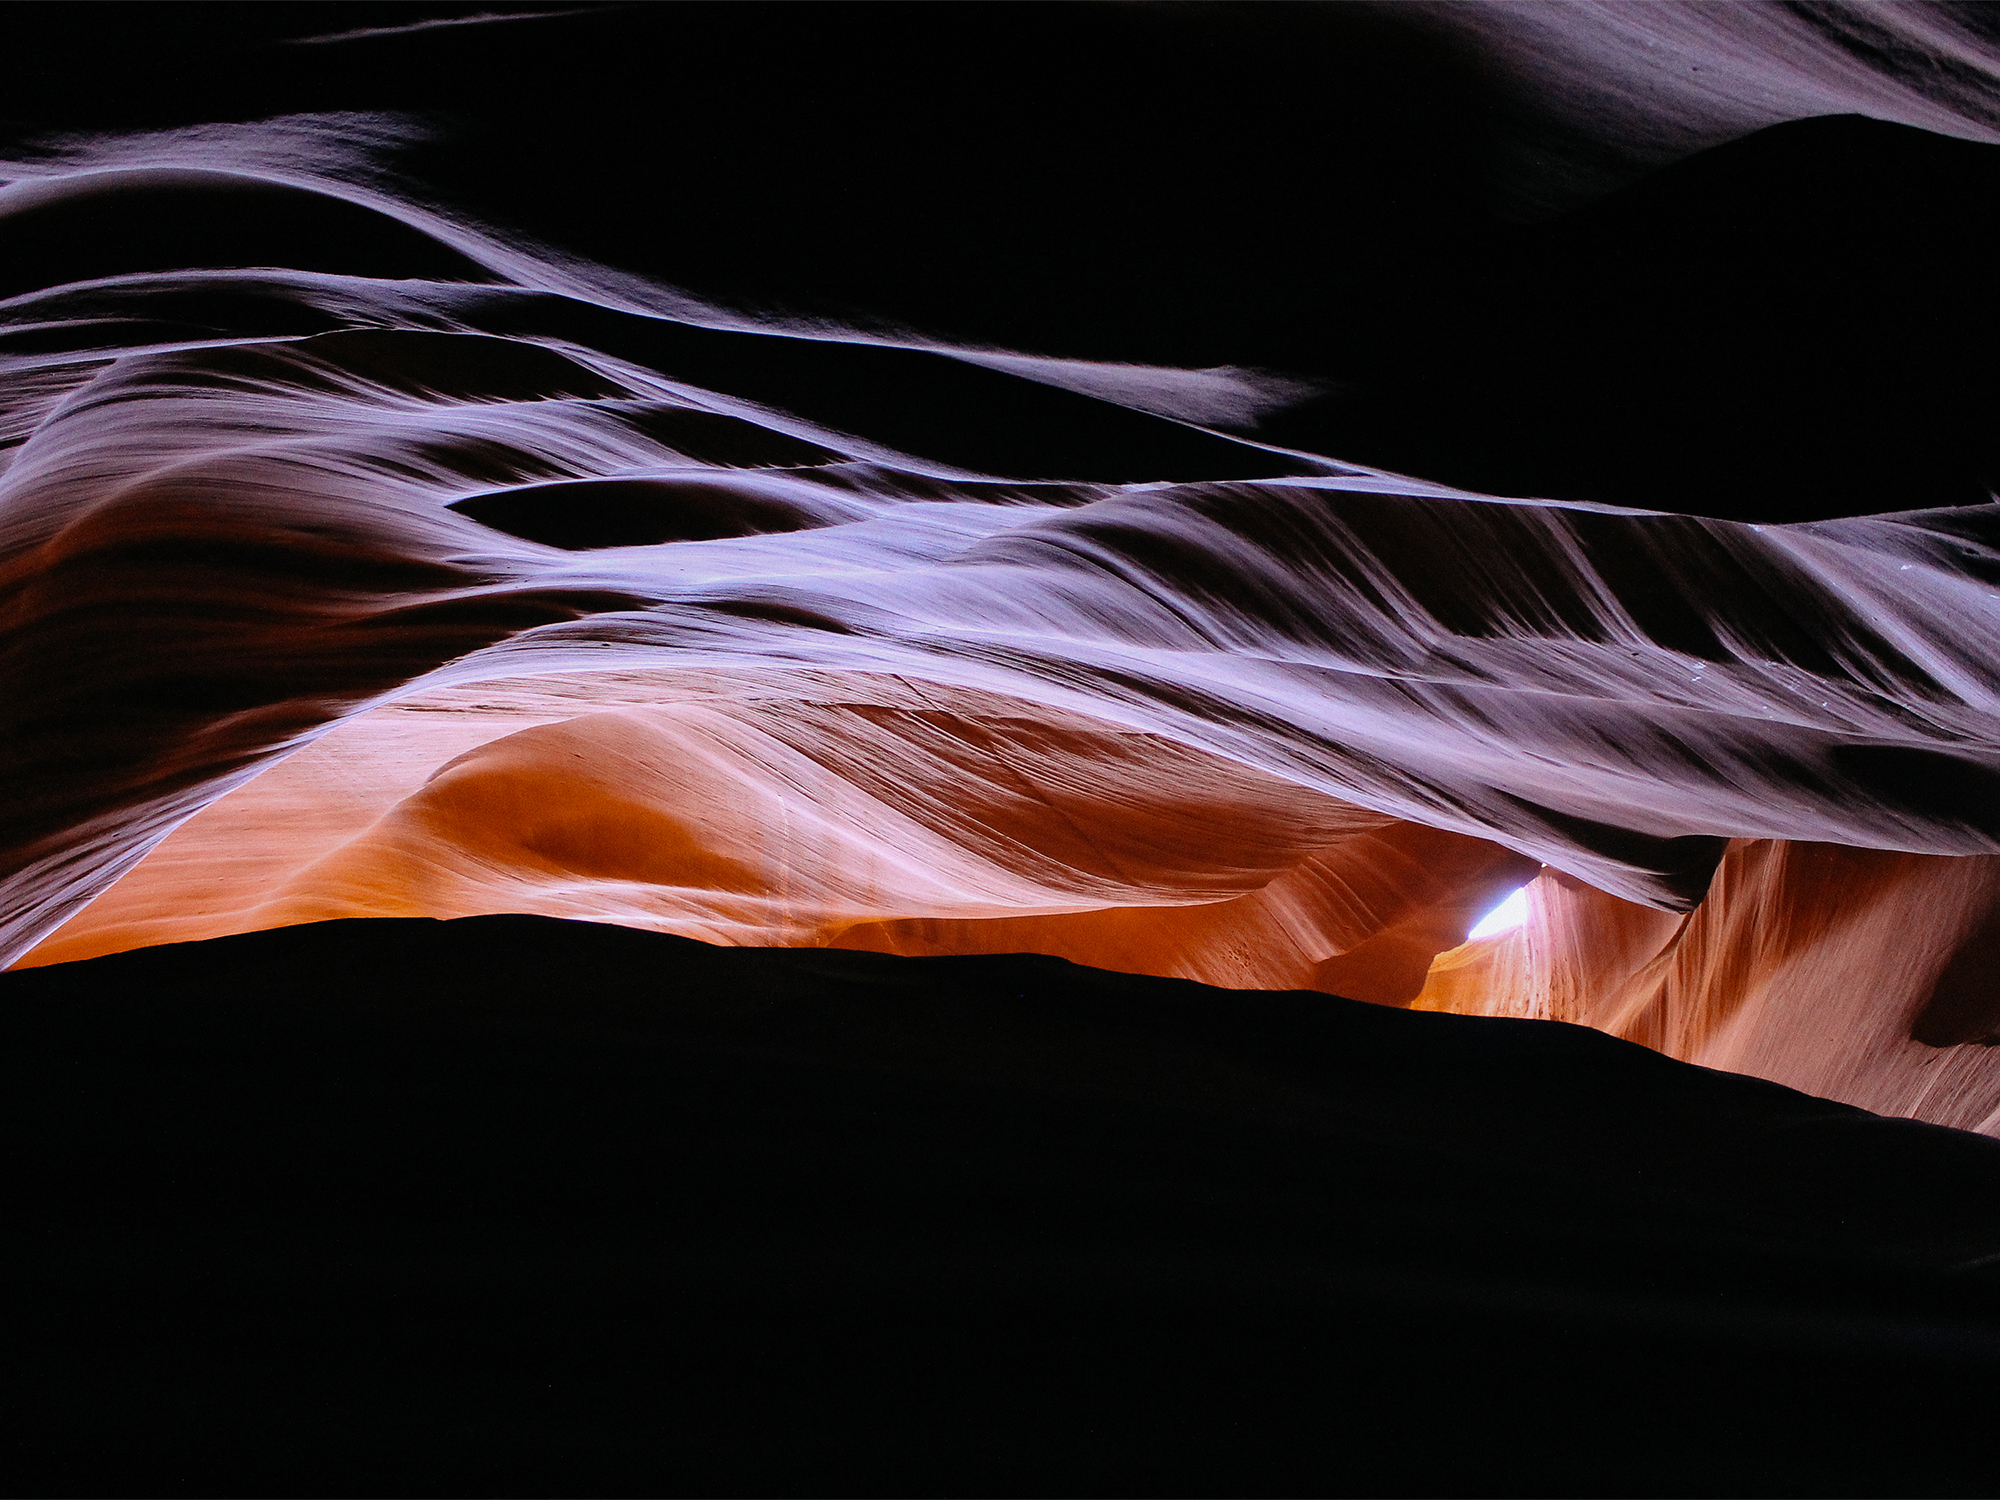
Our group got to Upper Antelope Canyon midday (1:30pm) and were able to catch the deep purple and orange hues the canyons are known for. This was a totally different experience than if you were to come during a peak sun hour (when the sun is highest in the sky) for the bright orange sunbeams.

I loved the dark hours of the later tour. The dimness made for a more quiet and intimate experience. Even though the canyon was overflowing with people, I felt alone—and it was the kind of solitude that keeps you lost in thought. It was a peaceful feeling. I was only brought back to reality when our guide would chime in every now and then to discuss the history of the canyon and explain where to stand for the best photos.
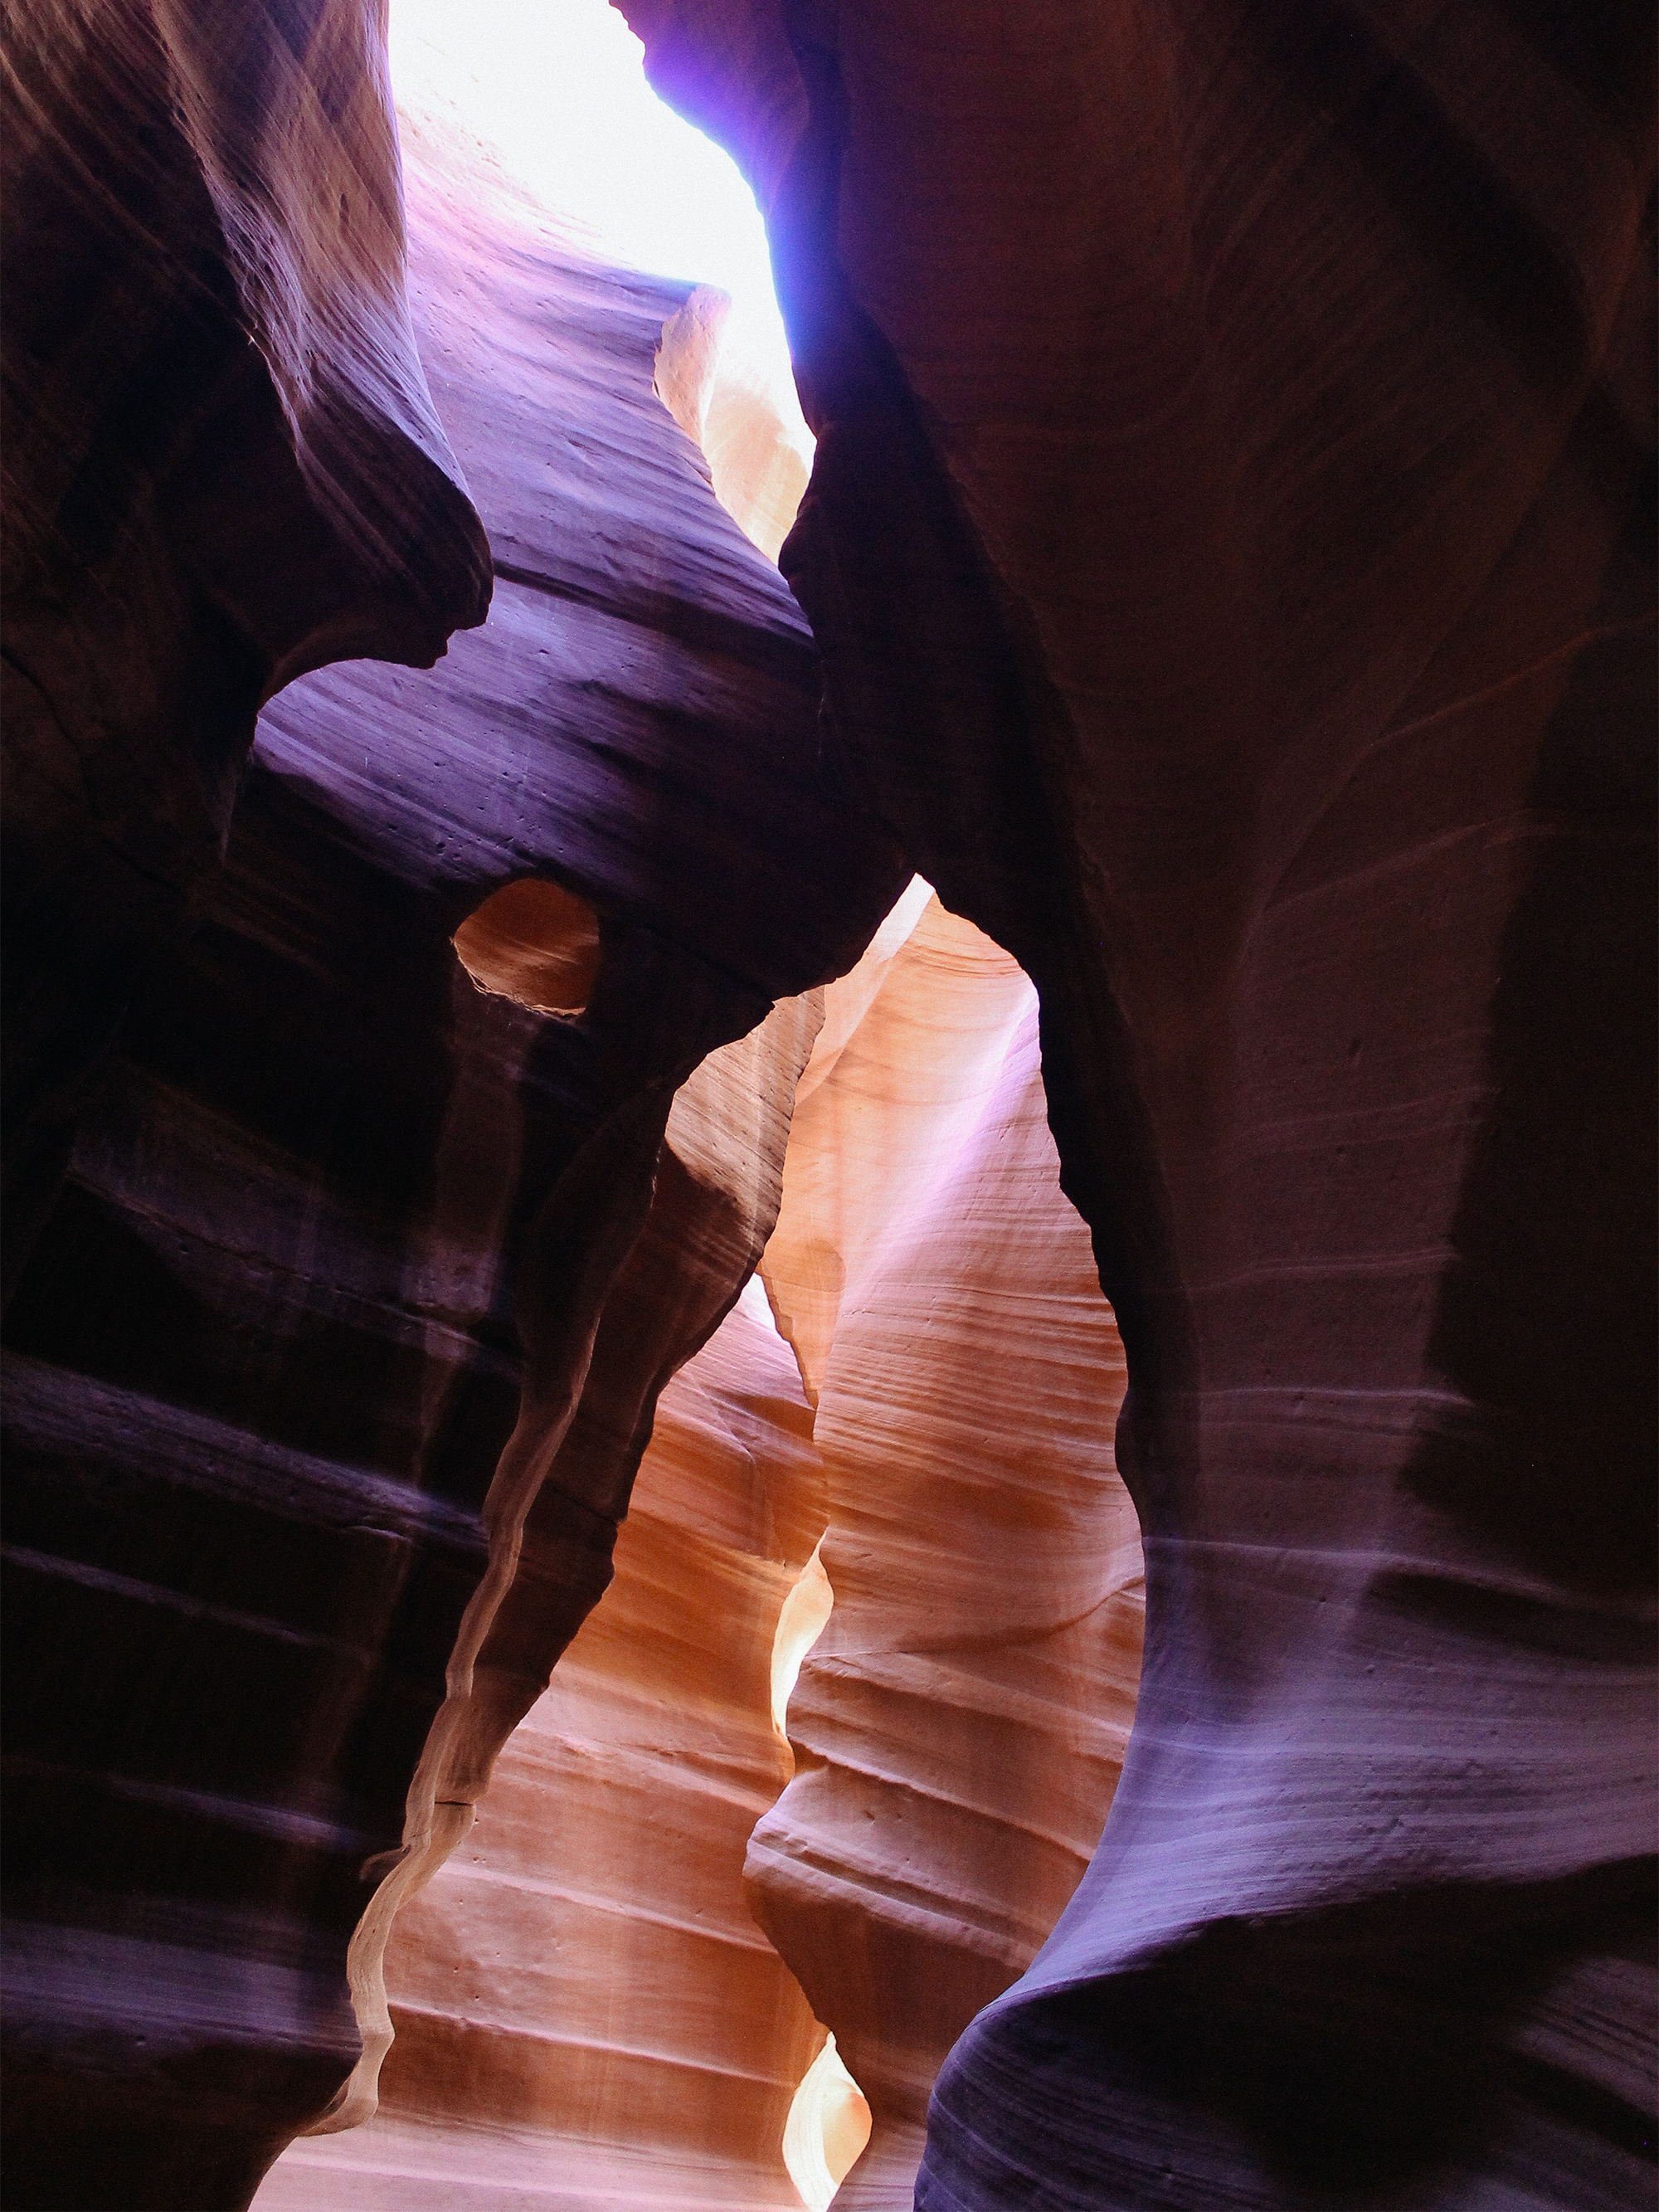
Each look at the canyon was another experience on its own. The different hues, the way the sun hits the top of the canyon, the light that shines through, the spiral of the walls, the deepness of the carvings—it was all so magical. It’s insane the way Upper Antelope Canyon was carved by wind and water. It’s humbling to be able to witness the works of Mother Nature over thousands of years. I don’t think I blinked throughout the entire tour; everything was so beautiful and I didn’t want to miss a thing.
Things to Know:
If you end up planning a trip out here— which you should!— make it a weekend road trip and visit both Upper and Lower Antelope Canyons. Experience the different characteristics and the contrasting light show of each canyon during different parts of the day. I’ve already added Upper Antelope to my list of “must-return” travel destinations.
Cheers,
Jennifer

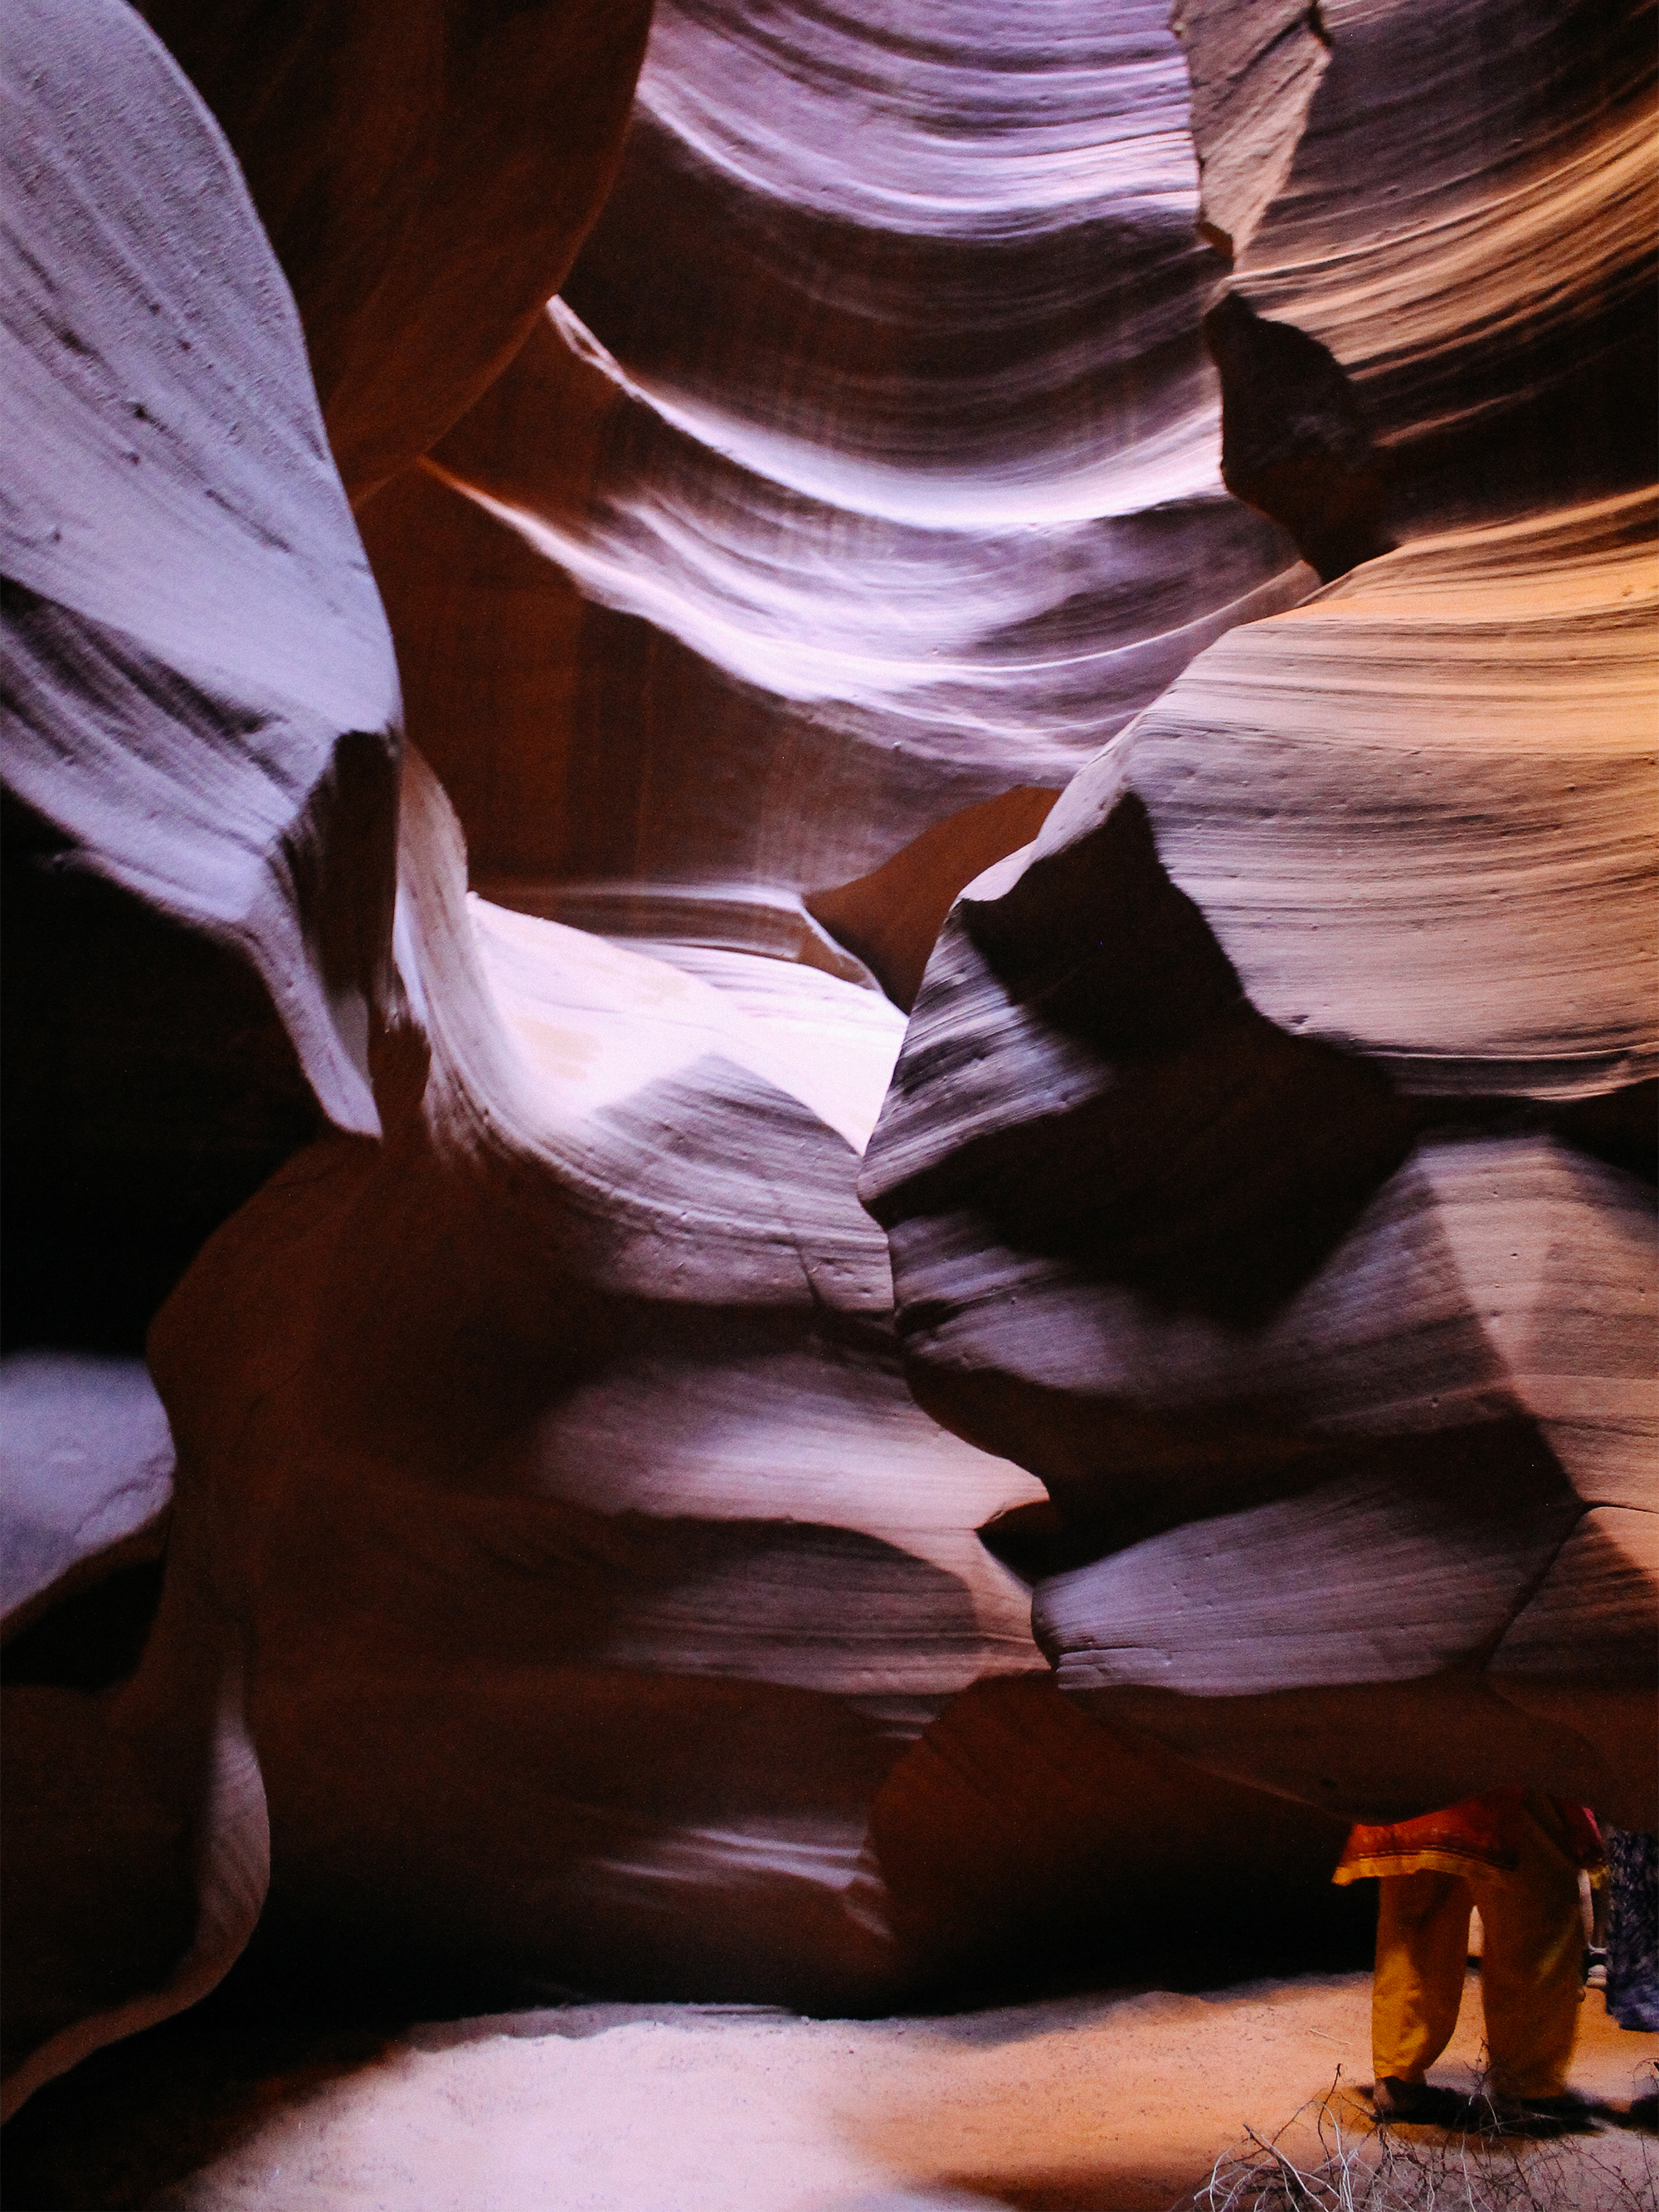
Antelope Canyon is a slot canyon located in Page, Arizona and is one of the American Southwest’s greatest treasures. For the Navajos, the canyons are a sacred land and for good reason. There are two canyons in Antelope—Upper and Lower Antelope Canyon—each created by the carving and sculpting of wind and water over thousands of years.

The Navajo name for Lower Antelope Canyon is Hazdistazí or in English, “spiral rock arches.” In comparison to Upper Antelope, Lower Antelope Canyon requires a tad bit more walking to get to, although it’s nothing too tough or strenuous. I thought the hike was extremely cool because you get to climb down into the canyons—imagine, walking down into a crack in the earth! Because of its ‘tougher’ accessibility, Lower Antelope Canyon is supposed to be the ‘less’ crowded tour. However, when Vivian and I went, it was still pretty darn crowded. I guess this means the popularity of the place has skyrocketed over the years.
To visit the canyon, you’ll need to reserve tickets for a tour. There are only 2 tours in Lower Antelope Canyon—Ken’s Tours and Dixie Ellis. We went with the Ken’s Tour for 1 hour 15 minutes at $20 per person.
Upon our arrival, our guide led us on a short 5-minute walk to the canyon from the check-in center. From the outside, the canyon looks like a dusty barren land (helllllloooo Mad Max Fury Road). The inside however, was a whole different story.

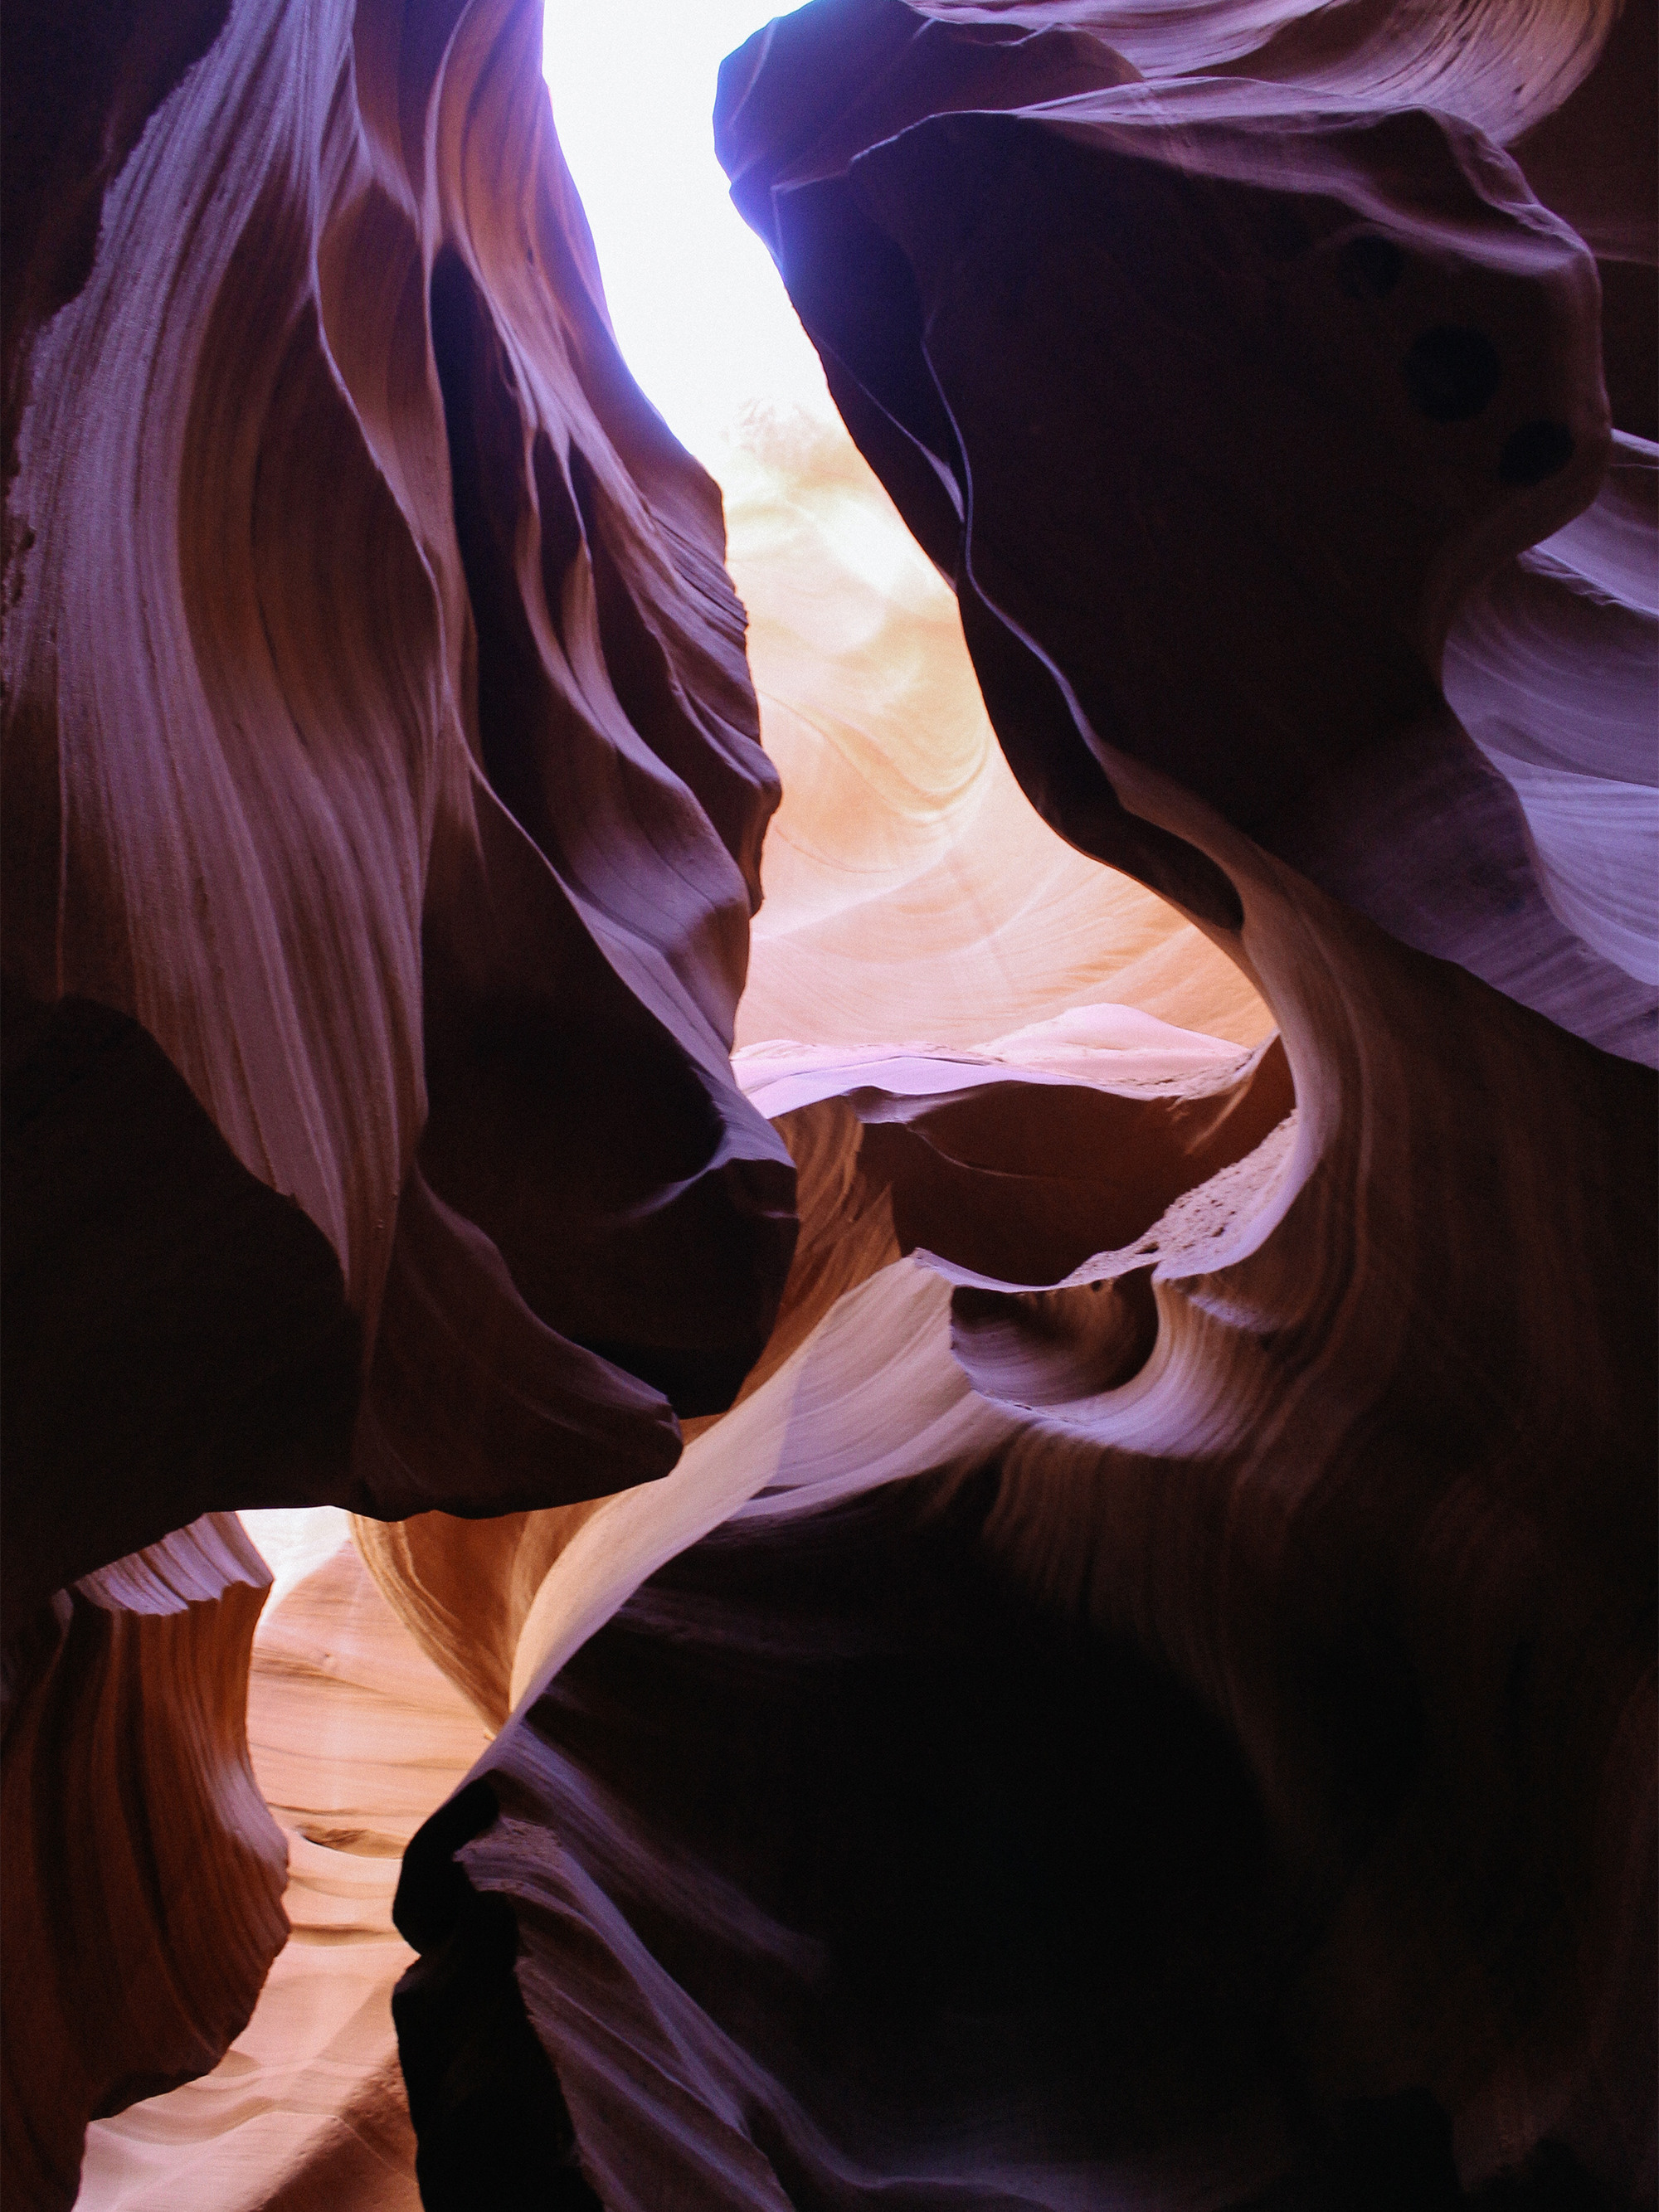
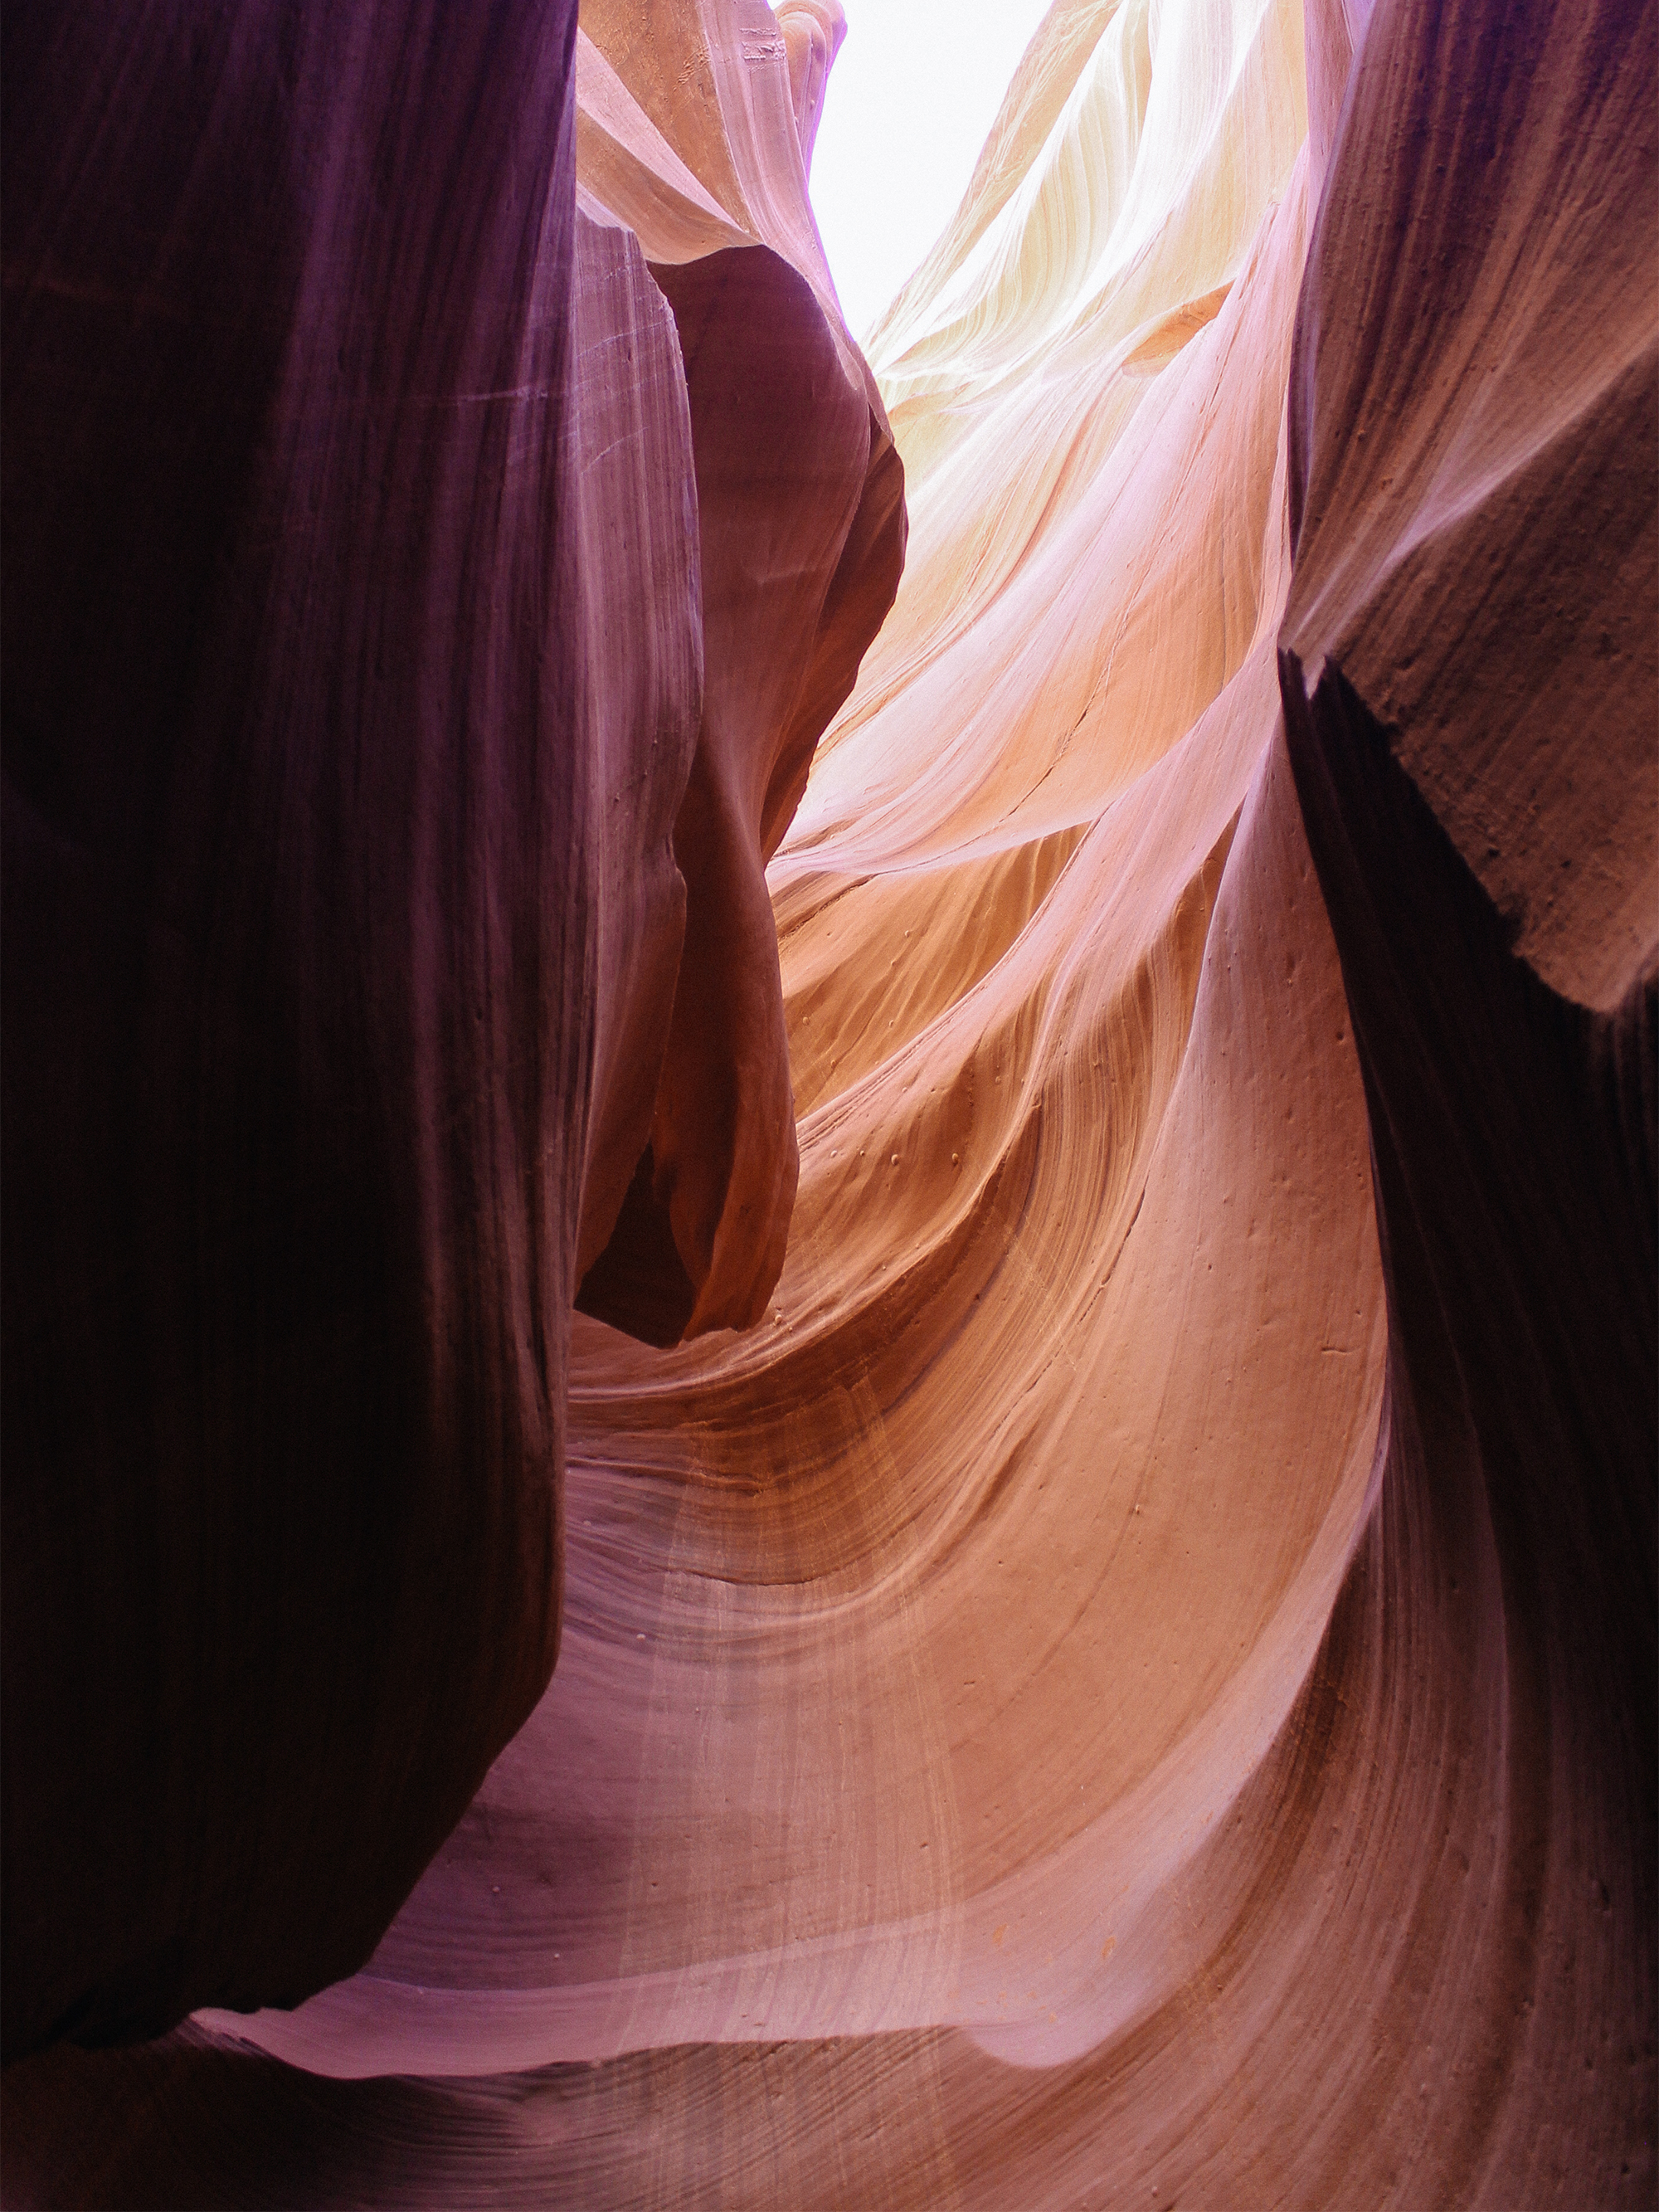
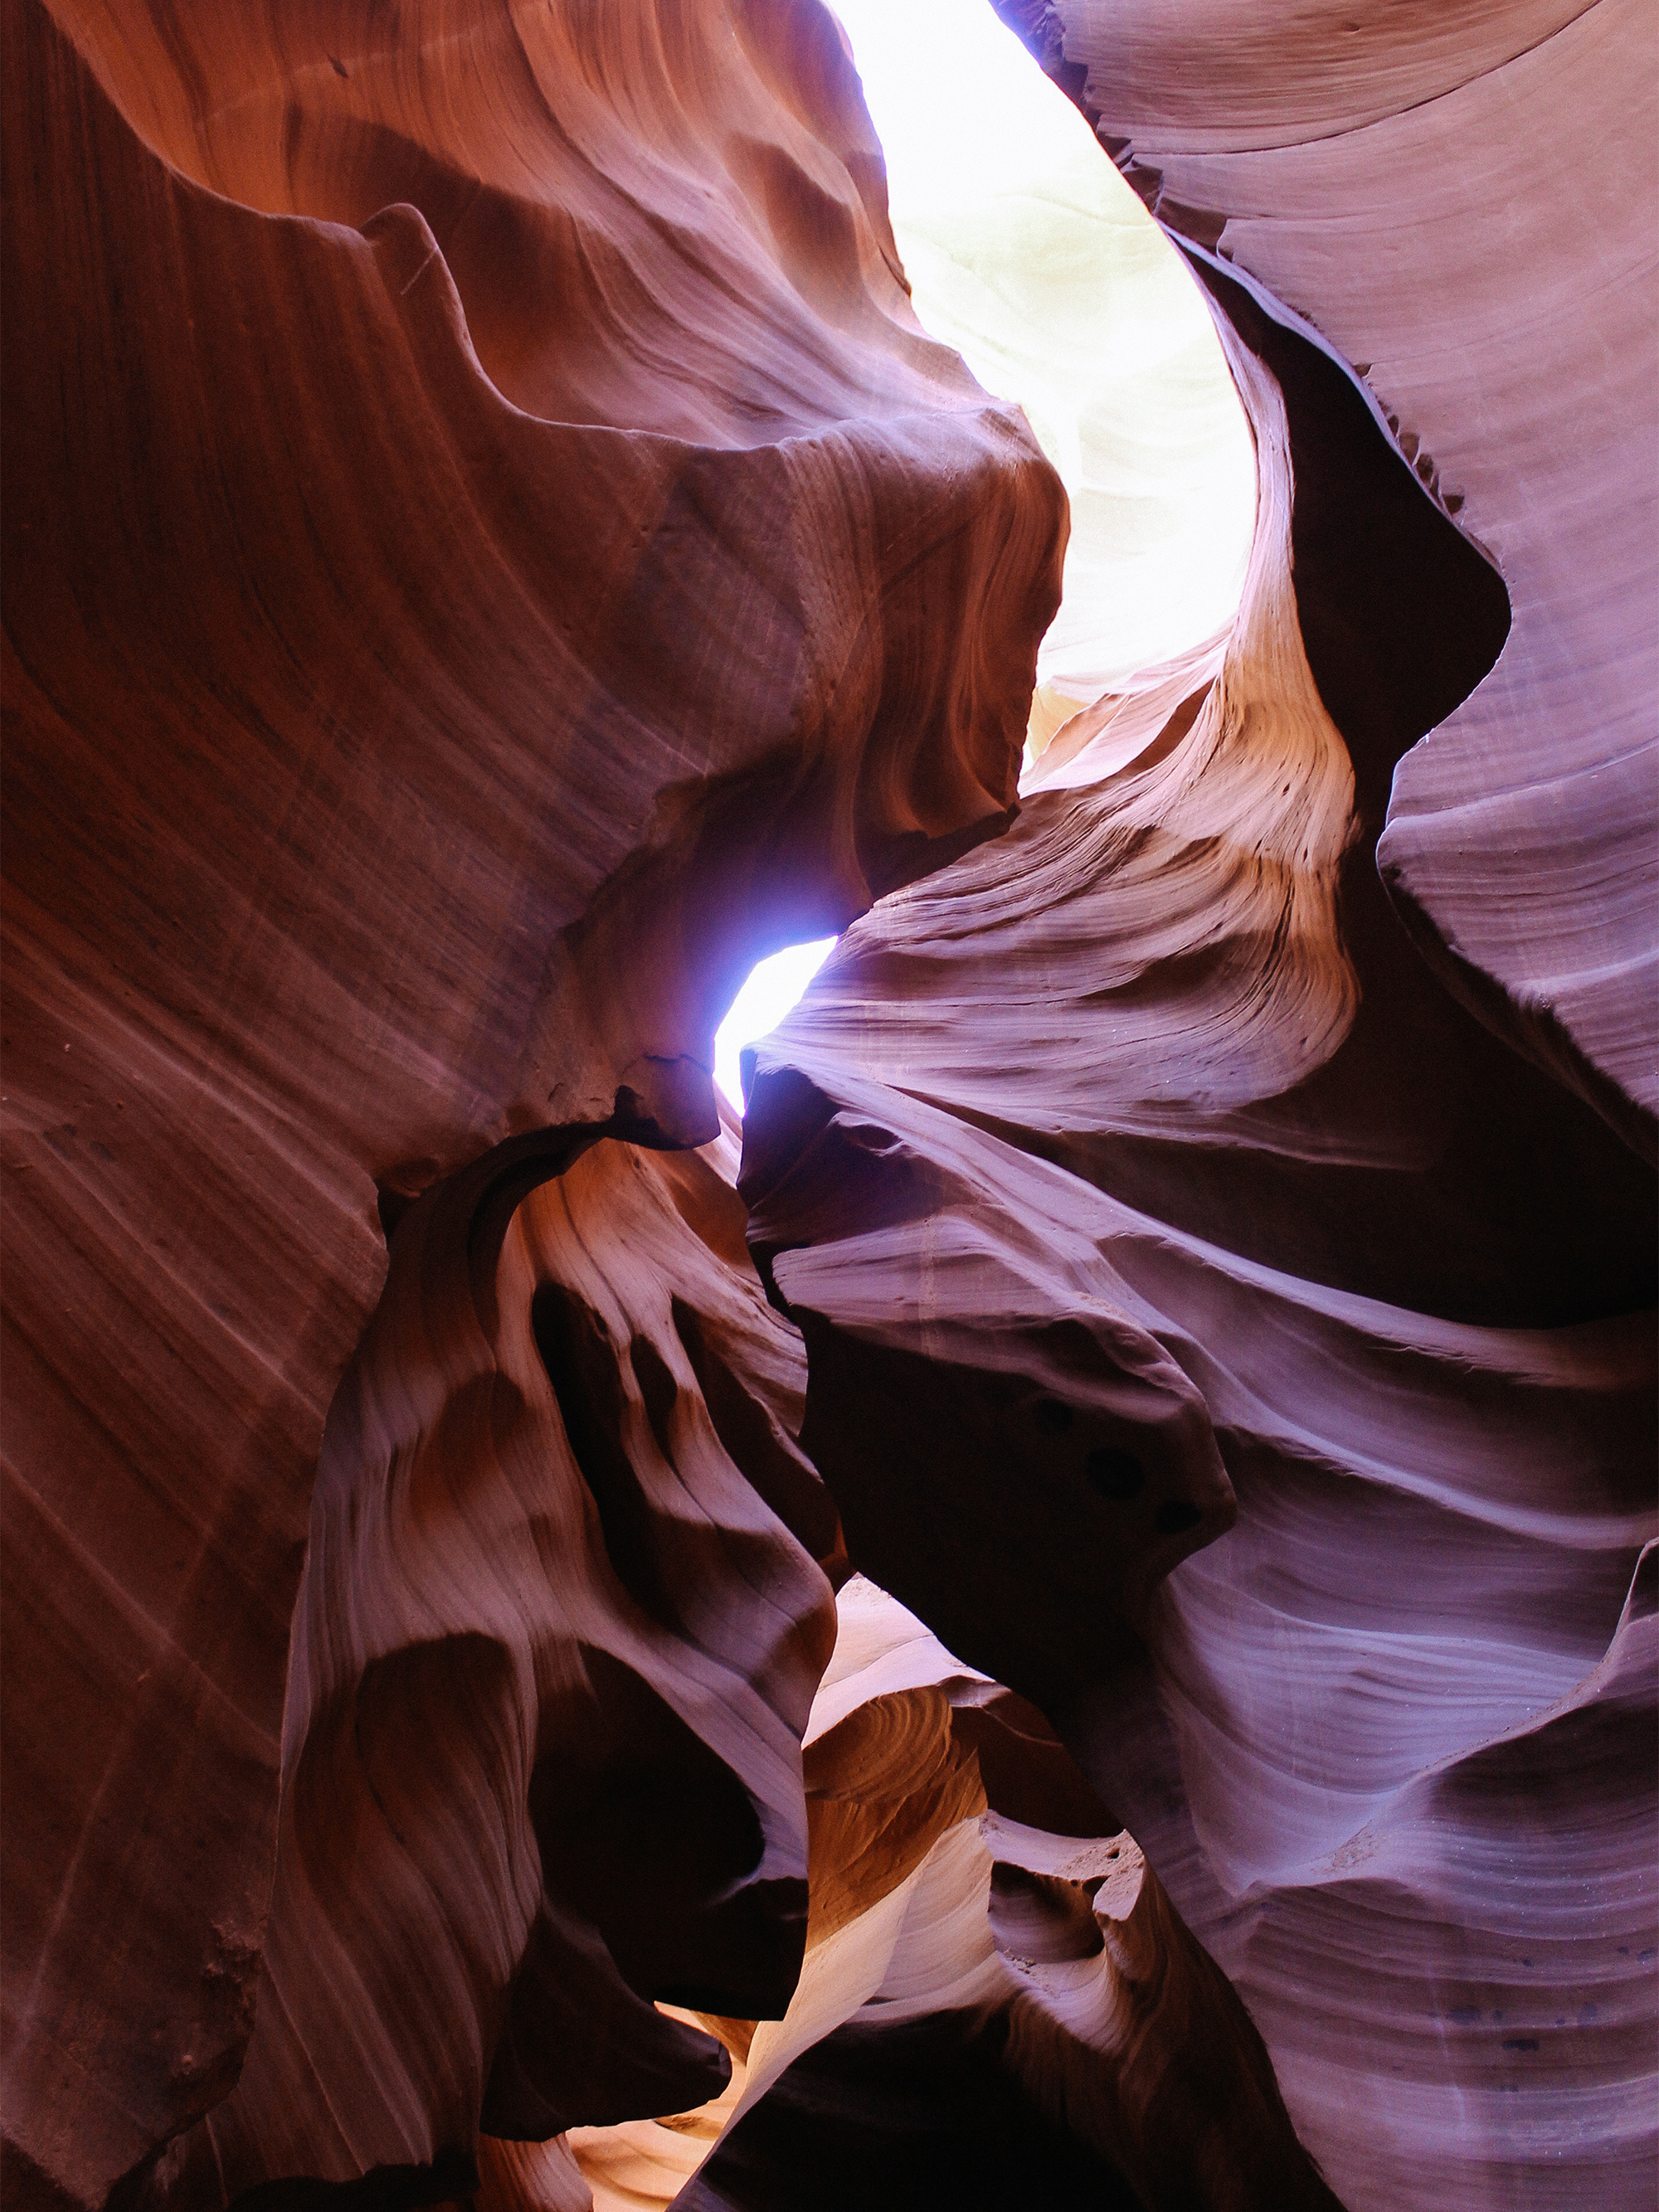
As I stood in the canyon surrounded by its massive walls, I instantly knew what others meant when they said the canyons were sacred ground. The walls were unbelievably beautiful. The carvings were so intricate and smooth—as if Mother Nature knew exactly how she wanted to sculpt the land. It was intense how beautiful a simple act like the sunlight hitting the rocks can be. We booked a tour for 10:30am and got to experience the sunbeams as it moved across the sky, falling ever so slightly on the grounds. It pierced through the inside, creating dazzling displays of color, light, and shadow. And the walls — they were so brightly lit in orange. It was truly magical. Mother Nature was definitely glowing. I can’t even begin to describe the experience so I hope these photos will show what I lack in words.
Things to know
Before the trip, I did intensive research on both Lower and Upper Antelope Canyon. Some visitors said the Lower Antelope Canyon was better for the deep purples and oranges hues while Upper Antelope Canyon is better for photographing sunbeams. From my experience, I think as long as you make it to either canyon during the right time (morning or late afternoon for deep hues vs. midday for sunbeams), you’re good. Make sure to buy tickets well in advance if you’re looking to book a specific time. If you can, visit both canyons as they each offer different views into the slot canyons. It’d be a crime to experience one without the other.
Cheers,
Jennifer

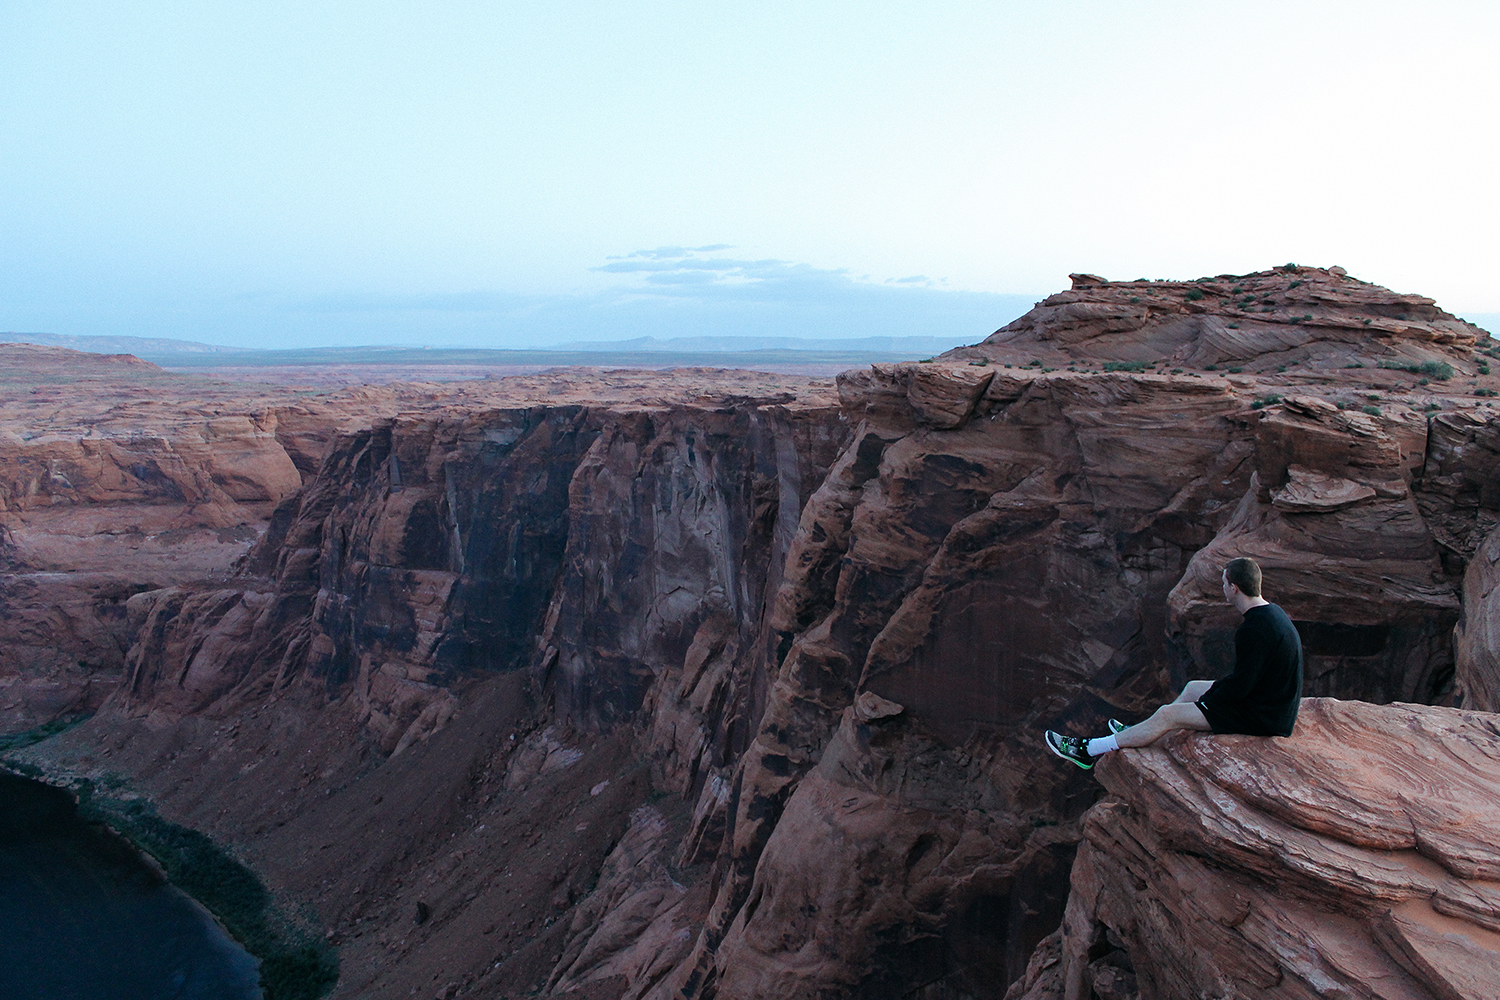
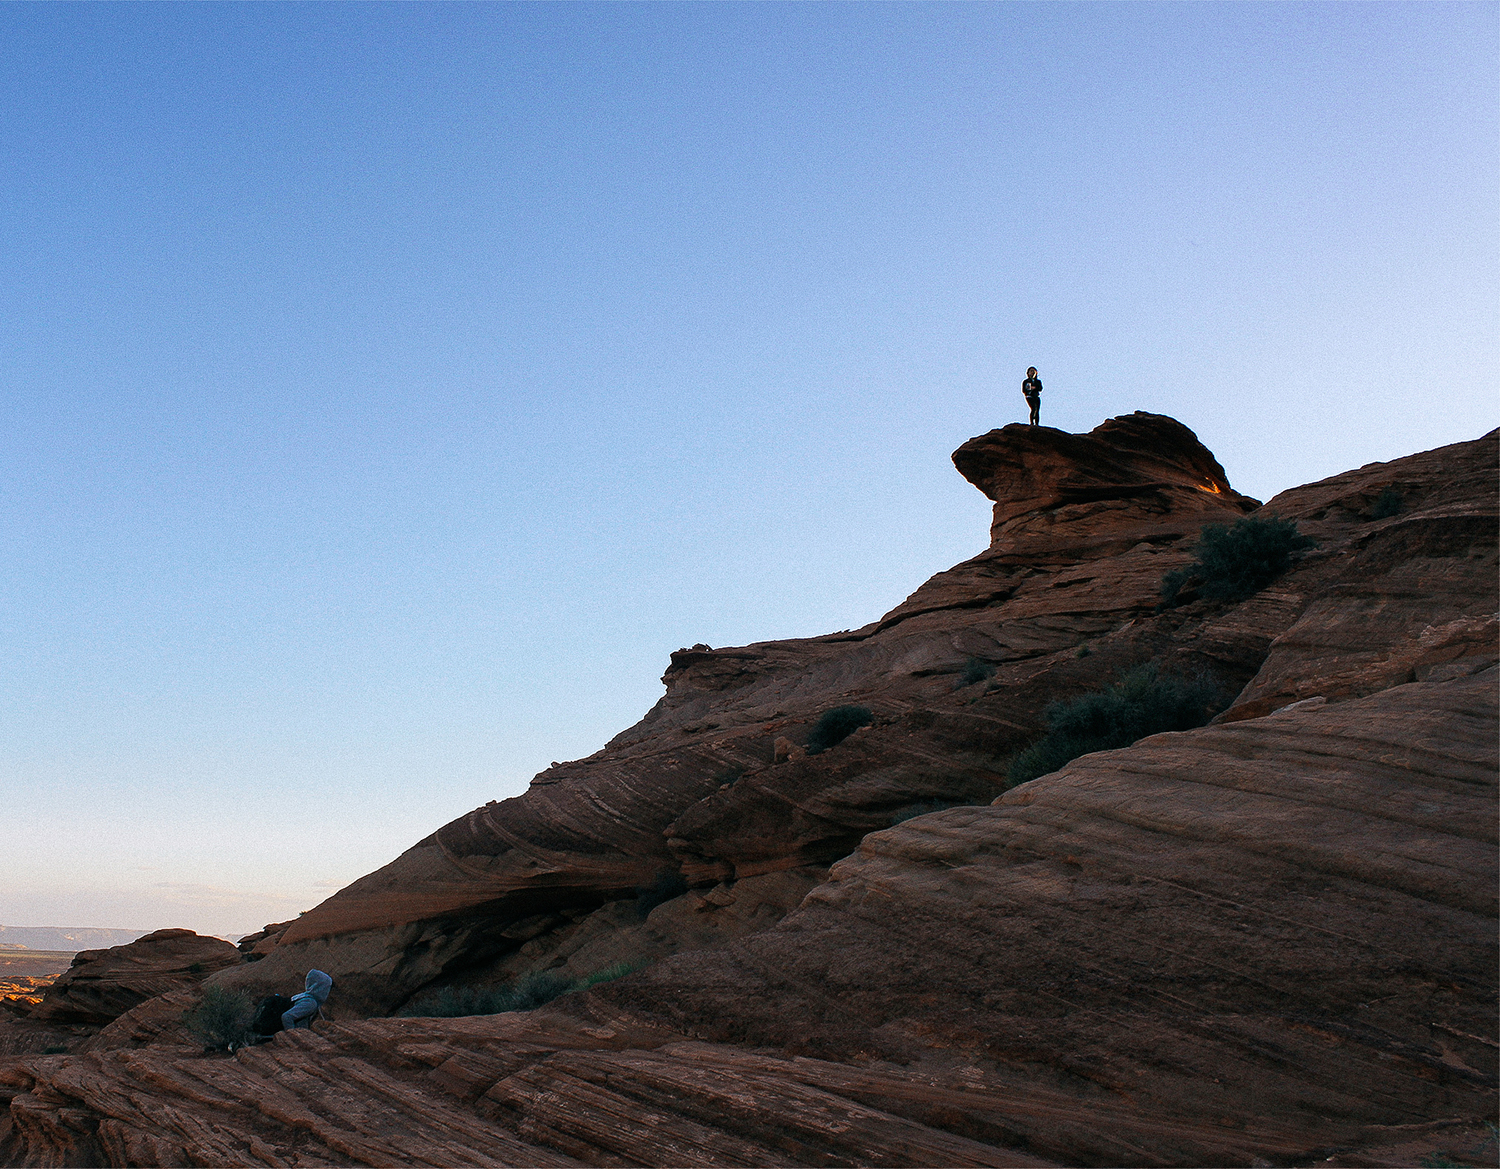
Just outside of Page, Arizona lies one of the most photographed places along the Colorado River. The iconic image can be seen on postcards, brochures, posters, wallpapers, calendars and on social media. Photographers and tourists all over the world flock to see and capture this unique formation that Mother Nature has created. What is this distinctive place you ask? Two words: Horseshoe Bend.
Over thousands of years, the Colorado River has carved and meandered through these massive red rocks creating today’s horseshoe-shaped bend in the canyon (hence the given name). Jennifer and I visited Horseshoe Bend late last month and witnessed the beauty of it. We came around sunrise and saw the colors of the rocks and river change as the sun rose from the horizon. Not a bad place to see first thing in the morning. As anywhere in the world, places are even more beautiful when seen with your very own naked eyes than through any camera or pictures. Trust me, Horseshoe Bend did not disappoint.
Tips to Keep In Mind:
Have you visited Horseshoe Bend? Share your experience in the comment section below. We would love to hear your thoughts!
Cheers,
Vivian
*Due to overcrowding and increased damages to this pristine area, changes has been made to Horseshoe Bend since we visited. Read more about it here.

Last year we both skydived 13,000 feet in the air and ever since then, there has always been a thirst for more adventures. Bungee jumping was the next thing on our list.
For months, we subscribed to Groupon in the hopes of snagging a good bungee jumping deal. Then one day, Mother Nature answered our prayers. Vivian stumbled upon a deal to jump off The Bridge to Nowhere for $60. Usually, one jump would cost a hefty $100, but with the deal for $80 and an extra special 25% off, it totaled a sweet $60. The jump also comes with a complimentary shirt. If a free shirt doesn’t get you, we don’t know what will.

The Bridge to Nowhere is the only bungee jumping destination in Southern California. It’s headed by Bungee America, a group of certified experts who have been bungee jumping off the bridge since 1989. After some research, we signed up for the Groupon deal, got the code, and bought our tickets. Things got real!
The day started early. We met our bungee group of (about) 80 at 7:30 in the morning. Not a morning bird? You’re going to have to be that day. Make sure to come 15-30 minutes beforehand to sign in and have the Bungee Team weigh you too. Once you’re set, they’ll hand you a wristband with a number indicating which weight bungee jumping group you will be a part of (light, mid-heavy, and heavy). You don’t have to worry about that until you get to the bridge.
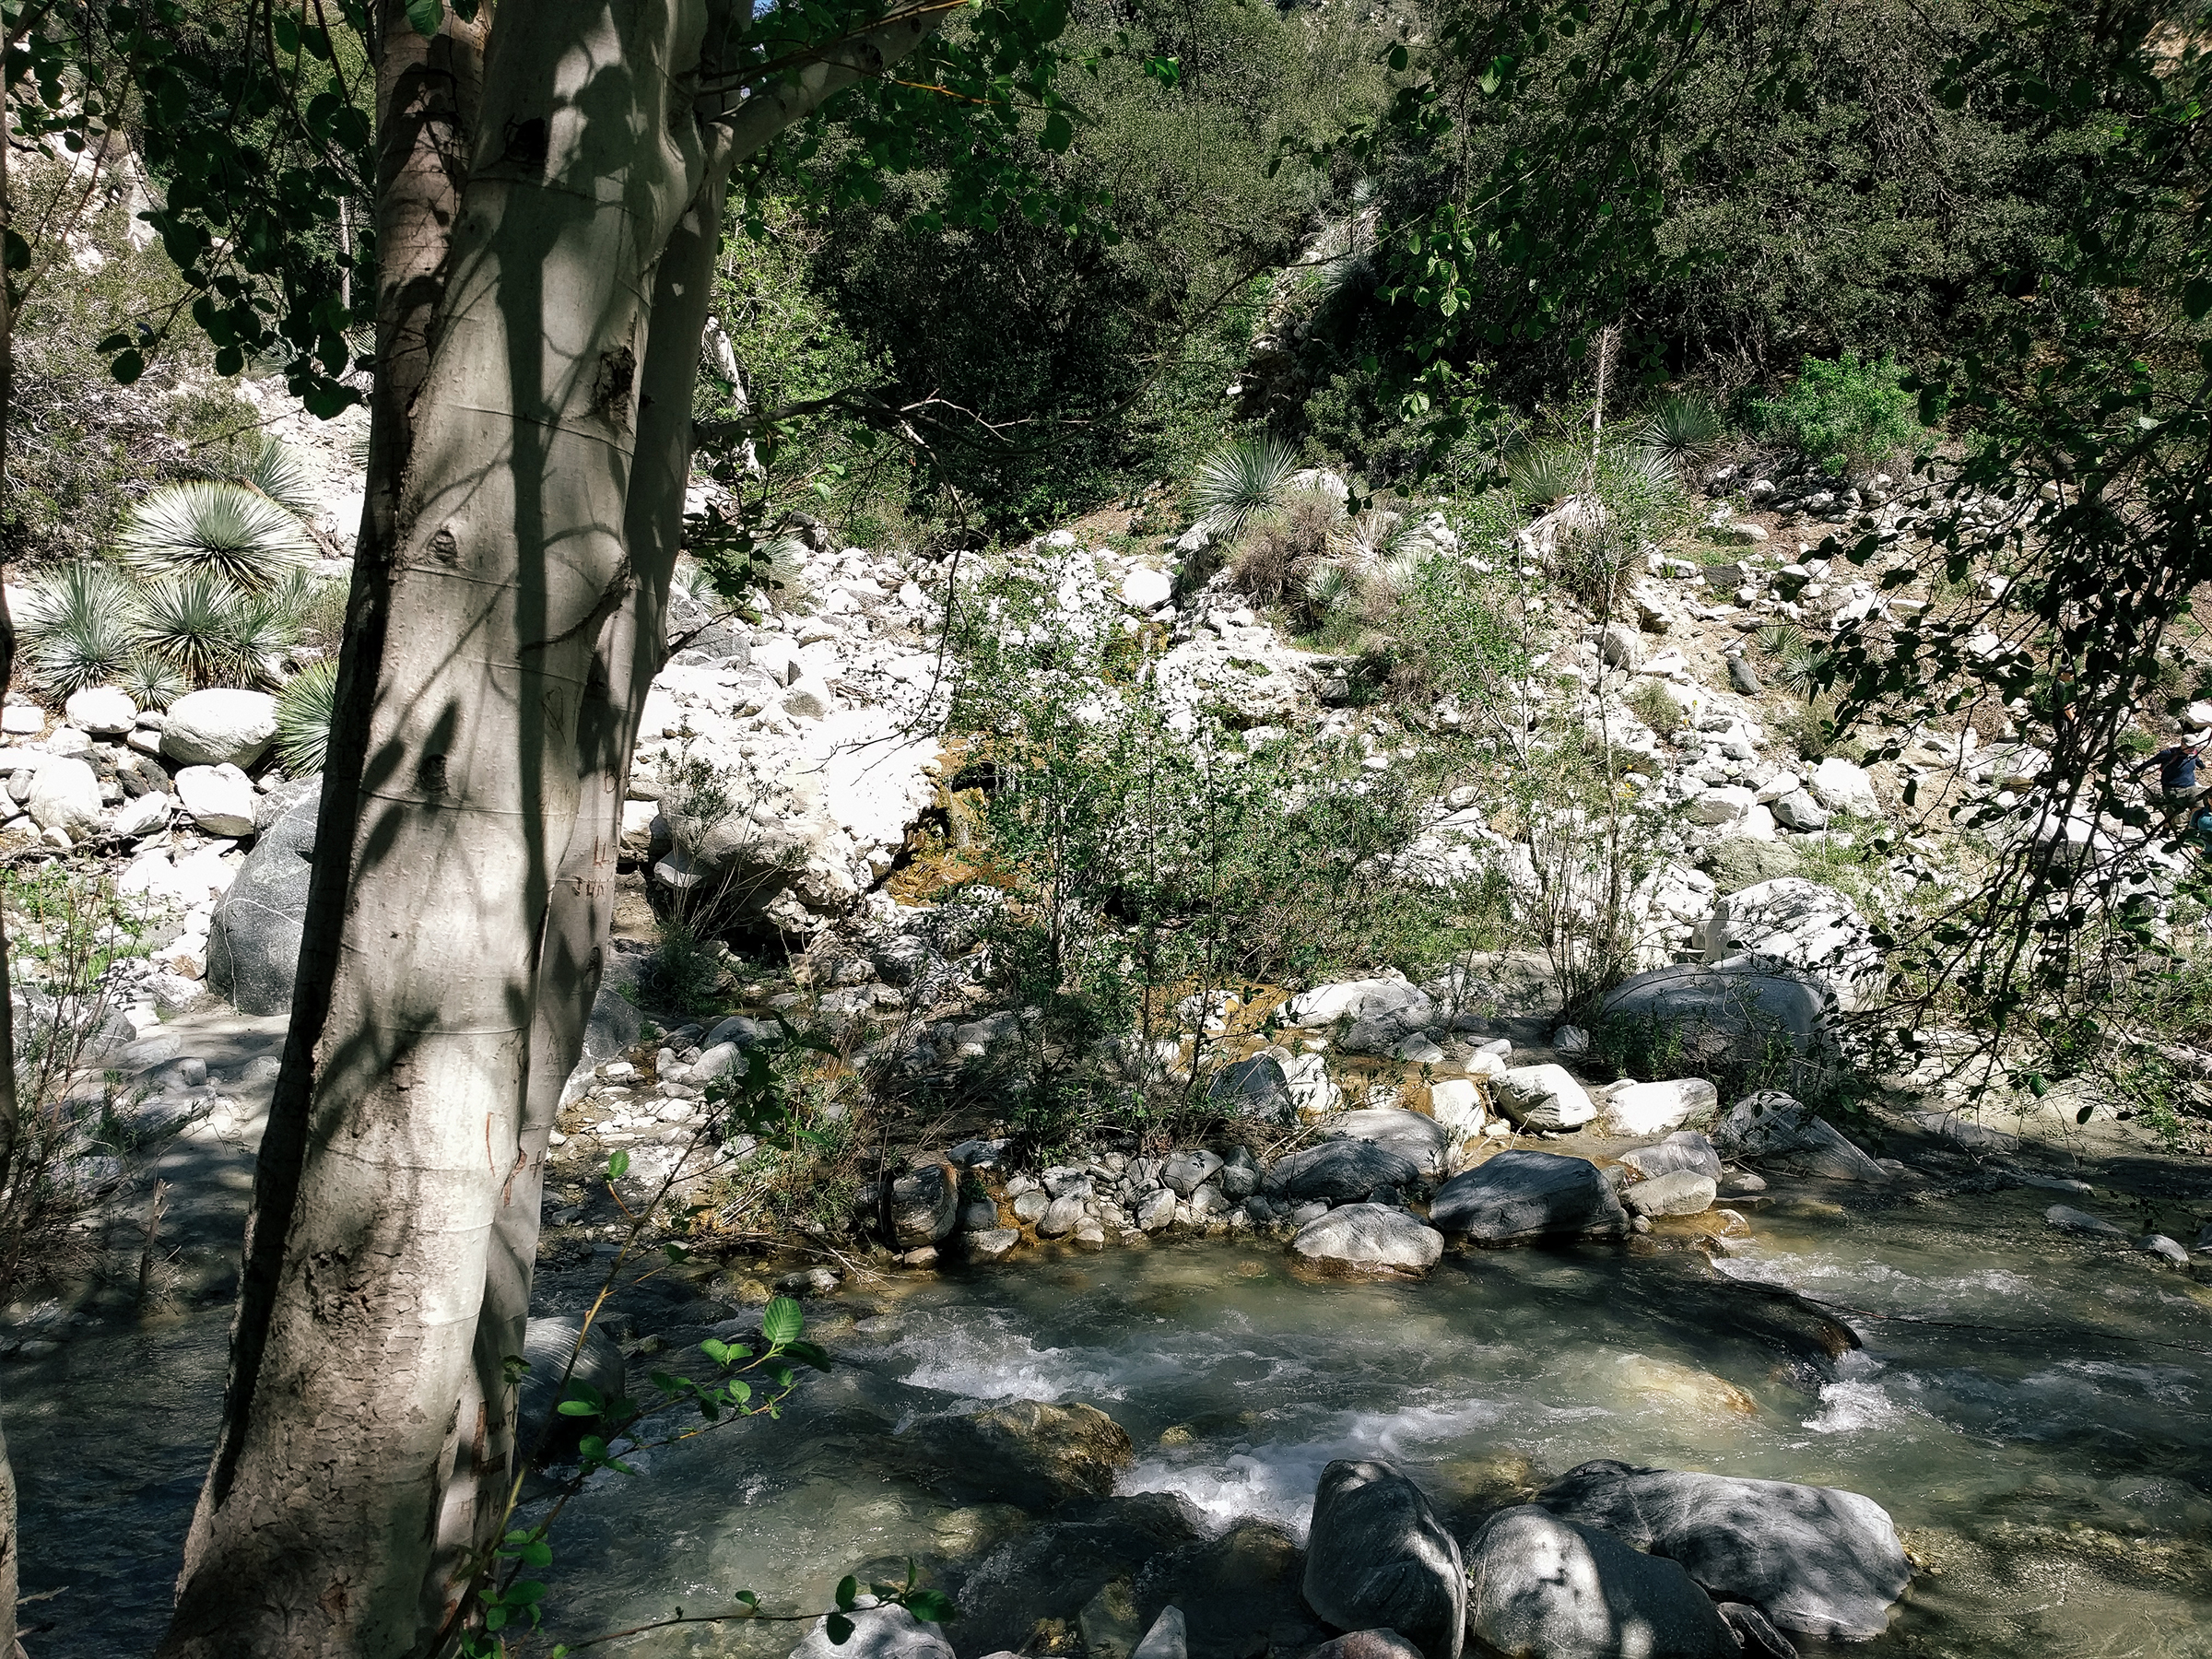
After everyone signs in, you’re given a quick pep talk, some rules and regulations, and the most important information, “how not to get lost on the trail.” In short, the trail that leads up to the bridge is unmarked, but if you follow the river up, you’ll reach the end of the hike. Follow the river down, you’ll make it back to the parking lot. Sounds easy enough. Don’t fret if you still get lost on the way down. We did. Just keep to the river. You’ll make it out alive eventually.
The trail is a 10-mile hike round trip. Nothing too strenuous. You will, however, be crossing the river 6-7 times ranging from ankle length to knee deep so bring along a pair of shorts and extra socks.
Once we got to the bridge, we had an hour to eat our lunches. It’s super important to eat something filling during this time. You’re more likely to throw up your nerves on an empty stomach than you are on a full stomach. There’s a quick training session on how to put on your ropes and harness, how to jump, and different ways you can jump. Once the talk was done, we were ready to go!
Jennifer’s Experience
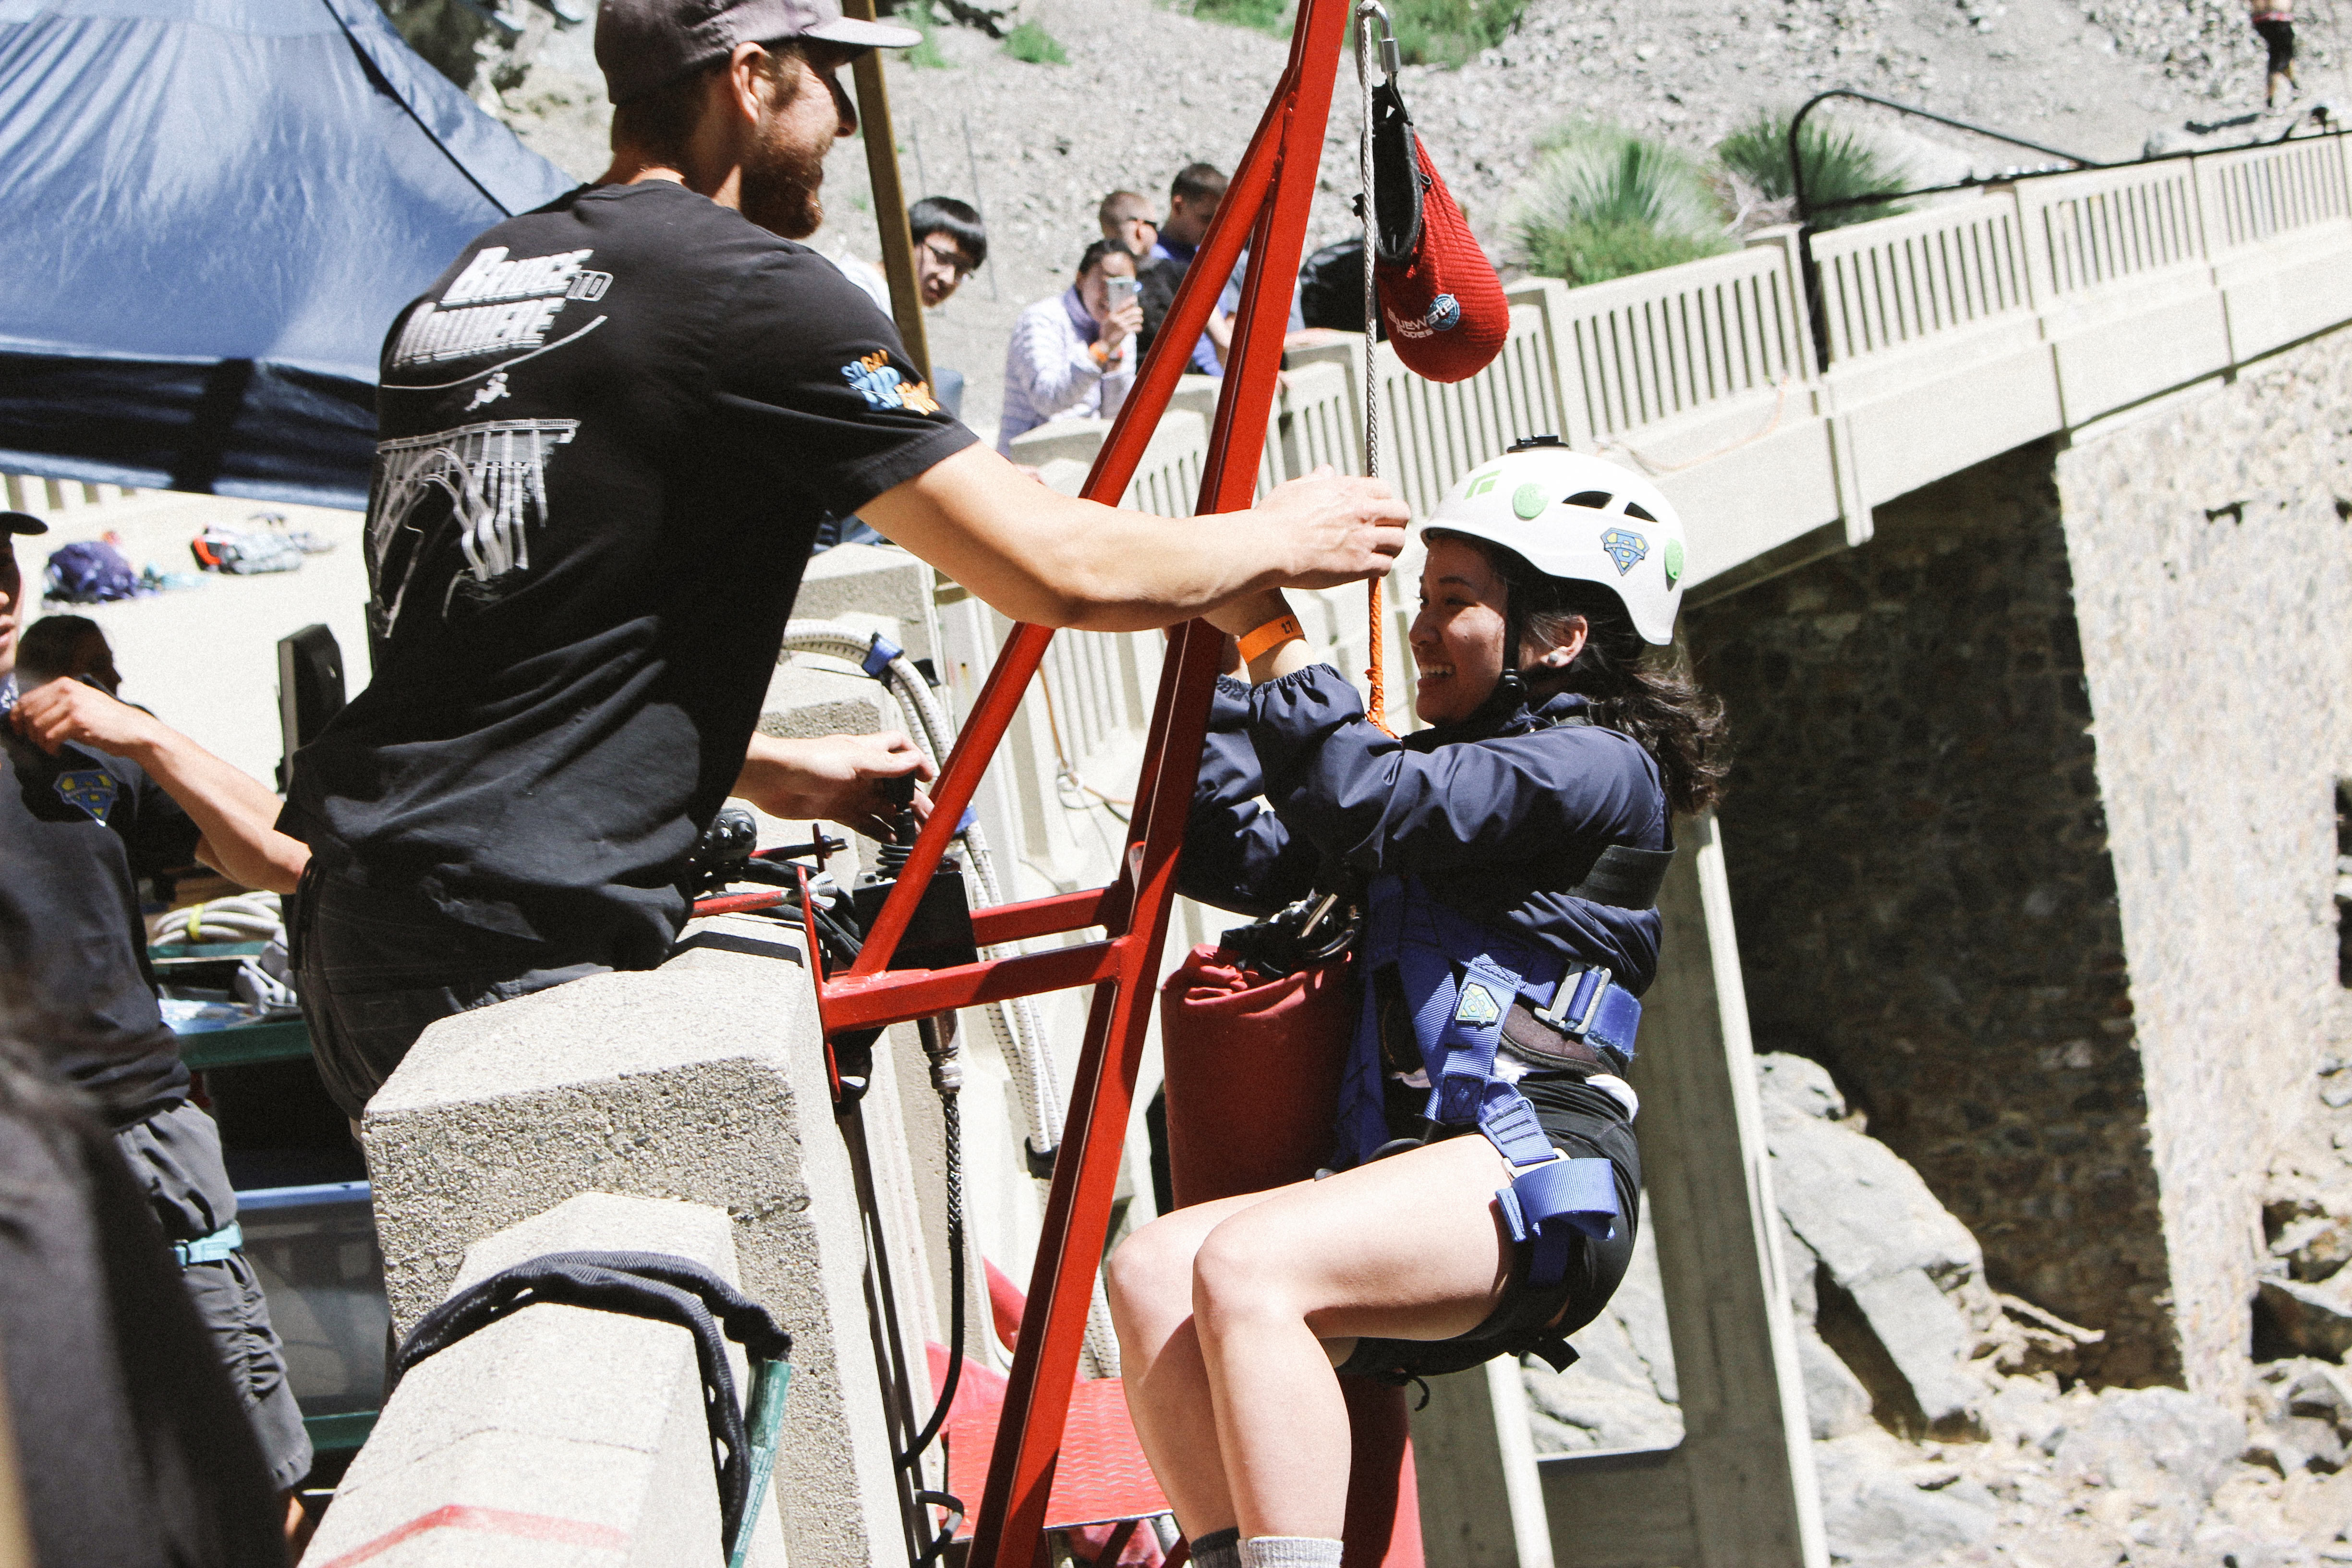
I had a lot of fun! It was definitely a very exhilarating experience. On the ride up the mountain, I freaked out because I was so nervous and almost mentally chickened out. A lot of people told me bungee jumping was a lot scarier than skydiving because you’re so close to the ground and I came into this with that mental thought. But when I stood on the edge of the bridge and counted down with the jumpmaster, I felt weirdly okay. In the end, I got more of an adrenaline rush from skydiving than I did bungee jumping. The jump was quick. It wasn’t too high. And the free-falling was cool. For me, the scariest thing was the “bouncing up and down” after the jump. That was when it hit me, “Oh shoot, I’m hanging 121 feet in the air with nothing on but a couple of ropes.” I was more nervous as I watched people jump than when I did it myself. Overall, I’m down to do this again but next time, I want to go higher!
Tip: When you’re standing at the edge and you count down DO NOT concentrate on the fact that you’re about to jump off a bridge. You’re going to psych yourself out. Be like Nike and just do it.
Vivian’s Experience

This was by far the most thrilling and adrenaline rushing experience I’ve ever had. Unlike Jennifer, I had more of an adrenaline rush from bungee jumping than I did skydiving. I was super excited as the jumpmasters began to suit me up. I felt so ready. I felt like I could easily conquer it. That was until I was on the edge of the bridge and looked down–bad idea. I psyched myself out and held onto the bridge for dear life. The jumpmaster tried to calm my nerves, but that didn’t help–especially when he started to count down. Not wanting to be that person who gets scared and doesn’t jump after the countdown, I mustered up my courage and jumped as far as I could. I started screaming even before I jumped. The audience definitely got a laugh out of that. From the jump, to the rebound, and to everything else, it was all an experience that I will never forget. Hands down, I would do this again, but I want to go even higher next time!
Tip: You will be extremely exhausted by the end of the day from both the hike and from the jump. Do yourself a favor and go straight to the shower and not to your couch/bed or you will not get up.
Want to see a video of Vivian bungee jumping and screaming her head off? Head over to our Instagram for a good laugh.
Cheers,
Jennifer & Vivian
(Photos: Phillip Tran)

Today we celebrate the 46th year of Earth Day, a day to raise public awareness about our environmental issues regarding clean air, clean water, and pollution. Since its founding in 1970, Earth Day has sparked a movement that has led to the creation of important acts such as the Clean Air, Clean Water and Endangered Species Acts.
Read More
This March, a couple of friends and I had the opportunity to visit two National Parks in Canada: Banff National Park and Jasper National Park.
Read More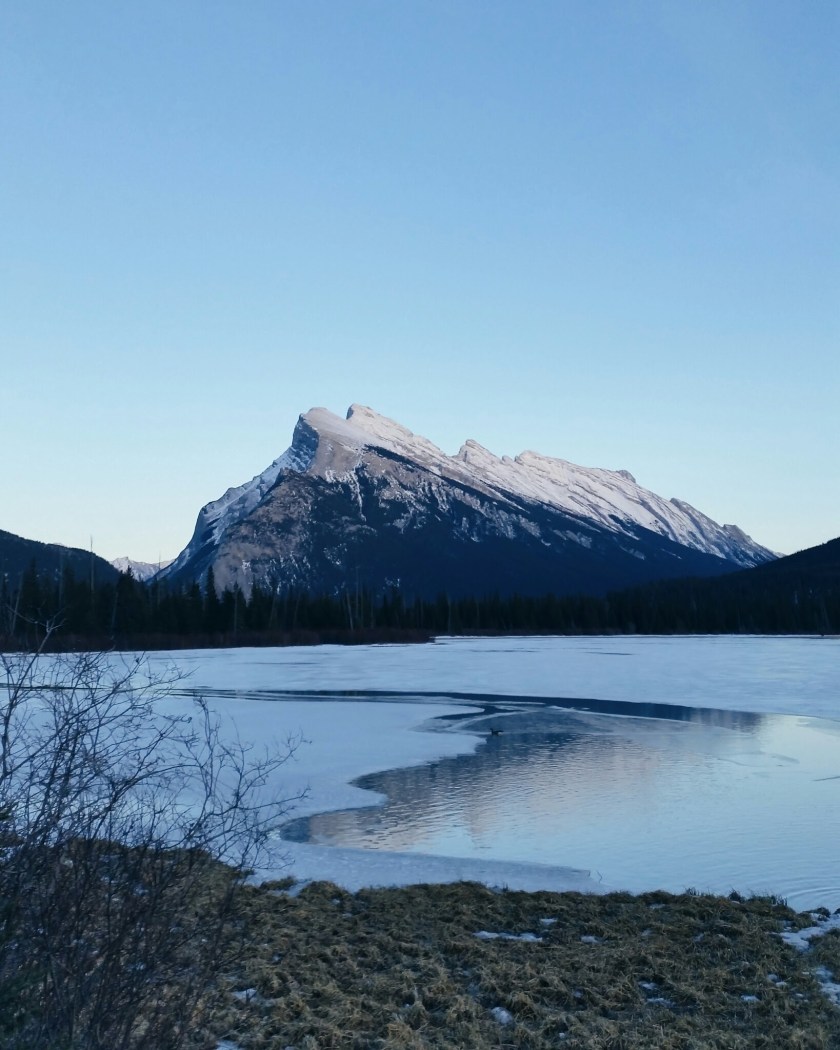
Banff National Park is a place that is known for its beautiful lakes, mighty waterfalls, spectacular glaciers and icefields, and the Canadian Rockies. Depending on when you go, the scenery will be different. In the summer, lakes and waterfalls will shimmer a turquoise blue (or emerald) while flowers will bloom throughout the park. In the winter, lakes and waterfalls will freeze and the entire national park will be blanketed with snow. Either way, the scenery is stunning year round.
Read More